
Browse docs
Connect a LinkedIn account
Add a LinkedIn account as a sending seat — where to click, what happens on the connection page, and how to check the seat is ready.
Updated
On this page
Every LinkedIn campaign sends from a connected LinkedIn account. In ReacherPro each connected account is a seat. This guide walks you through connecting your first one right after you sign in, and adding more later.
How it works
- You start the connection from the Accounts page in ReacherPro.
- ReacherPro sends you to a secure connection page outside the app, where you sign in to LinkedIn.
- When the sign-in is done, the account appears on the LinkedIn seats page as a seat with the status Connected.
- From then on you can pick it as the sender of a campaign or a lead list.
Before you start
- The LinkedIn login of the account that will send. Sign in as the person whose name prospects should see.
- A free seat on your plan. LinkedIn accounts and email inboxes share one pool of seats. See Manage seats and reconnect to check how many you have left.
- Permission to add accounts. If your role can't add accounts, the button is greyed out and its tooltip says so. Ask an admin on your team.
Connect your first LinkedIn account
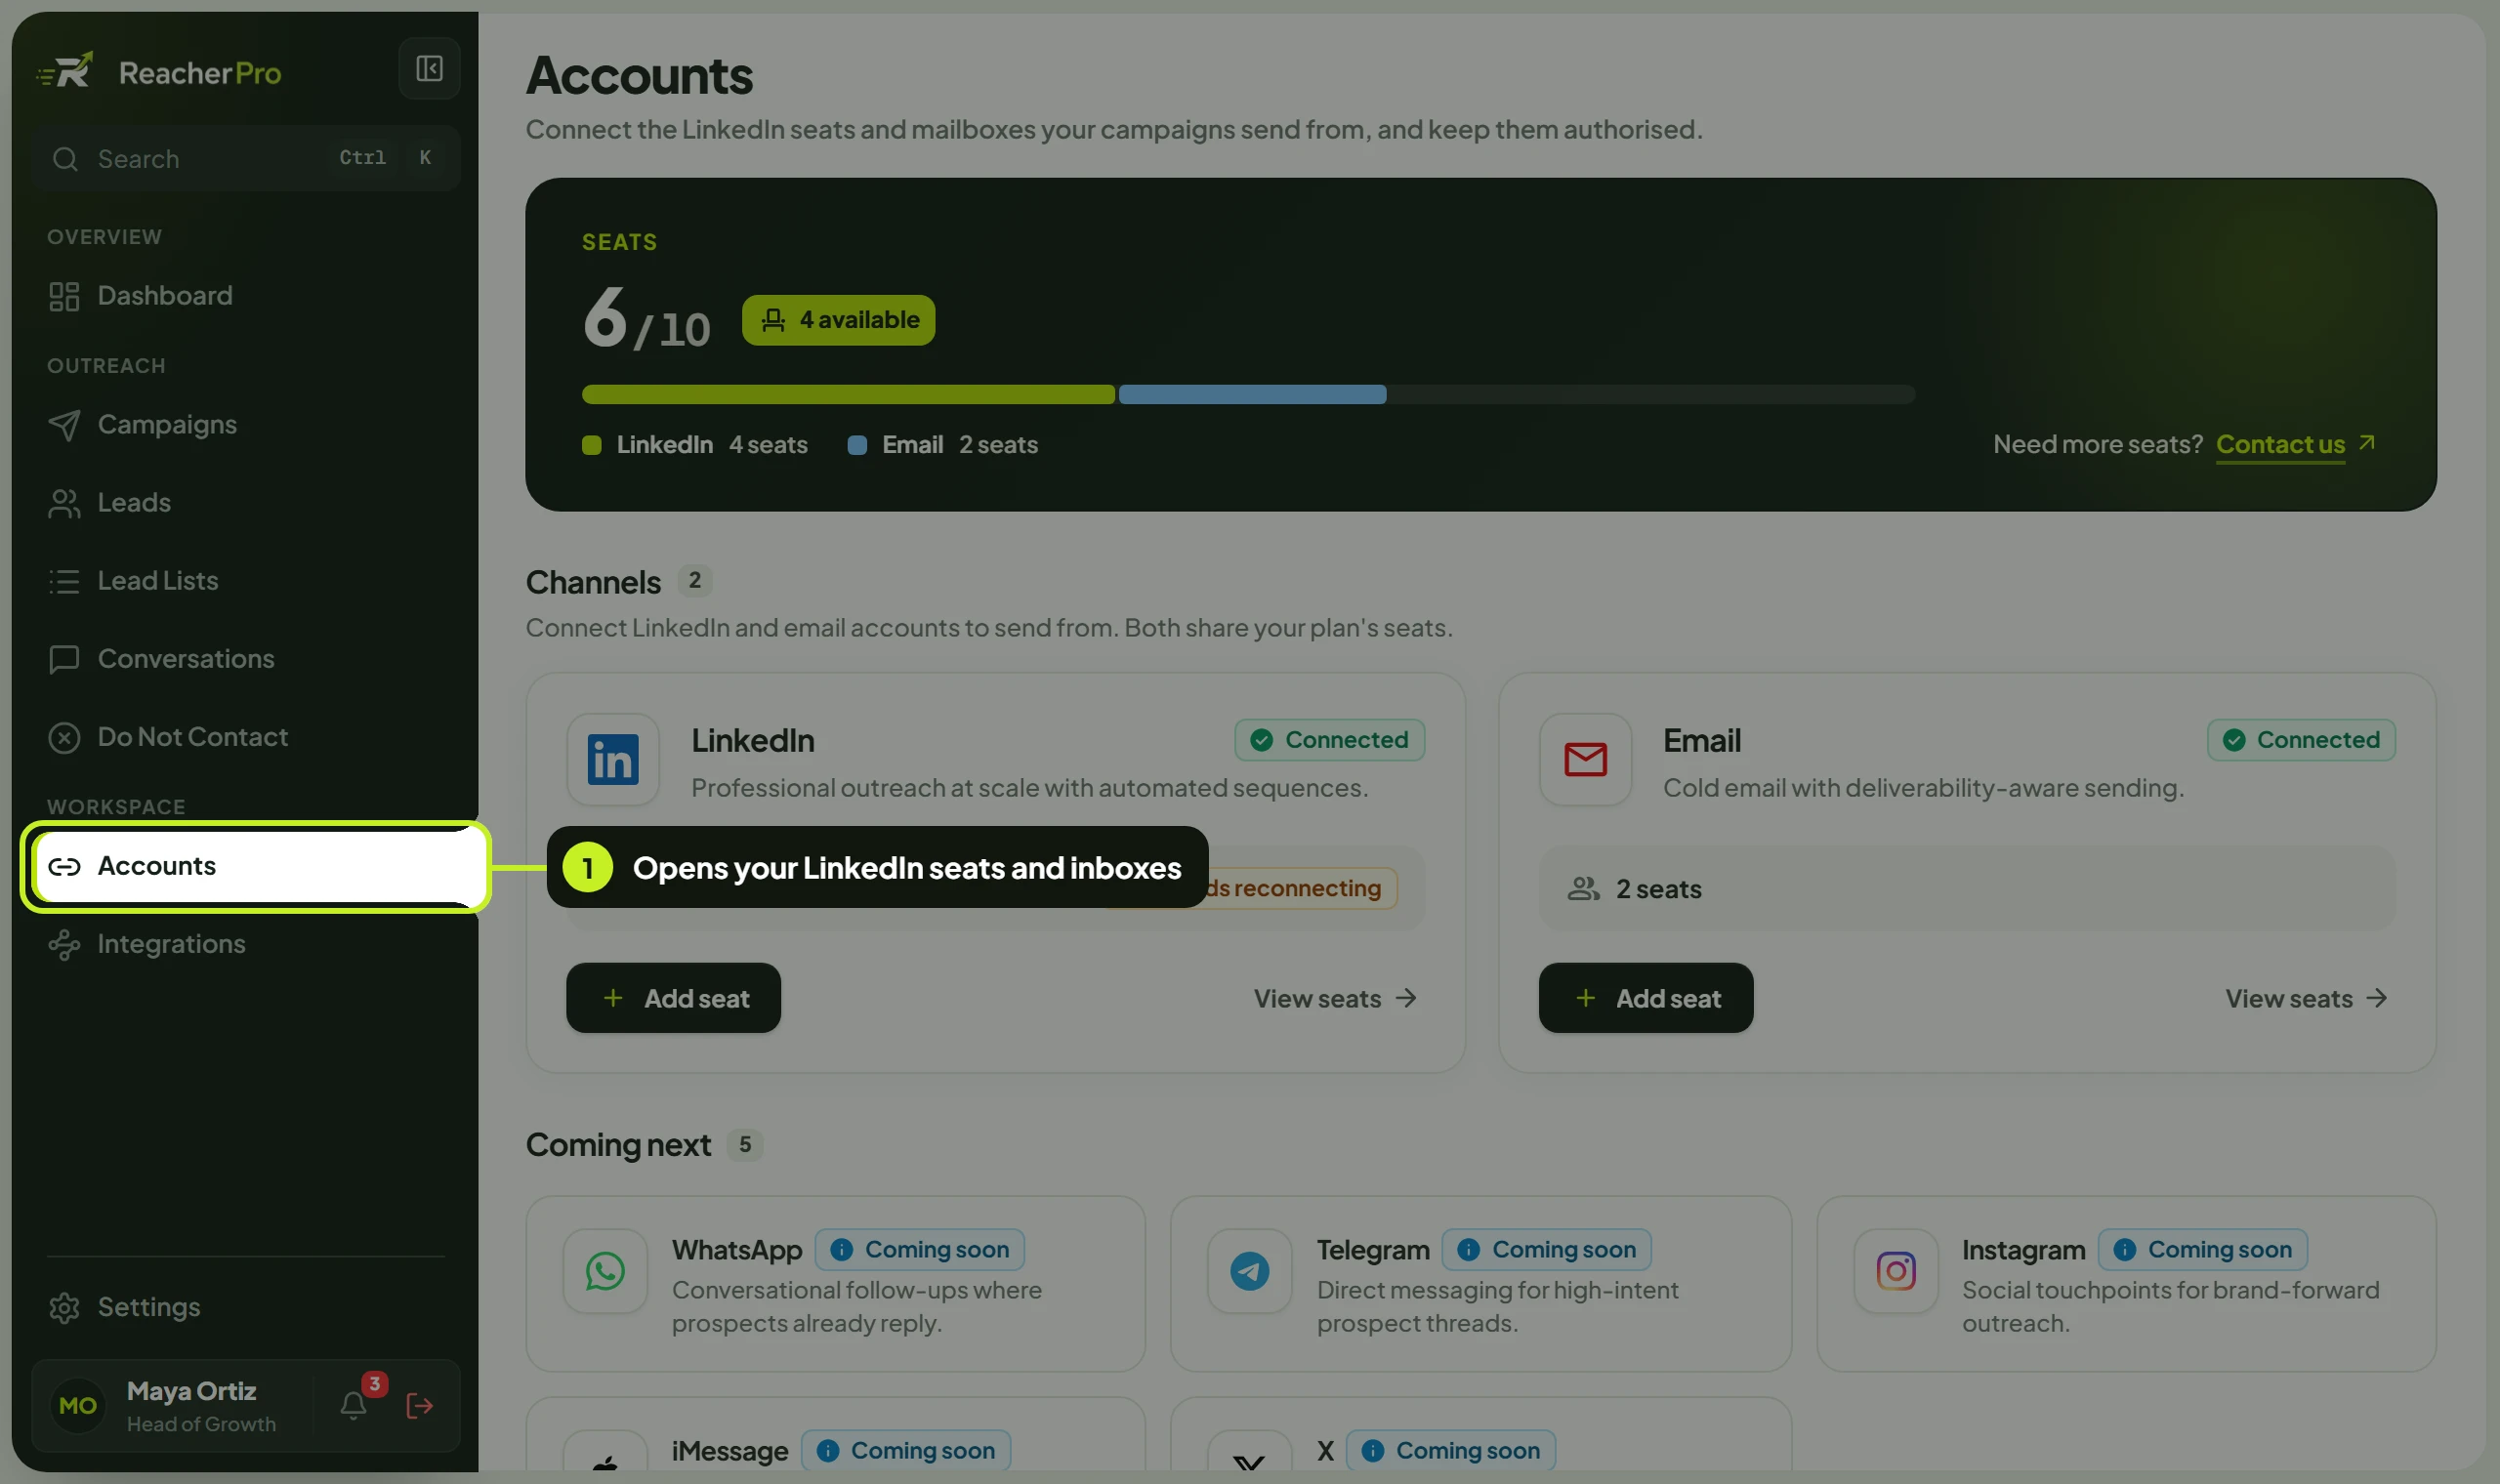
- In the sidebar, under Workspace, click Accounts. The Accounts page opens. Under Channels there's a card for LinkedIn and a card for Email, and Seats shows how many of your plan's seats are used.
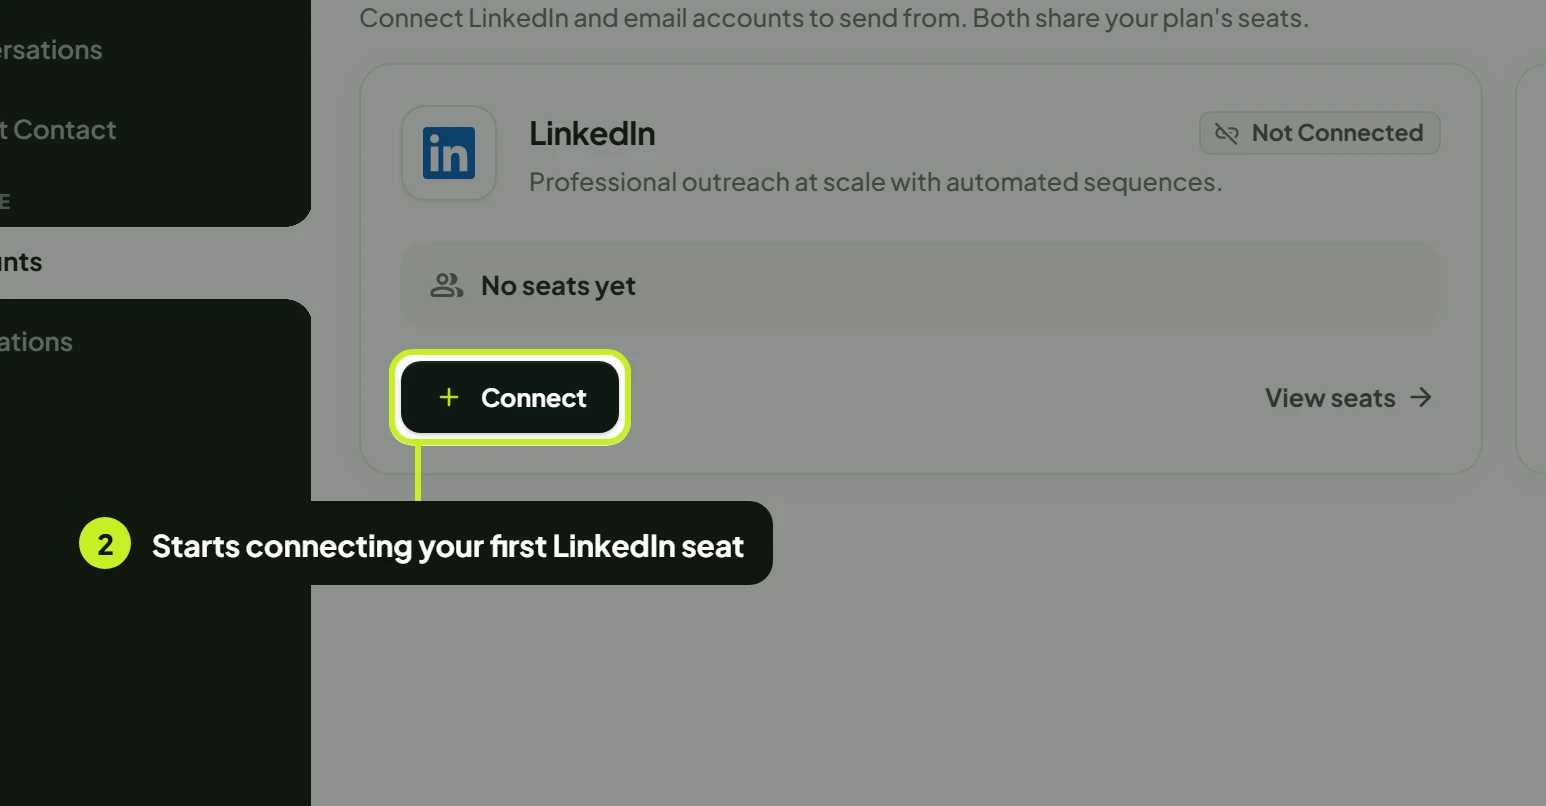
- On the LinkedIn card, click Connect. Before your first seat, the card reads No seats yet. ReacherPro shows Redirecting to connect your account and your browser moves to the connection page.
- On the connection page, sign in to LinkedIn and follow the steps it shows. This page isn't part of ReacherPro, so its steps can change. If LinkedIn asks you to confirm the sign-in (for example with a code or a prompt in the LinkedIn app), finish that too.
- Go back to Accounts. The LinkedIn card now counts your seats (for example 1 seat).
- Click View seats on the card. LinkedIn seats opens with your new seat in the list.
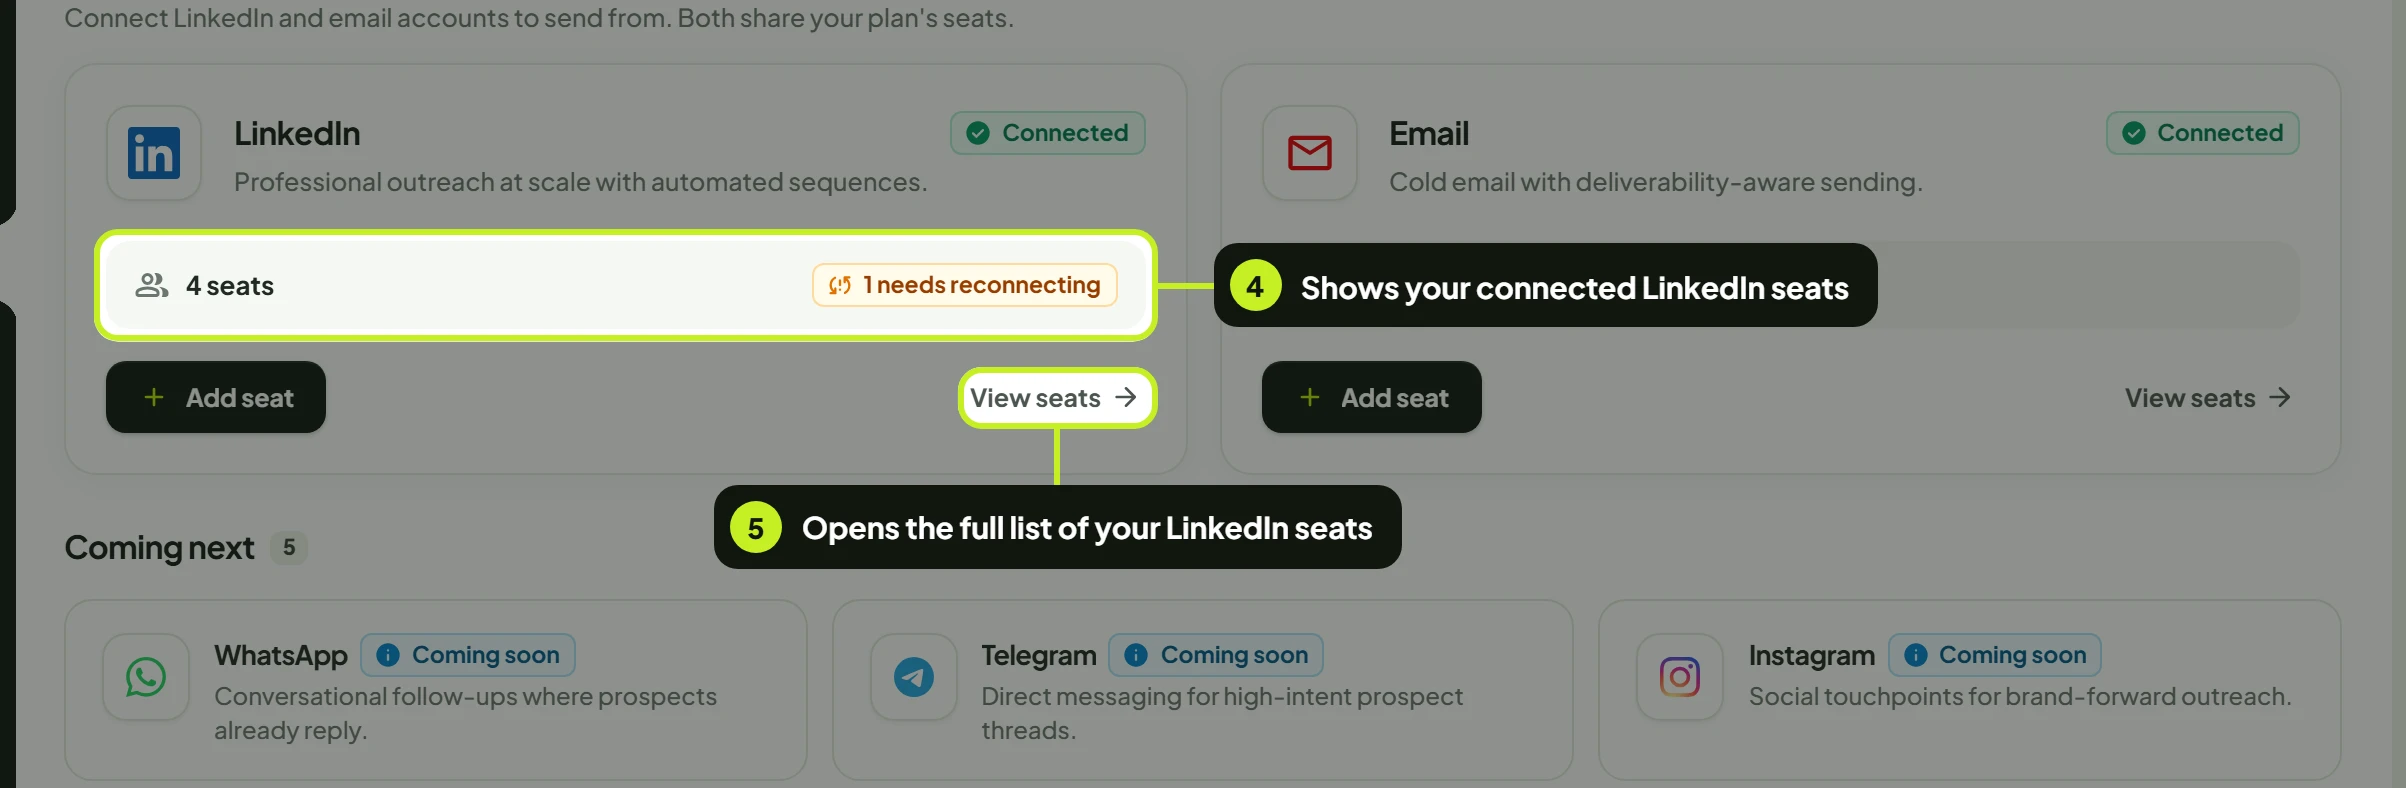
Tip: Once a channel has at least one seat, its button changes from Connect to Add seat. Both start the same connection.
Check the new seat
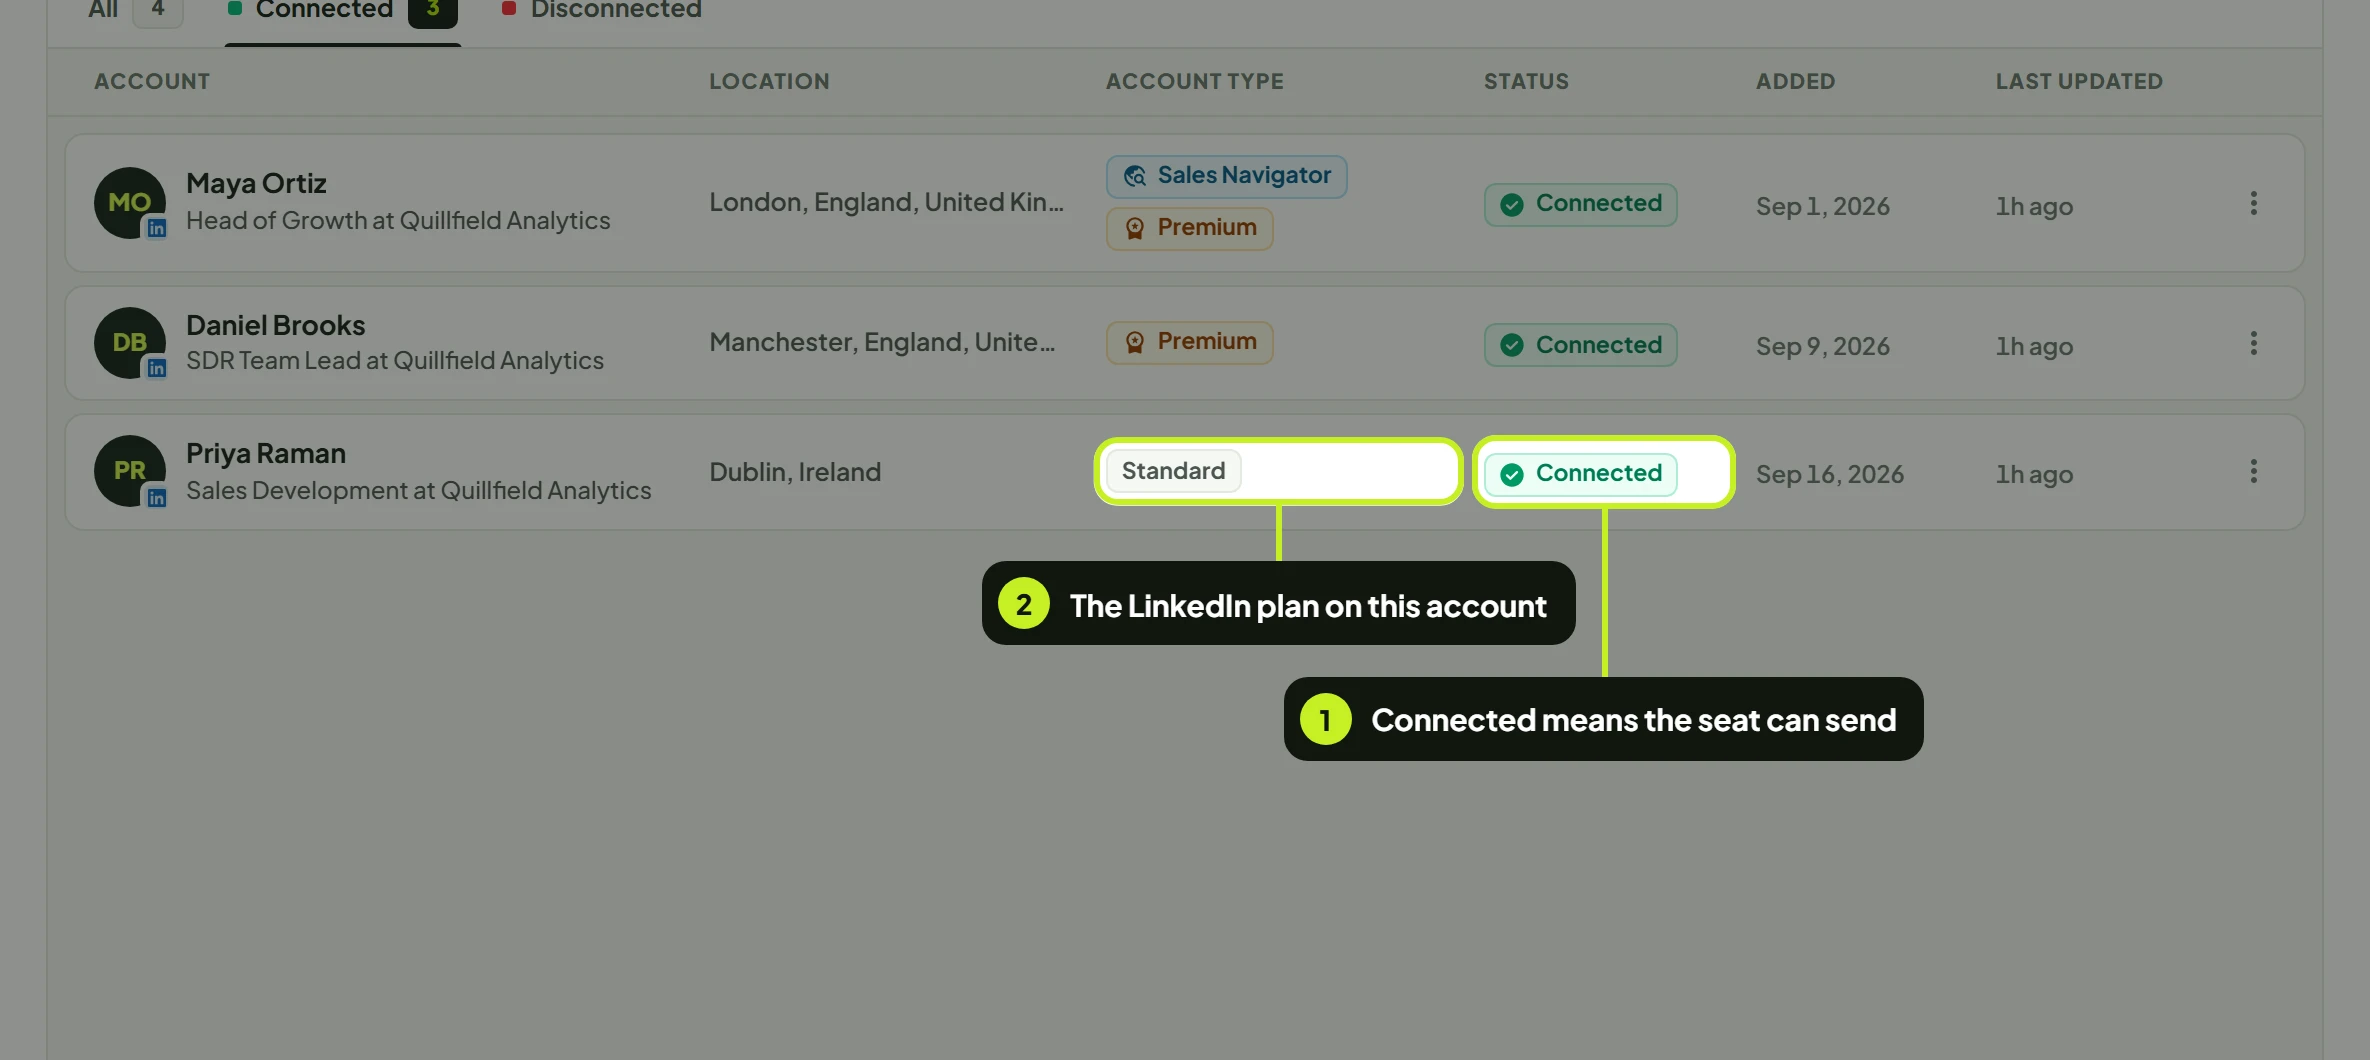
On LinkedIn seats, each row is one connected LinkedIn account. Click a row to see its details, including its Account ID with a copy button. The Account column shows the person's name and LinkedIn headline.
- Look at Status. Connected means the seat is ready to send.
- Look at Account type. It shows which kind of LinkedIn subscription the account has.
| Column | What it shows |
|---|---|
| Account | The LinkedIn name and headline of the account. |
| Location | The location on the LinkedIn profile. |
| Account type | Standard, or badges for Premium and Sales Navigator. |
| Status | Whether the seat can send. See Manage seats and reconnect for every status. |
| Added | When the seat was connected. |
| Last updated | When ReacherPro last refreshed the seat: Today, a number of hours (3h ago) or days (2d ago). |
Account types
ReacherPro reads the account type from LinkedIn. You don't choose it.
| Account type | How it appears | What it means for you |
|---|---|---|
| Standard | A grey Standard chip | The account has no paid LinkedIn plan. |
| Premium | A gold Premium badge | The account has LinkedIn Premium. |
| Sales Navigator | A blue Sales Navigator badge | The account has a Sales Navigator subscription. A Sales Navigator search URL comes from this kind of account. |
An account with both Premium and Sales Navigator shows both badges, one above the other.

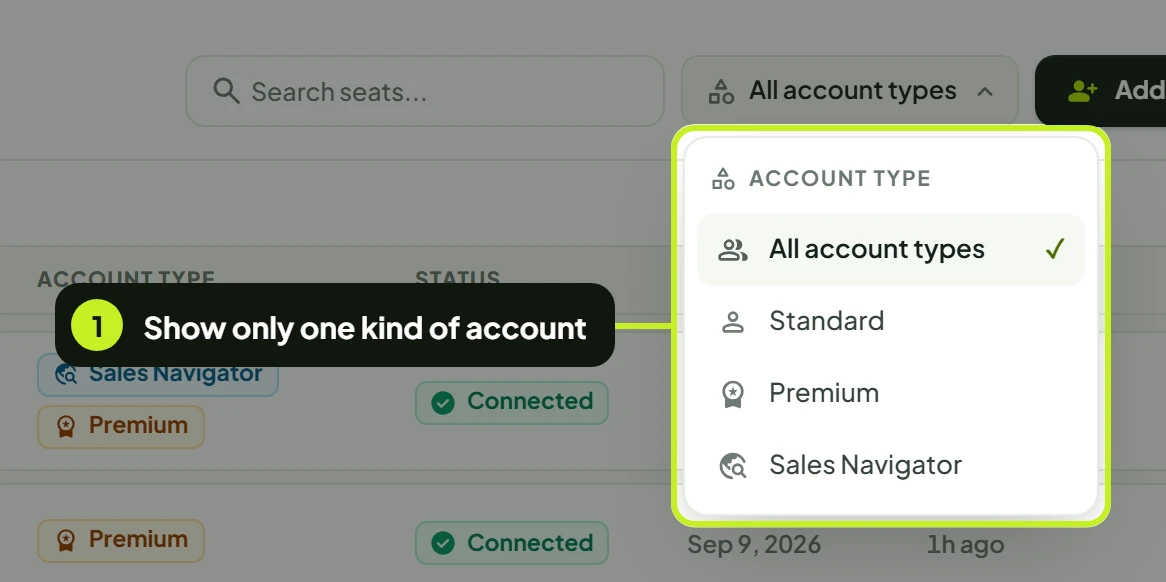
To see only one kind of account, open All account types and choose Standard, Premium or Sales Navigator.
Add another LinkedIn seat
Each extra account takes one more seat from your plan.
- On Accounts, click Add seat on the LinkedIn card, or
- On LinkedIn seats, click Add seat in the top right.
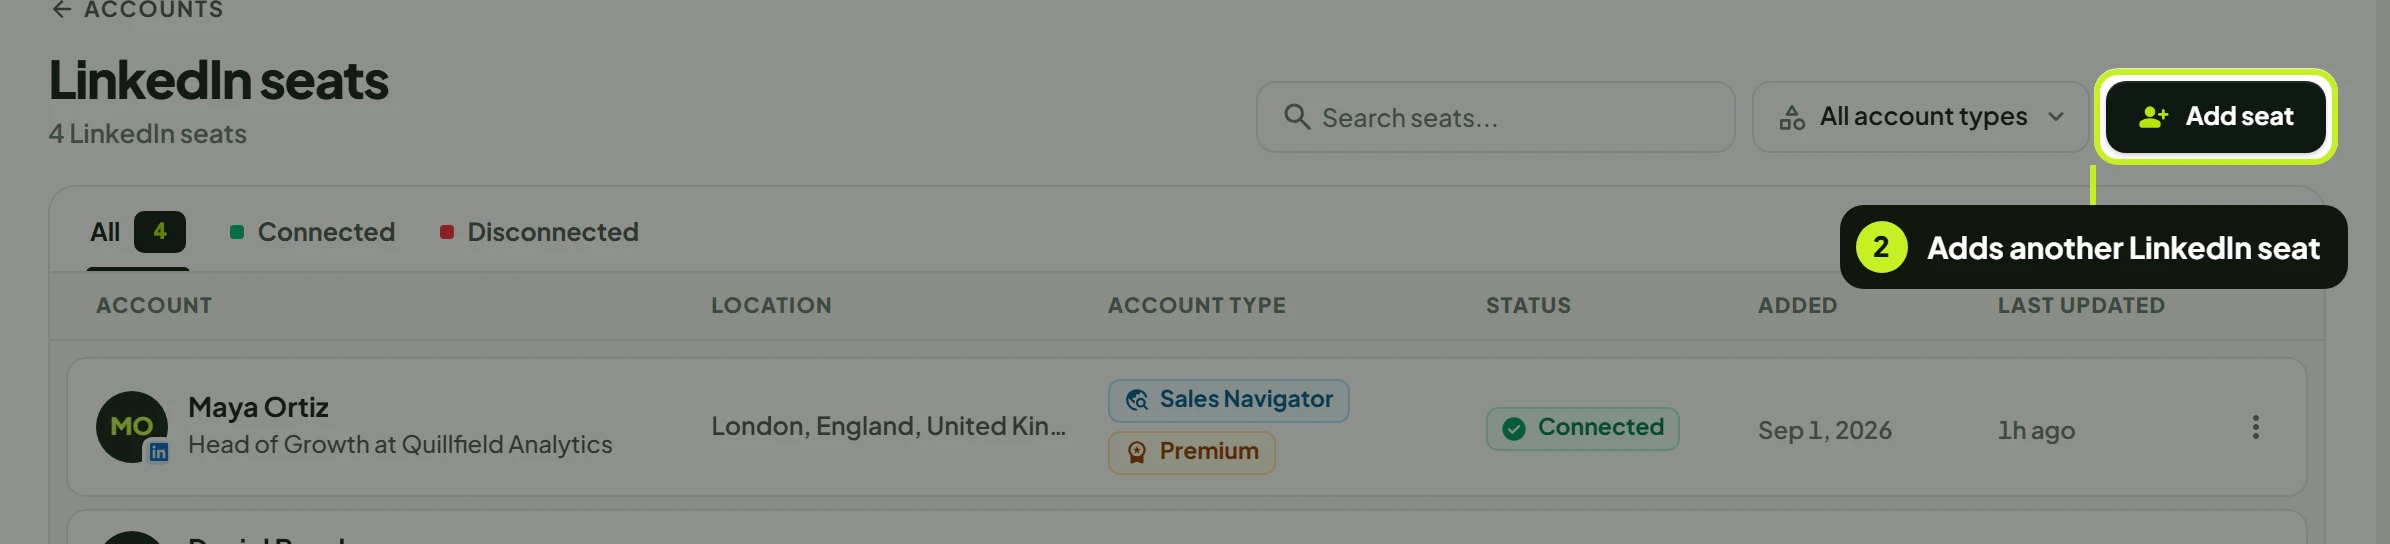
Both open the same connection page as your first seat. Sign in there with the other LinkedIn account, not one that is already connected.
What you can do once it's connected
- Pick the seat as the LinkedIn Account of a lead list. See Create a lead list.
- Pick it as the sender of a campaign. See Build and launch a campaign.
- Reply to its LinkedIn messages in Conversations.
Common problems
| What you see | What it means | What to do |
|---|---|---|
| Connect or Add seat is greyed out, and its tooltip says Your plan allows … connected account(s). Disconnect one before connecting another. | Every seat on your plan is in use. | Disconnect a seat you no longer need, or click Contact us next to Need more seats? on Accounts. |
| The tooltip says You don't have permission to create accounts | Your role can't add accounts. | Ask an admin on your team to connect it, or to change your role. |
| Unable to start account connection right now. Please try again. | ReacherPro couldn't open the connection page. | Wait a moment and click the button again. |
| You finished signing in, but the seat isn't listed | The list hasn't refreshed yet, or the sign-in wasn't completed. | Reload LinkedIn seats. If it's still missing, start again from Add seat and finish every step on the connection page. |
| The seat shows Disconnected | LinkedIn ended the session, often after a password change or a security check. | Reconnect it. See Manage seats and reconnect. |
| Your seat isn't offered when you create a lead list or campaign | Only Connected seats are listed. | Check its status on LinkedIn seats and reconnect it if needed. |
Next: Add an inbox for email steps in Connect an email inbox.