
Browse docs
Account and security
Update your profile, photo, organization name and timezone, turn on two-factor sign-in, change your password, sign out other devices and delete an account.
Updated
On this page
Your profile and your sign-in security live in Settings, on the Profile and Security tabs. Everyone in a workspace has both tabs for their own account, whatever their role.
How it works
| What | Where | Affects |
|---|---|---|
| Photo, name, phone, job title, timezone | Profile tab | Only you |
| Company name | Profile tab | The whole workspace. Needs Organization: Update |
| Two-factor sign-in, password, signed-in devices | Security tab | Only you |
| Danger zone (delete the account) | Profile tab | The whole workspace. Workspace admins only |
Before you start: Have your authenticator app ready if you're turning on 2FA. To manage other people's access instead of your own, see Invite your team.
Open Settings
- Click Settings at the bottom of the sidebar, just above your name. It opens on the Profile tab.
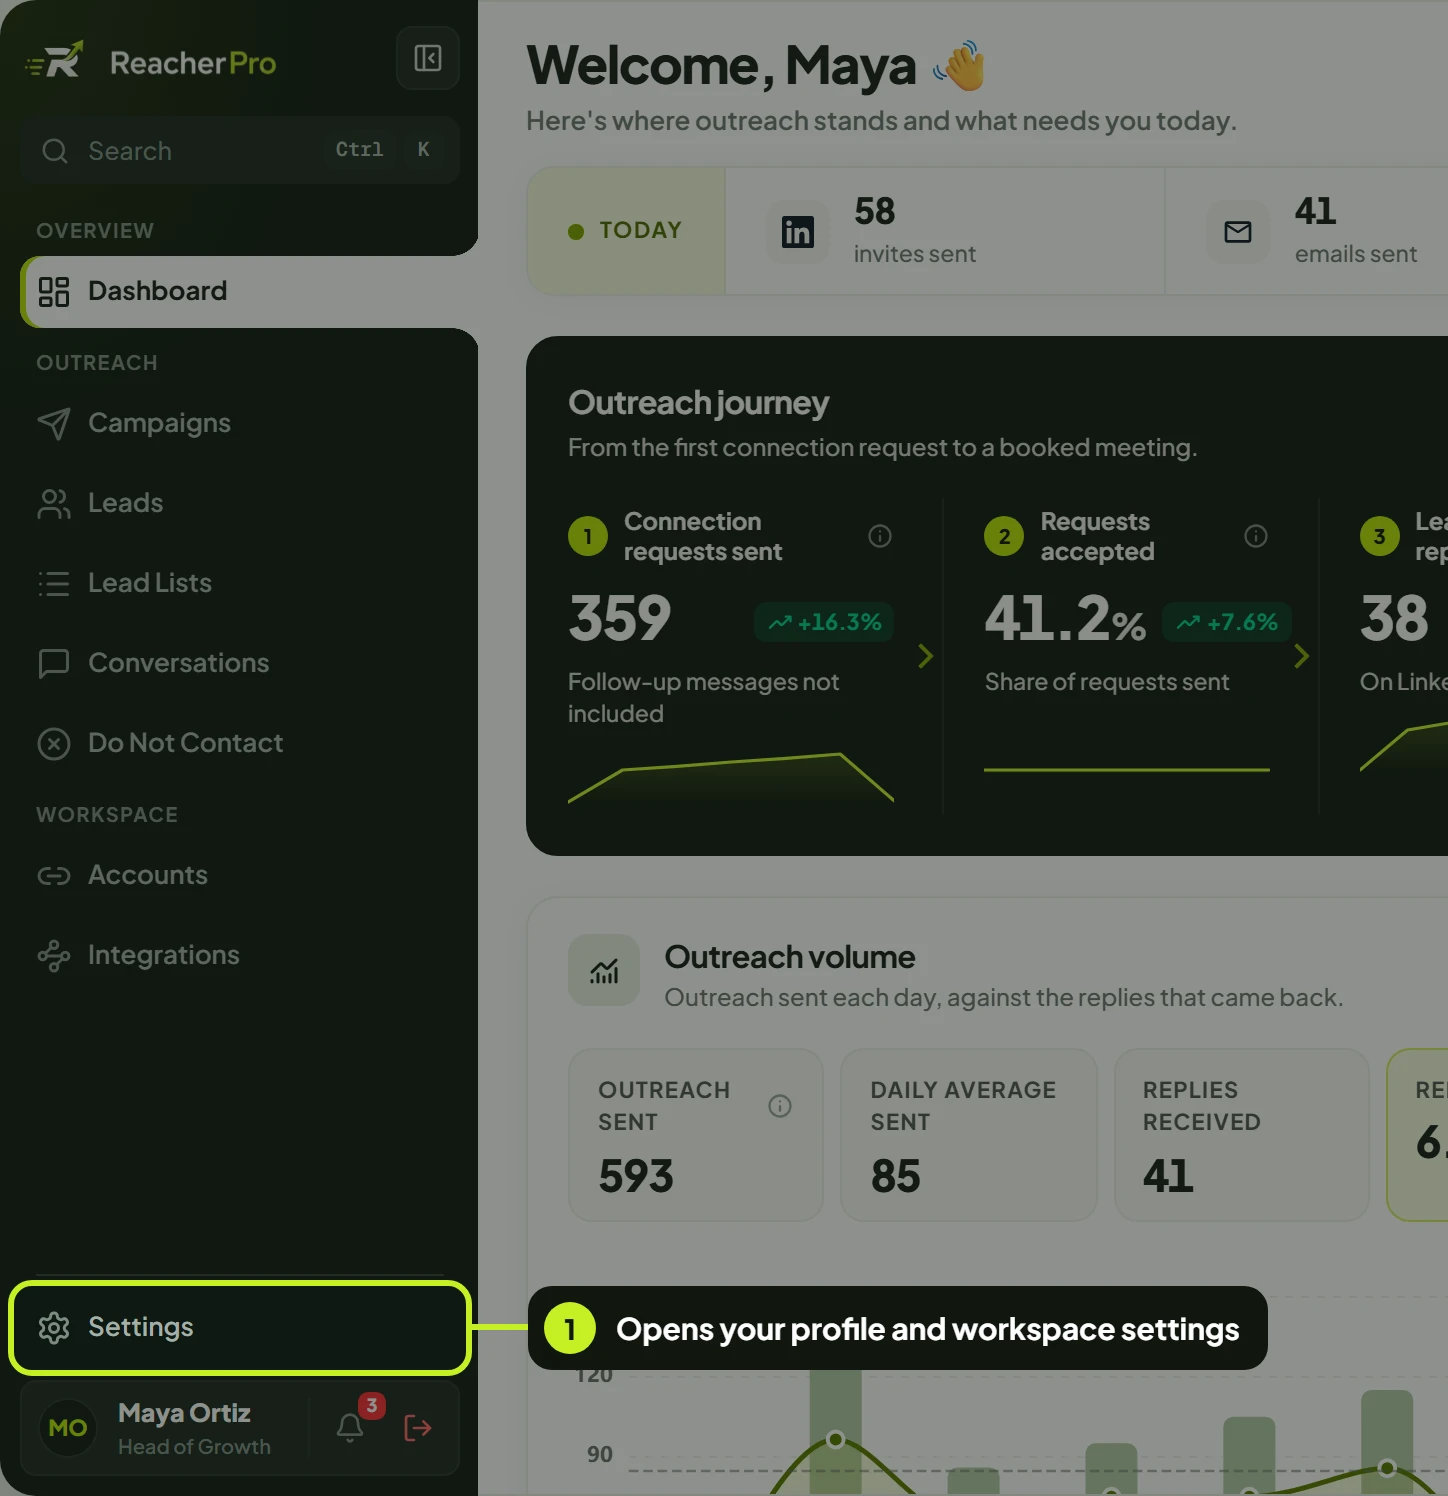
The tabs along the top are Profile, Security, Team, Roles, Billing, API & Webhooks and Preferences. You only see the tabs your role lets you open. Profile and Security are always there.
Update your profile
The Personal and workspace details card holds your profile.
- Open the Profile tab, if you're not already on it.
- To add or replace your photo, click Change photo and pick a JPG, PNG or WebP image up to 5 MB. Remove takes the current photo off. Either way, the change waits until you save.
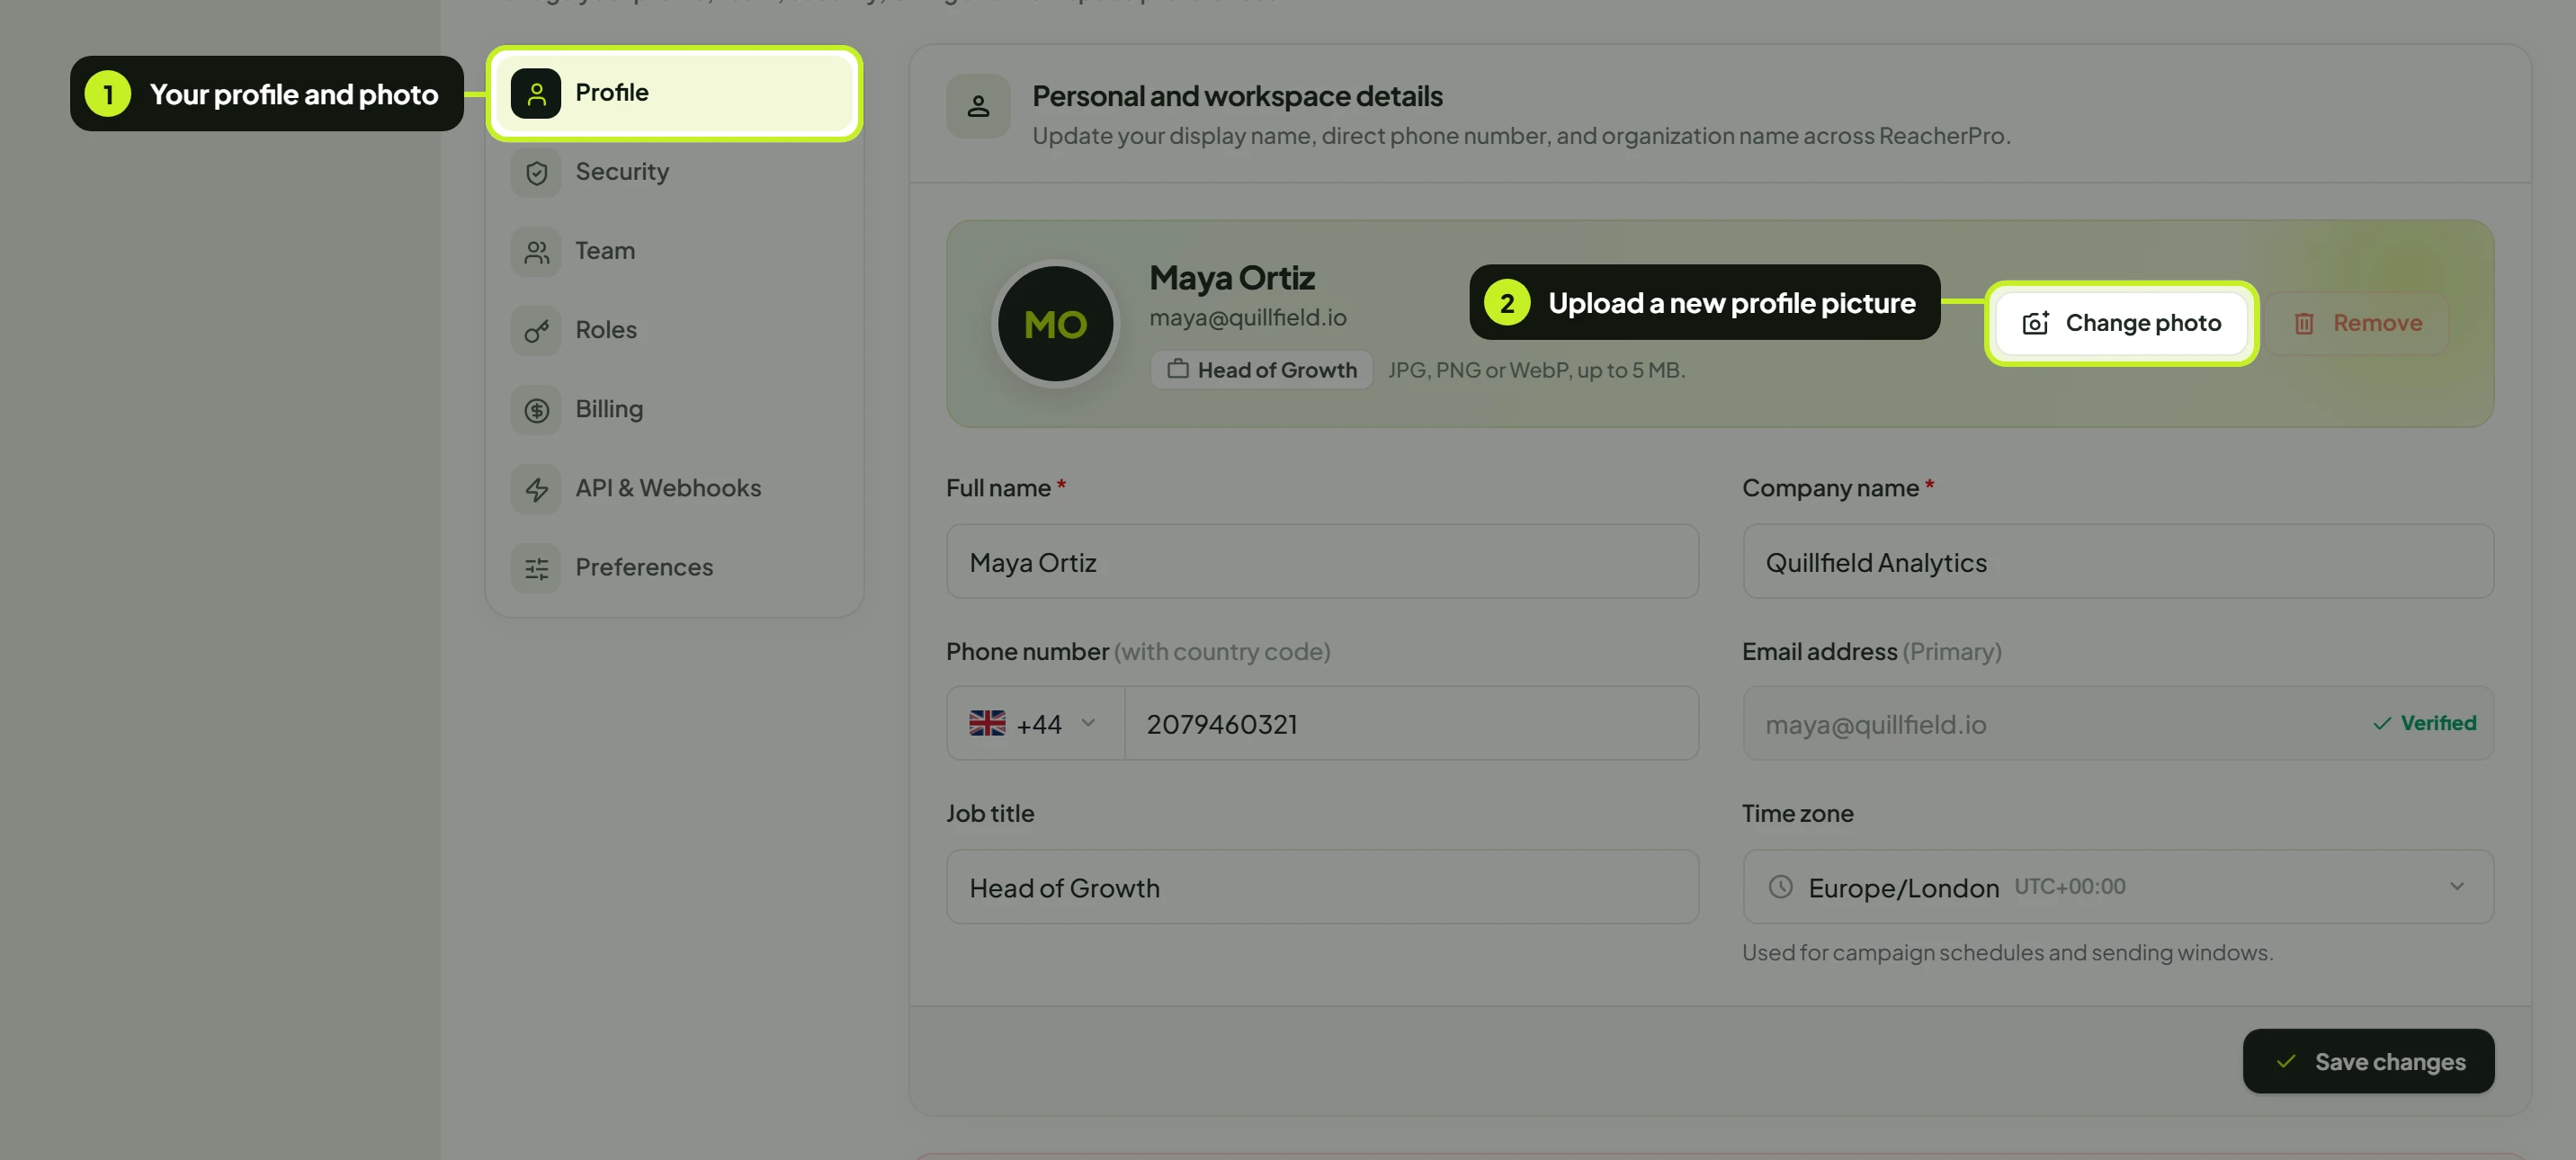
- Edit Full name. It's required, and it's the name your team sees across ReacherPro.
- Edit Company name. This renames the whole workspace for everyone in it, not just for you (see the note below).

- Pick your country code and enter Phone number. It's optional, but if you enter a number it has to be valid for the country you chose.
- Enter a Job title, for example Head of SDR. It shows under your name at the bottom of the sidebar.
- Choose your Time zone. Type a city or zone name to search. ReacherPro uses it as the starting timezone for new campaign schedules and sending windows.
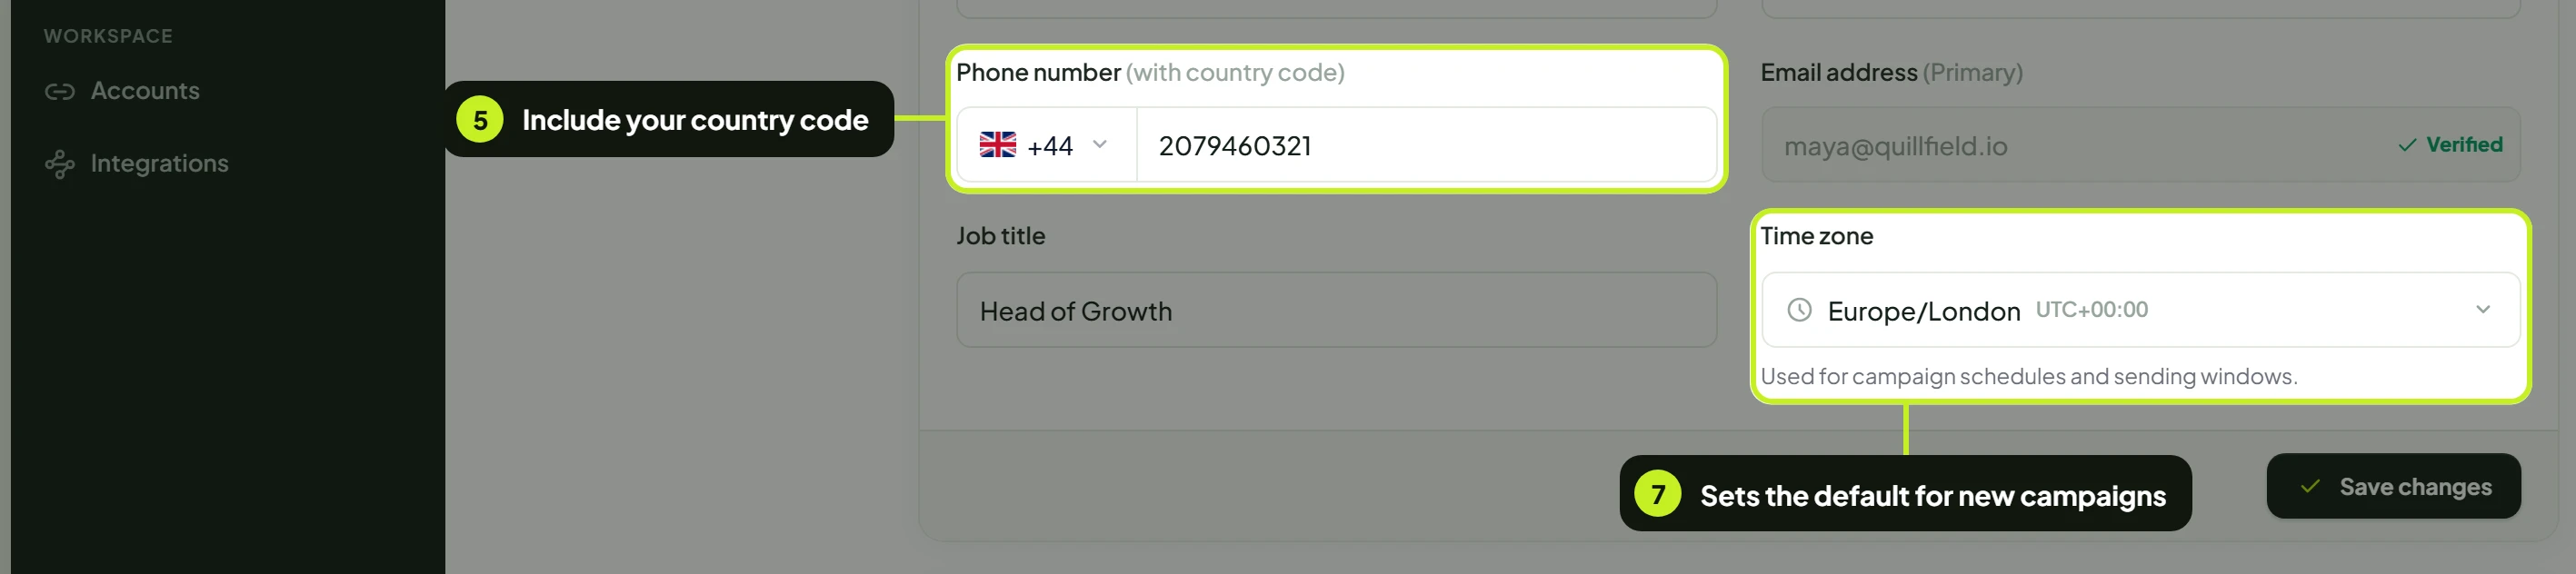
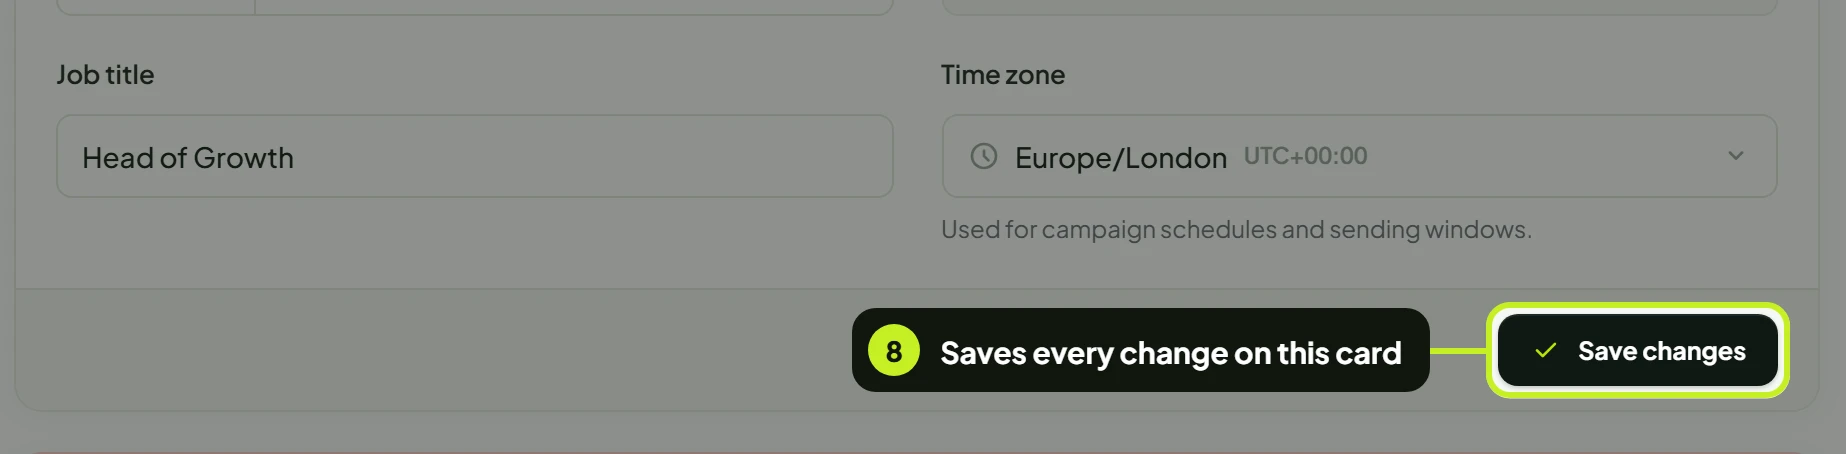
- Click Save changes. You'll see Profile updated. If you haven't changed anything, you'll see Nothing to save instead.
Email address (Primary) is read-only. It's the address you sign in with and it's marked Verified. You can't change it from this page.
Note: Renaming the organization needs the Organization: Update permission. Without it, the field still shows the name but it's locked, and hovering it tells you why. Everything else on the card is your own and you can always edit it. See Roles and permissions.
Turn on two-factor sign-in (2FA)
With 2FA turned on, signing in asks for a 6-digit code from Google Authenticator, or another authenticator app or browser extension, as well as your password.
- Open the Security tab.
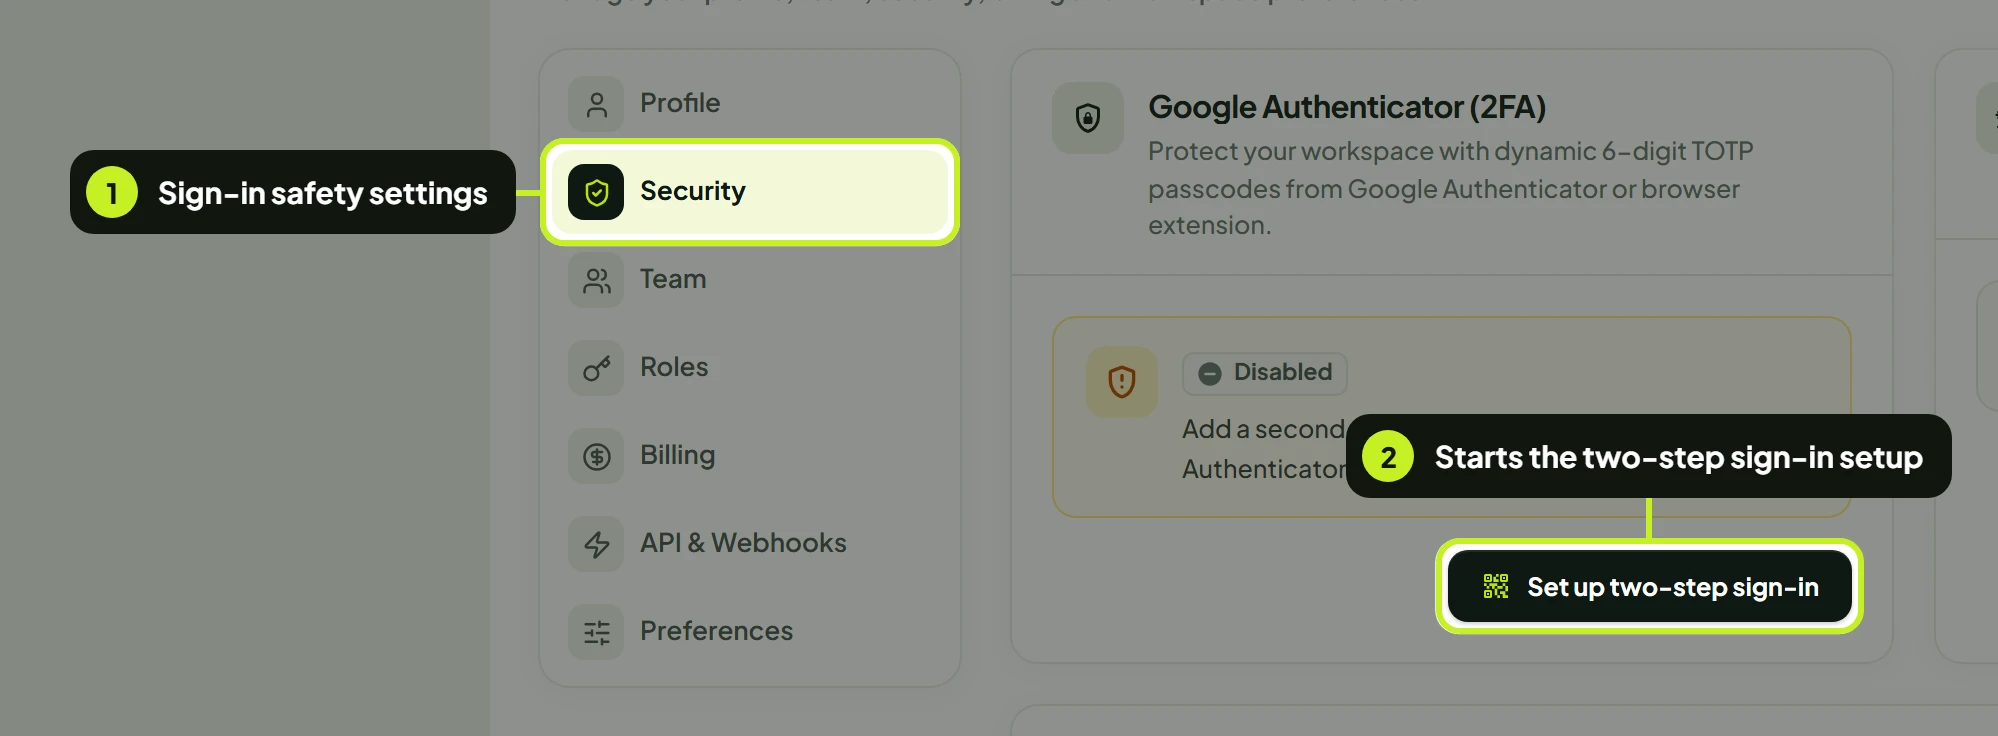
- On the Google Authenticator (2FA) card, click Set up two-step sign-in. The badge on the card reads Disabled until you finish setup. The setup opens in a dialog.
- Scan the QR code with your authenticator app. If you can't scan it, type the setup key shown under Or enter manual setup key: into the app instead. Copy copies the key; it ticks and reads Copied.
- Under Enter the 6-digit code from your authenticator app, type the code your app shows right now and click Turn on two-step sign-in. Codes change every 30 seconds.
- Save your Recovery codes. Use Copy or Download, keep them in a password manager, then click I have saved my recovery codes. Each code works once, and they're the way back in if you lose your phone. These recovery codes will not be shown again.
Once 2FA is on, the badge reads Enabled. To turn it off, click Disable 2FA, enter a current code from your app and click Turn off two-step sign-in.
Change your password
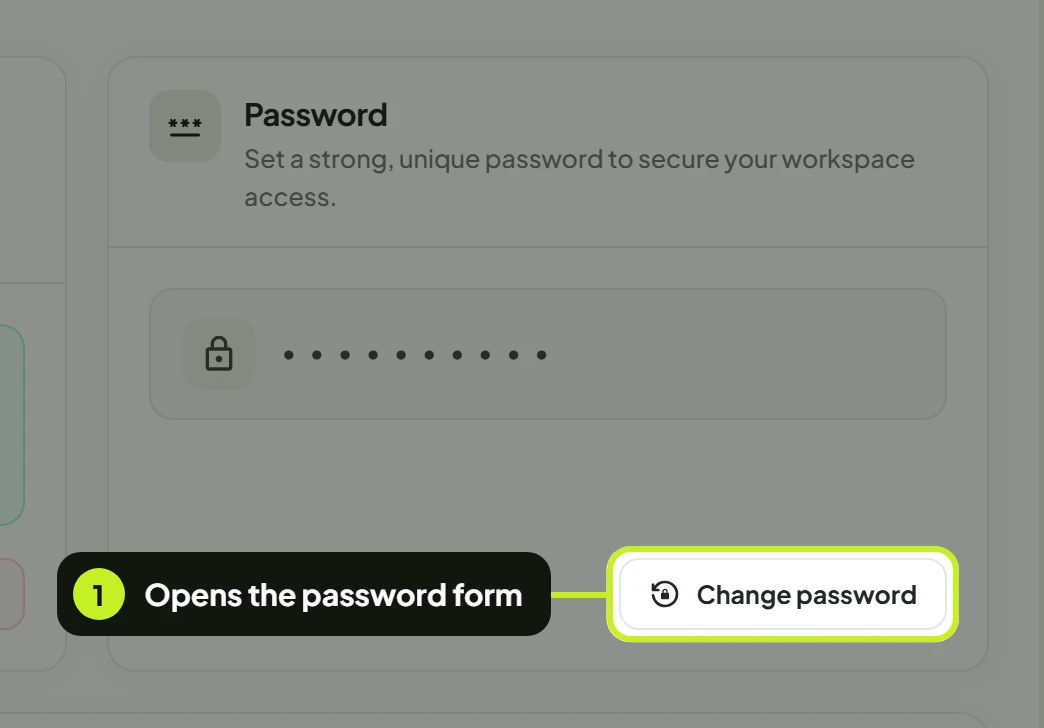
- On the Security tab, click Change password on the Password card.
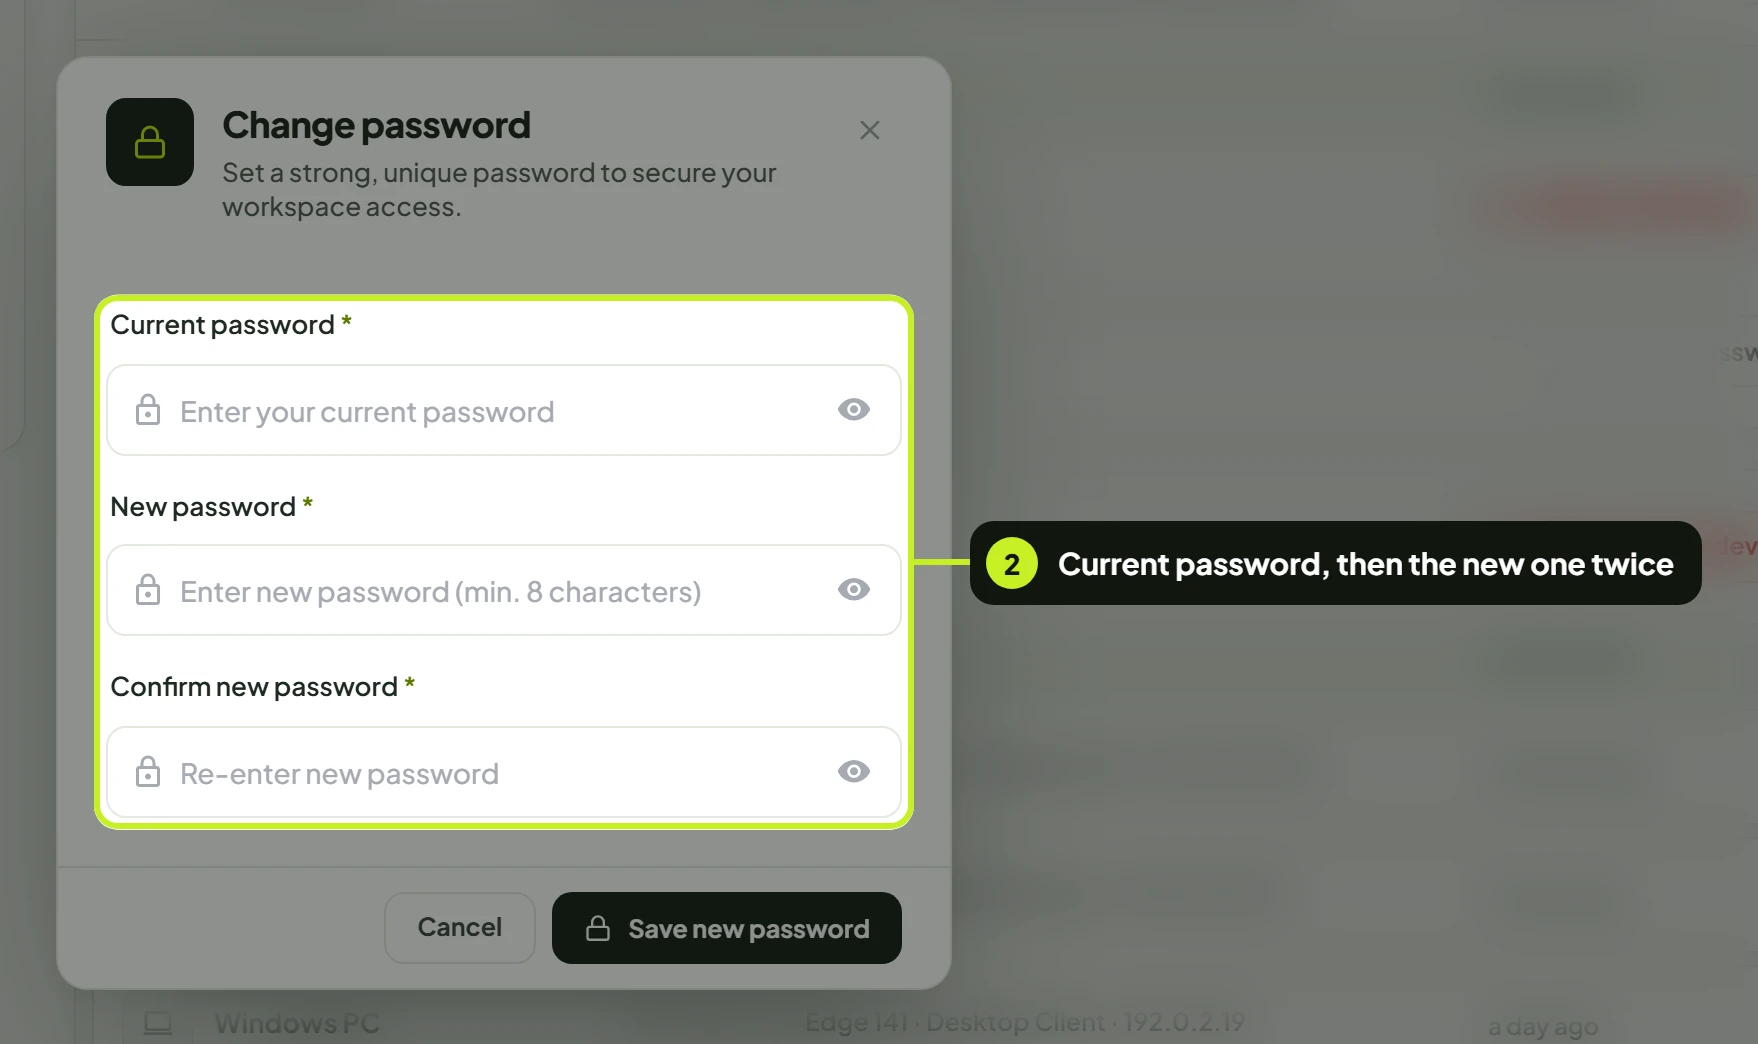
- Fill in Current password, New password (at least 8 characters) and Confirm new password. The eye icon shows what you typed.
- Click Save new password. You'll see Password updated.
Tip: If you've never set a password, the button reads Set password and you won't be asked for a current one.
Sign out other devices
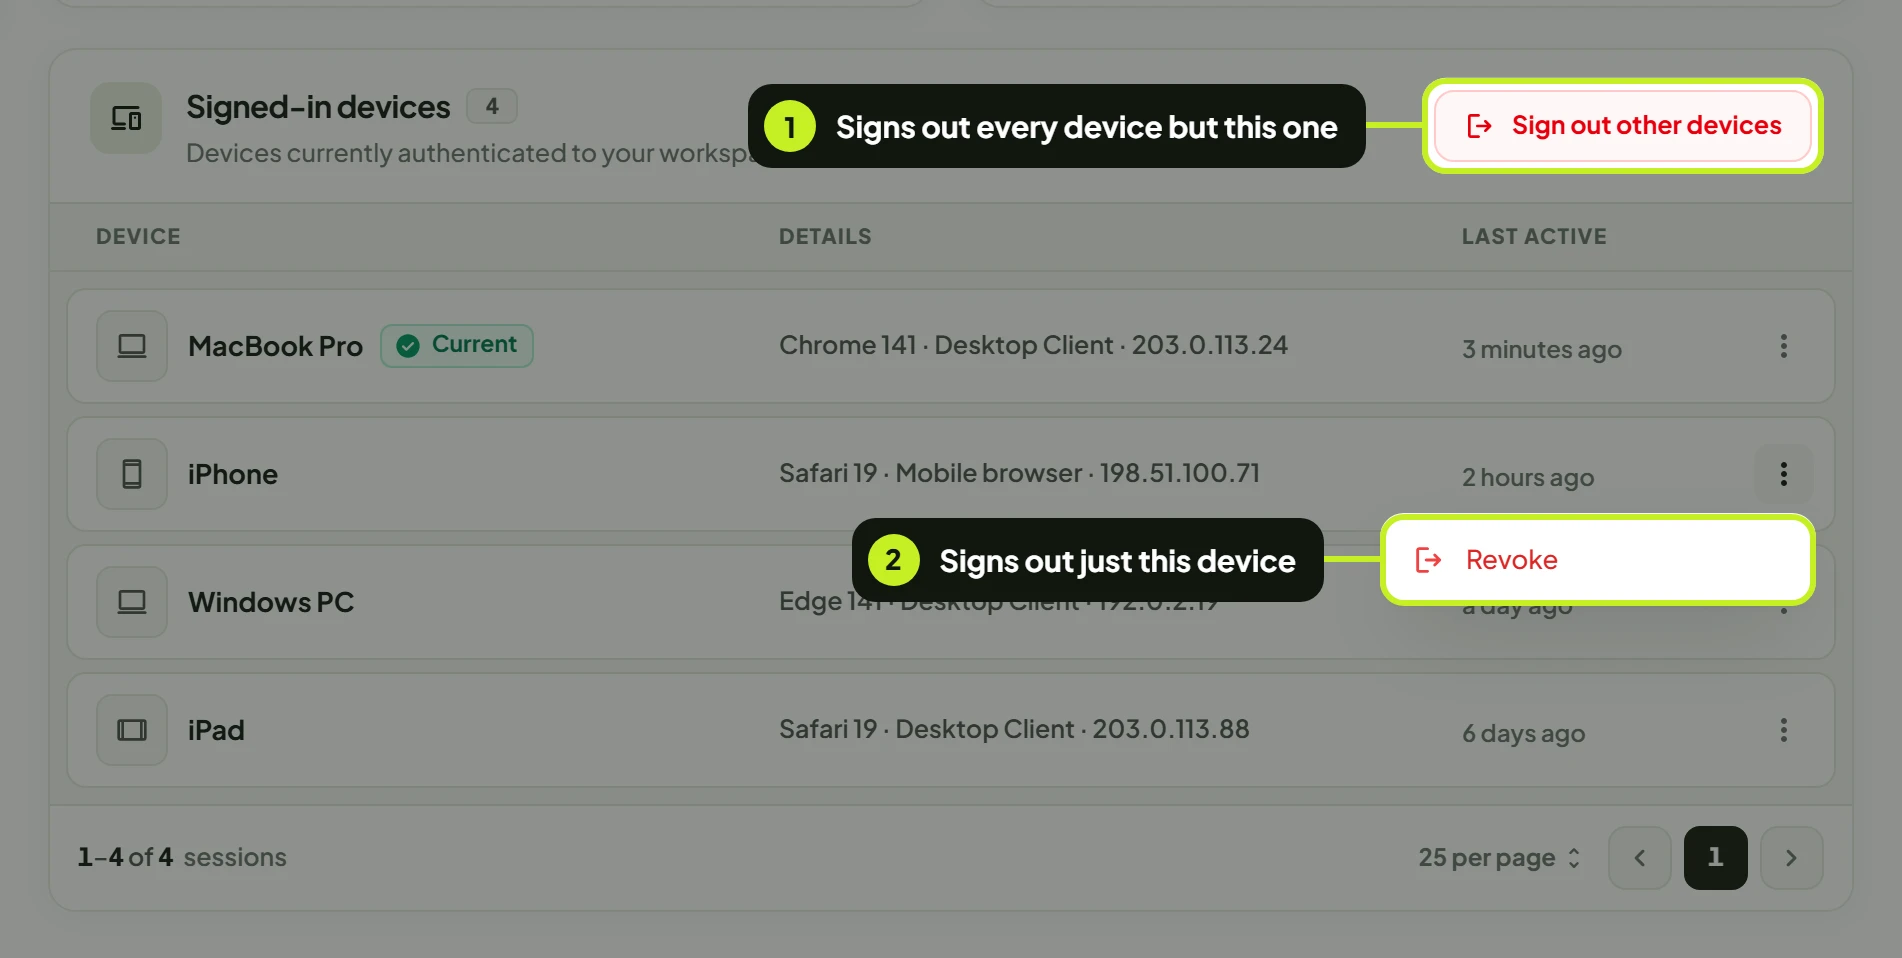
The Signed-in devices card lists every device that's signed in to your account. For each one you'll see the Device, its Details (browser, client and IP address) and when it was Last active. The device you're using now is marked Current.
- To sign out every device except the one you're on, click Sign out other devices and confirm.
- To sign out a single device, open the ⋮ menu on its row, click Revoke, then confirm with Sign out device.
A signed-out device has to sign in again before it can get back into the workspace. Do this if you lose a laptop or phone, or if you see a device you don't recognize. Then change your password too.
Delete an account
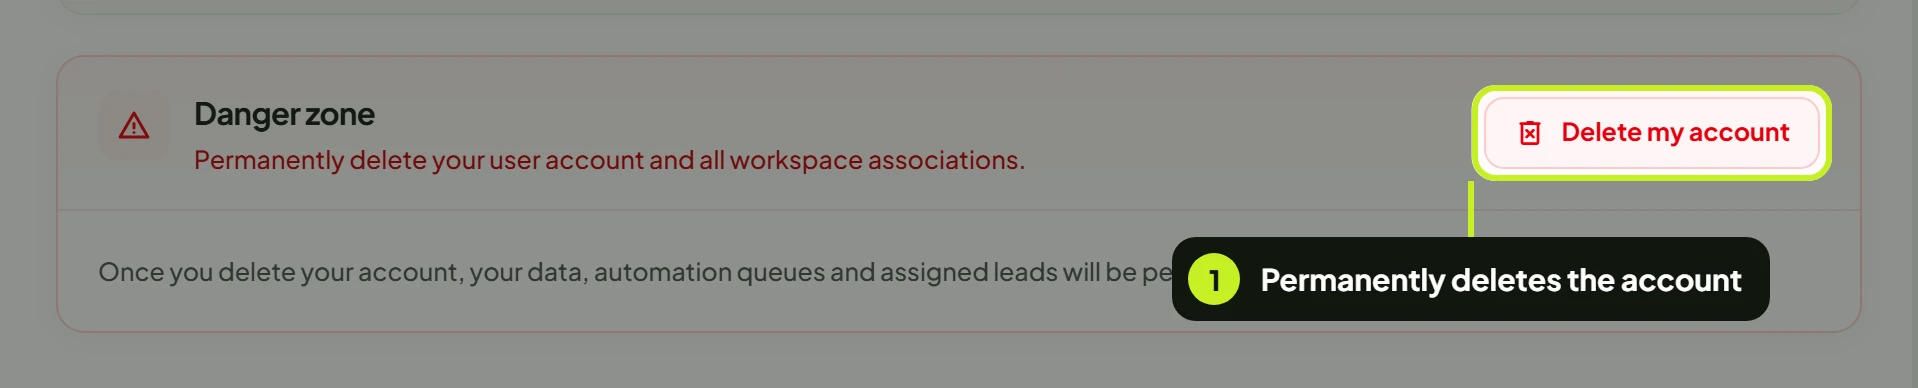
Only a workspace admin sees the Danger zone card at the bottom of the Profile tab.
Warning: Deleting erases more than one person's profile. It permanently deletes the account, its campaigns, synced leads and every API configuration, as well as automation queues and assigned leads. This action cannot be undone.
- Click Delete my account.
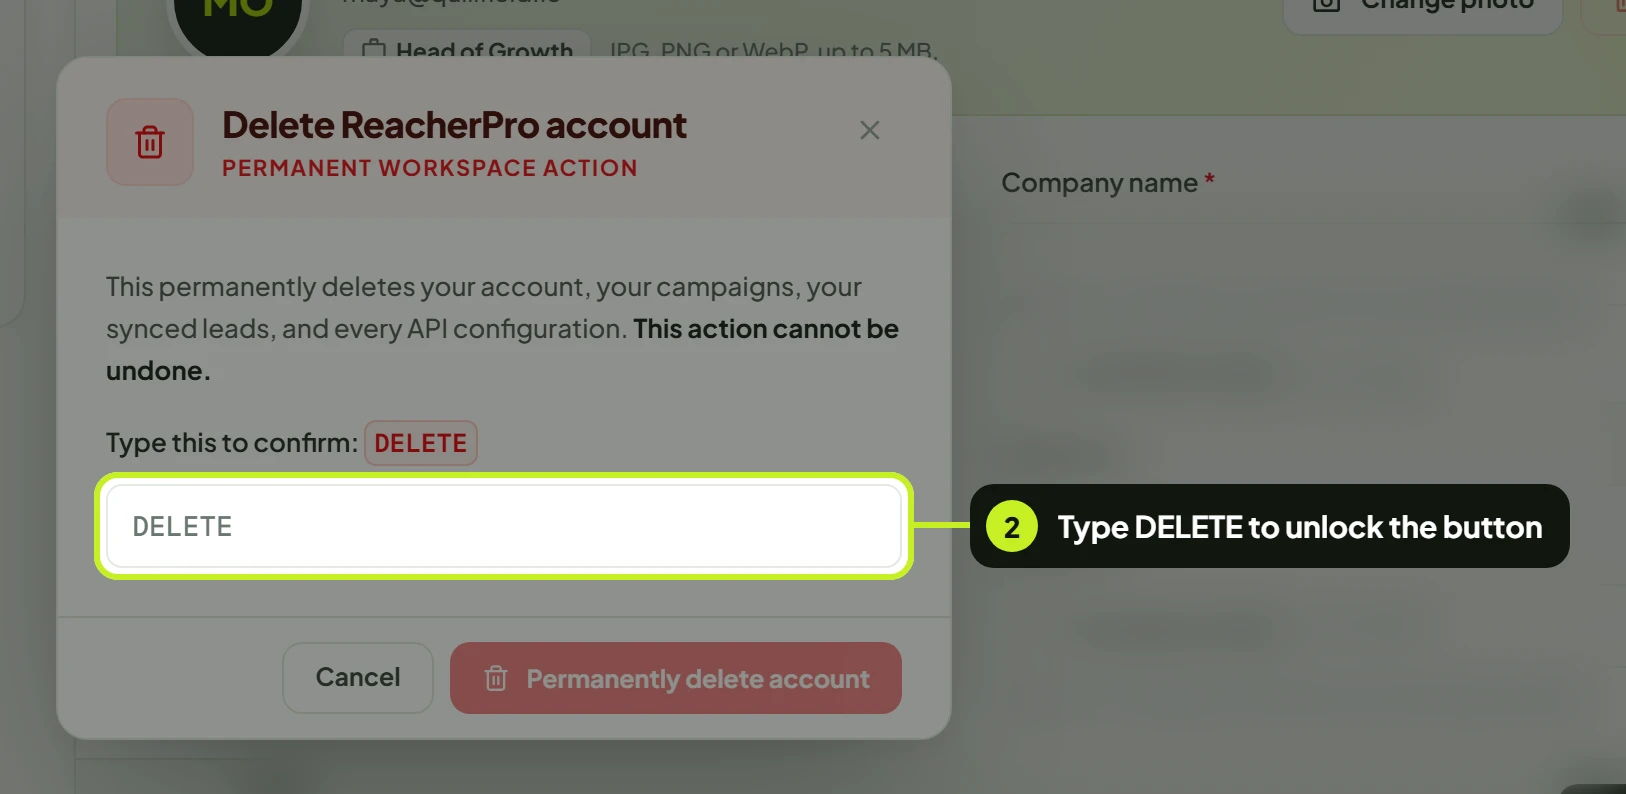
- In Delete ReacherPro account, type
DELETEin the box under Type this to confirm:. The button stays disabled until the word matches. - Click Permanently delete account. You're signed out once it's done.
To remove a teammate rather than the whole account, use Delete user on the Team tab. See Invite your team.
Troubleshooting
| What you see | What it means | What to do |
|---|---|---|
| Enter a valid phone number for the selected country. | The number doesn't match the country code | Fix the country code, or clear the number. It's optional |
| Profile photo must be 5 MB or smaller. | The image is too big | Resize it, or save it as JPG or WebP |
| Upload a JPG, PNG, or WebP image. | The file isn't one of those formats | Convert it (GIF, HEIC and SVG aren't accepted) |
| Nothing to save | You clicked save without changing anything | Edit a field first |
| Company name is greyed out | Your role doesn't include Organization: Update | Ask the Owner or a workspace admin |
| Invalid code when turning on 2FA | The code was mistyped or has expired | Type the code showing now. Make sure your phone sets its clock automatically |
| Couldn't update your password. Check your current password and try again. | The current password was wrong | Re-enter it, or use Forgot password? on the sign-in page |
| Password must be at least 8 characters | The new password is too short | Choose a longer one |
| No Danger zone card | Only workspace admins can delete an account | Ask the Owner |
Next: Add teammates in Invite your team.