
Browse docs
Invite your team
Add teammates to your workspace, give each one a role, turn sign-in on or off, and remove people who no longer need access. Also covers what team members share.
Updated
On this page
A workspace can have more than one person signed in. The person who created it is the Owner. Everyone you add on the Team tab is a team member working inside the same workspace, and each one gets a role that controls what they can see and change.
Before you start: You need Users: View to open the Team tab, Users: Create to add people and Users: Update to edit, deactivate or remove them. The Owner and workspace admins have all three. See Roles and permissions.
How it works
- The Owner comes first. The workspace is created with one primary account, which has every permission.
- You add a team member on the Team tab, with their email and a first password.
- You give them a role. The role decides which pages they see and what they can change.
- They sign in to the same workspace and work alongside you, within what their role allows.
Owner and team members
The Owner is the account the workspace was created with. In the team table their role shows as Admin, and they have every permission. The Owner's row has no actions menu and its Active switch is locked, so the Owner can't be edited, deactivated or removed from this page.
Team members (sometimes called secondary users) are the people you add. Each one:
- Signs in with their own email address and password. You set both when you add them, so pass the sign-in details on to your teammate yourself.
- Works in your workspace, not a copy of it. They use the same organization, connected LinkedIn accounts and inboxes, lead lists, campaigns, conversations and settings. What they can actually open and change depends on their role.
- Shares your Do Not Contact list. The workspace has one Do Not Contact list. Its blocklist, and the Prevent duplicate outreach setting, apply to every campaign anyone in the workspace runs, whoever added the entry. See Use the blocklist.
- Has their own profile and security. Each person sets their own name, photo, phone, job title and timezone, and their own password, 2FA and signed-in devices. See Account and security.
- Isn't a seat. A seat is a LinkedIn account or email inbox you send from. Adding a person doesn't use one, and connecting a seat doesn't add a person.
Tip: Agencies should give each client their own workspace. Each workspace has its own team, seats and Do Not Contact list, so one client's blocklist never affects another client's campaigns.
Add a team member
- Go to Settings and open the Team tab. The Team members card shows how many people are in the workspace.
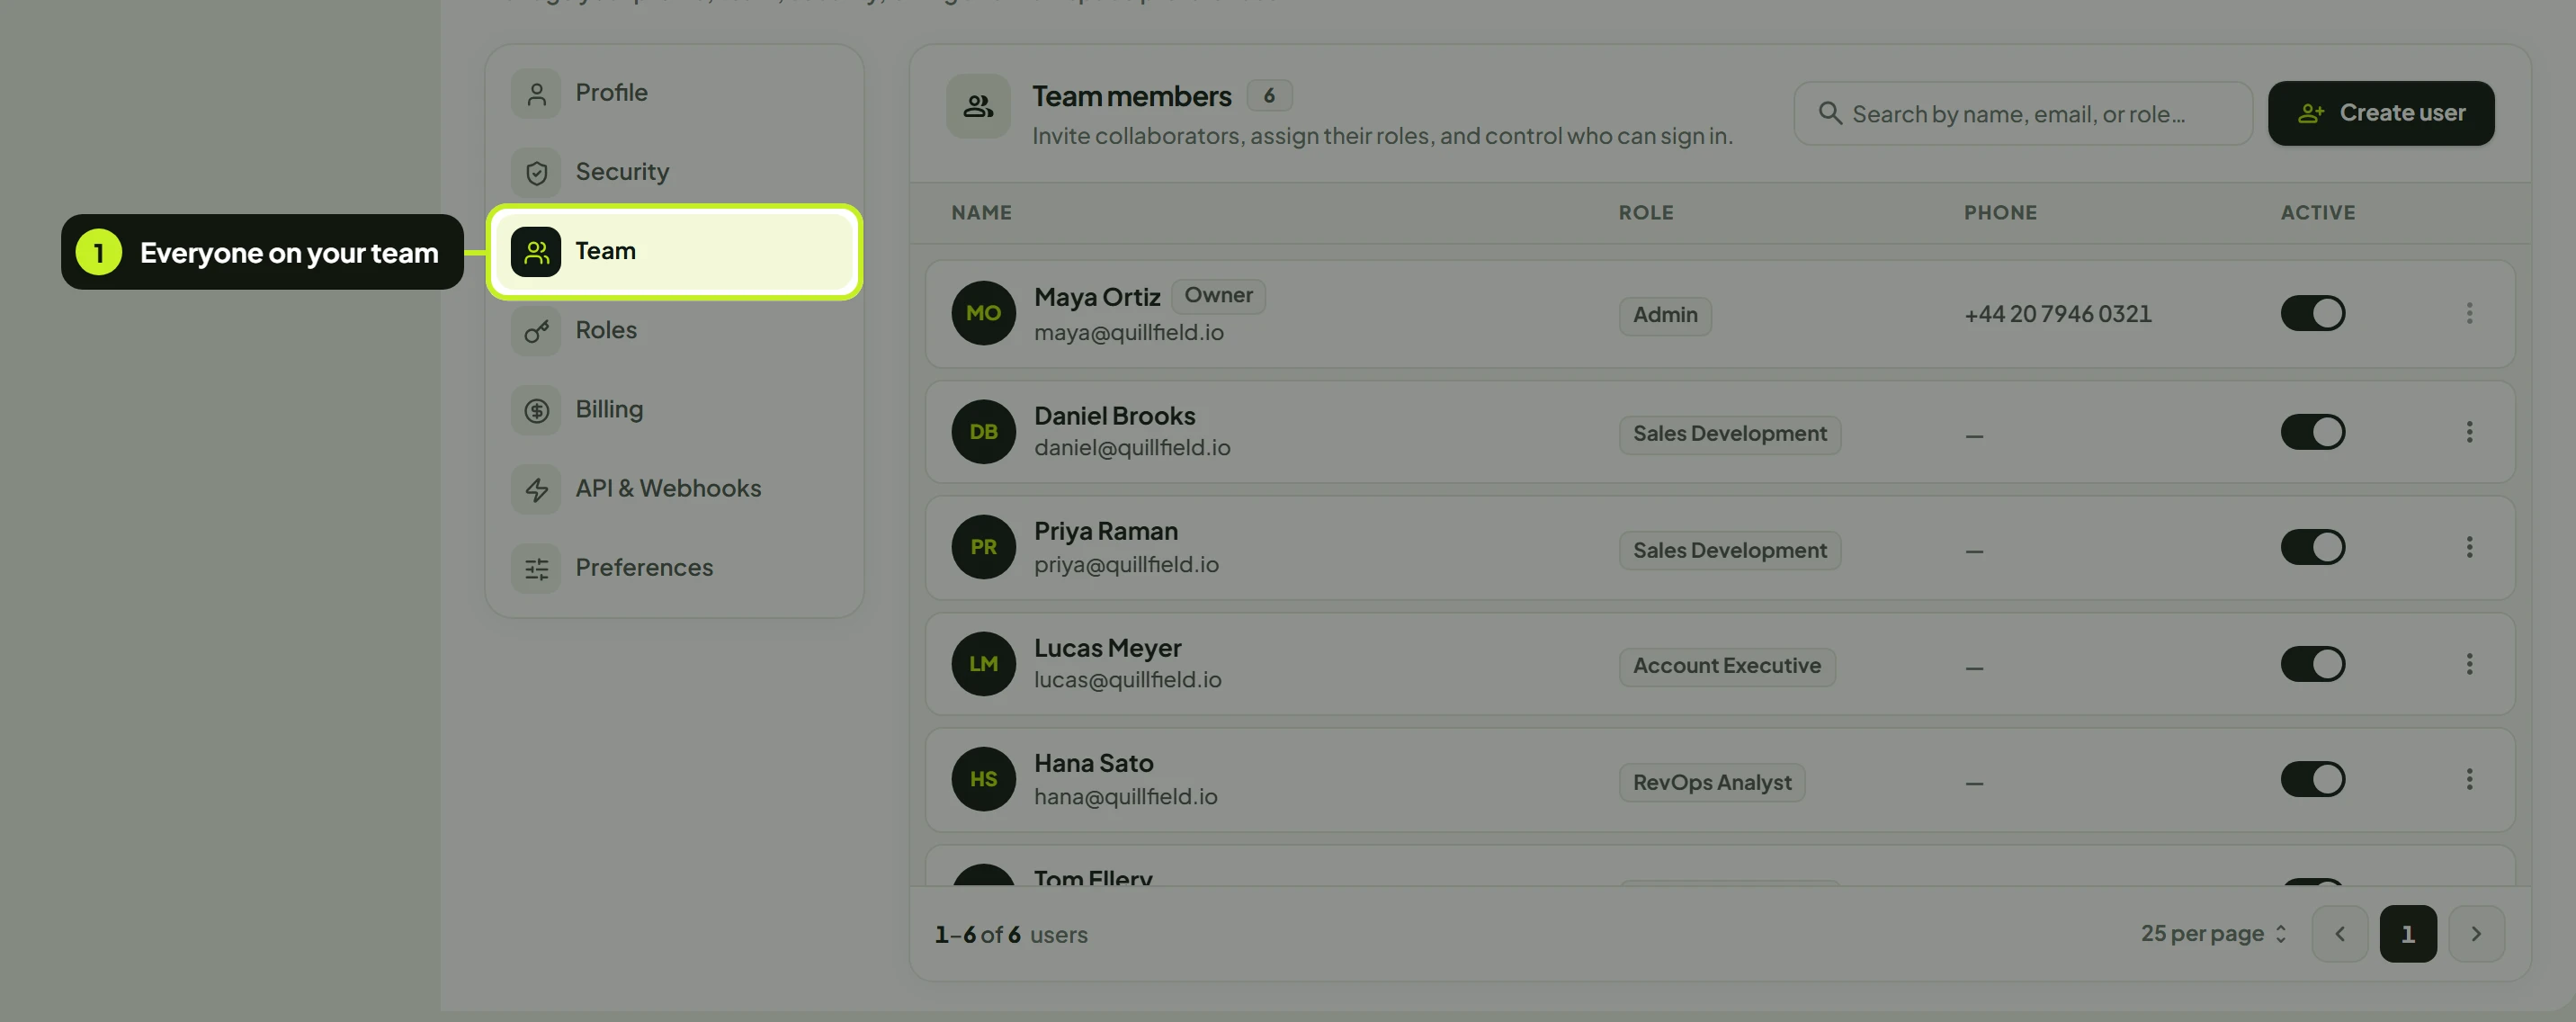
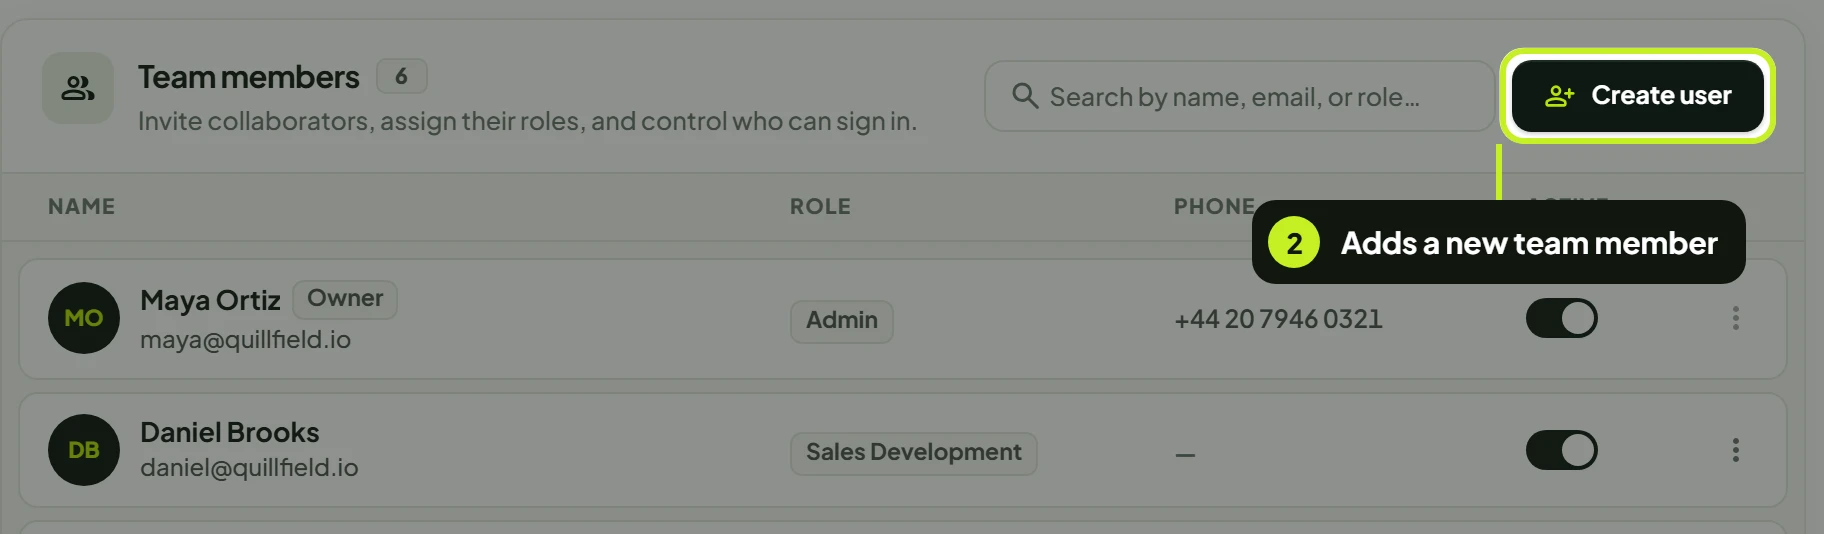
- Click Create user. If it's greyed out, your role doesn't include Users: Create.
- Enter the person's Full name.
- Enter their Email. This is the address they'll sign in with, and it can't be changed later.
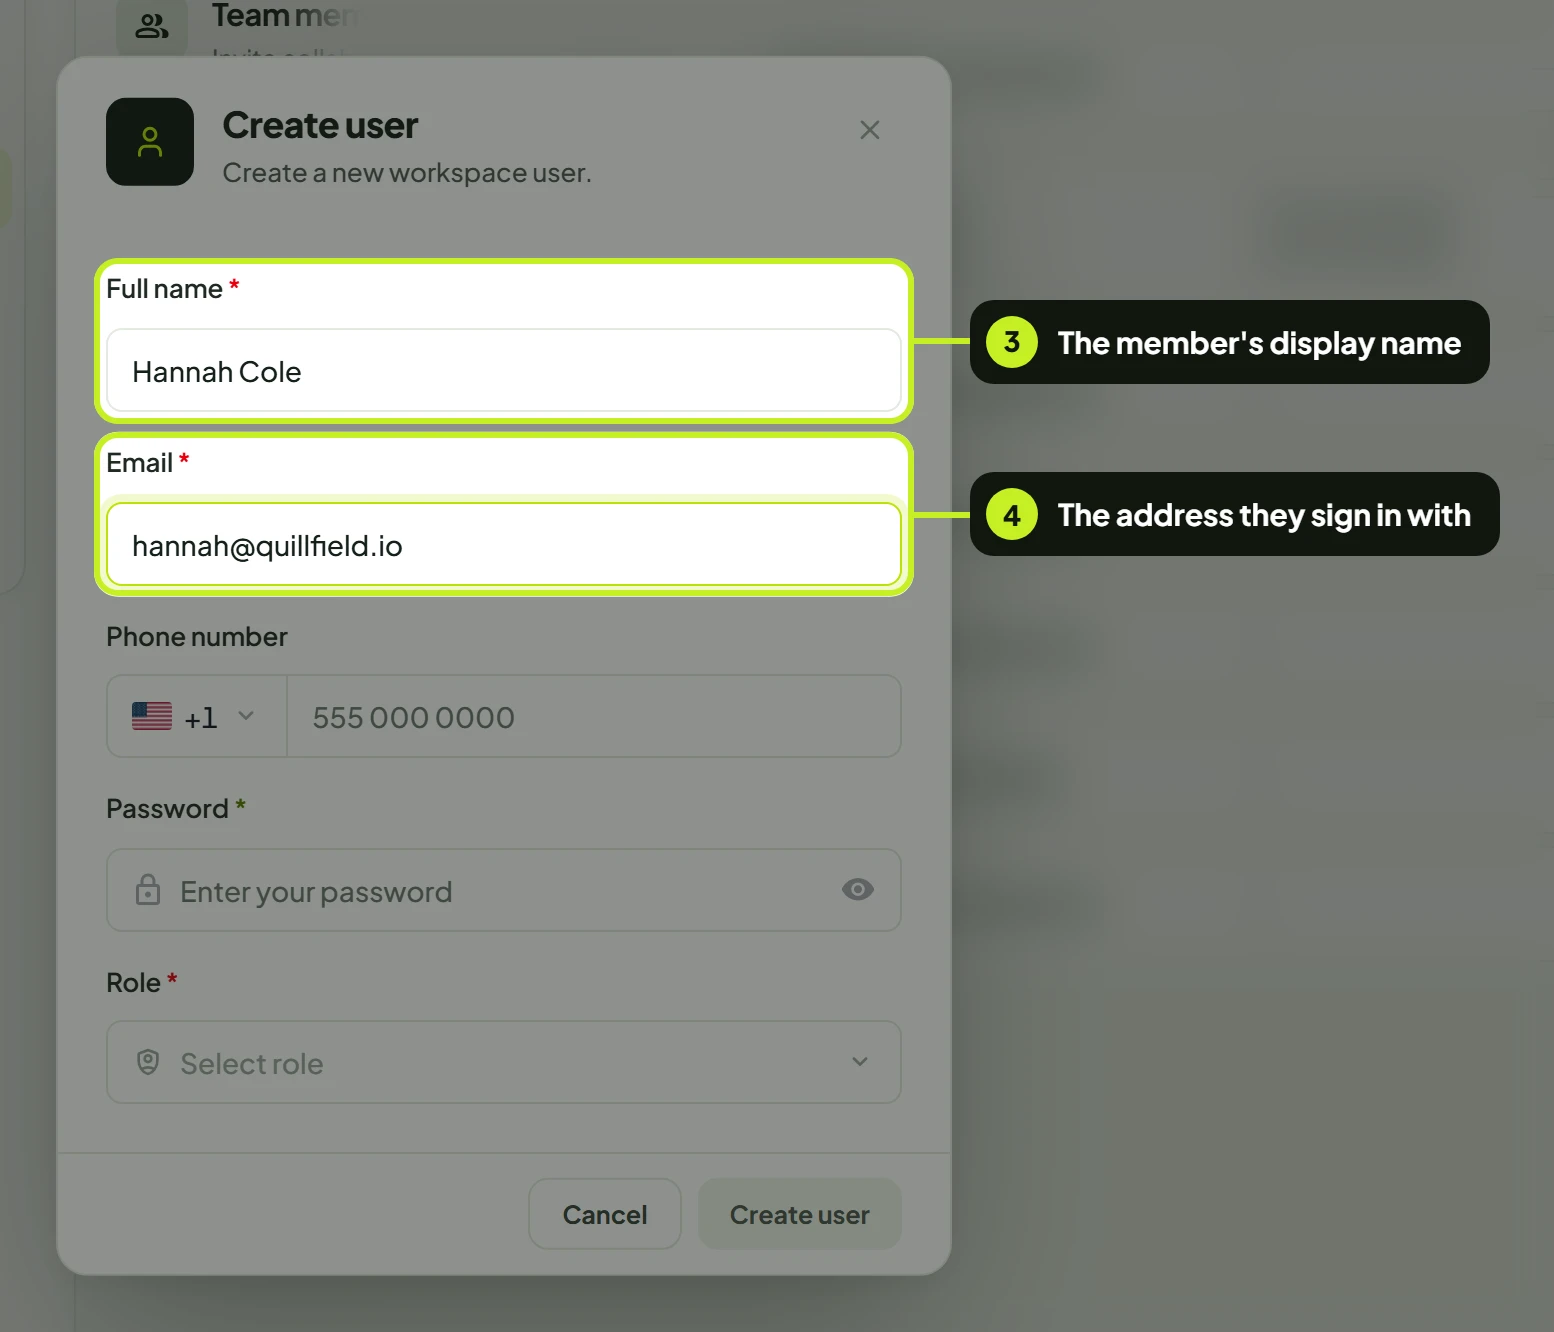
- Optionally, pick a country code and enter a Phone number.
- Set a Password for their first sign-in. They can change it from their own Security tab.
- Open Role and choose one. A role is required. If none fits, create a role first.
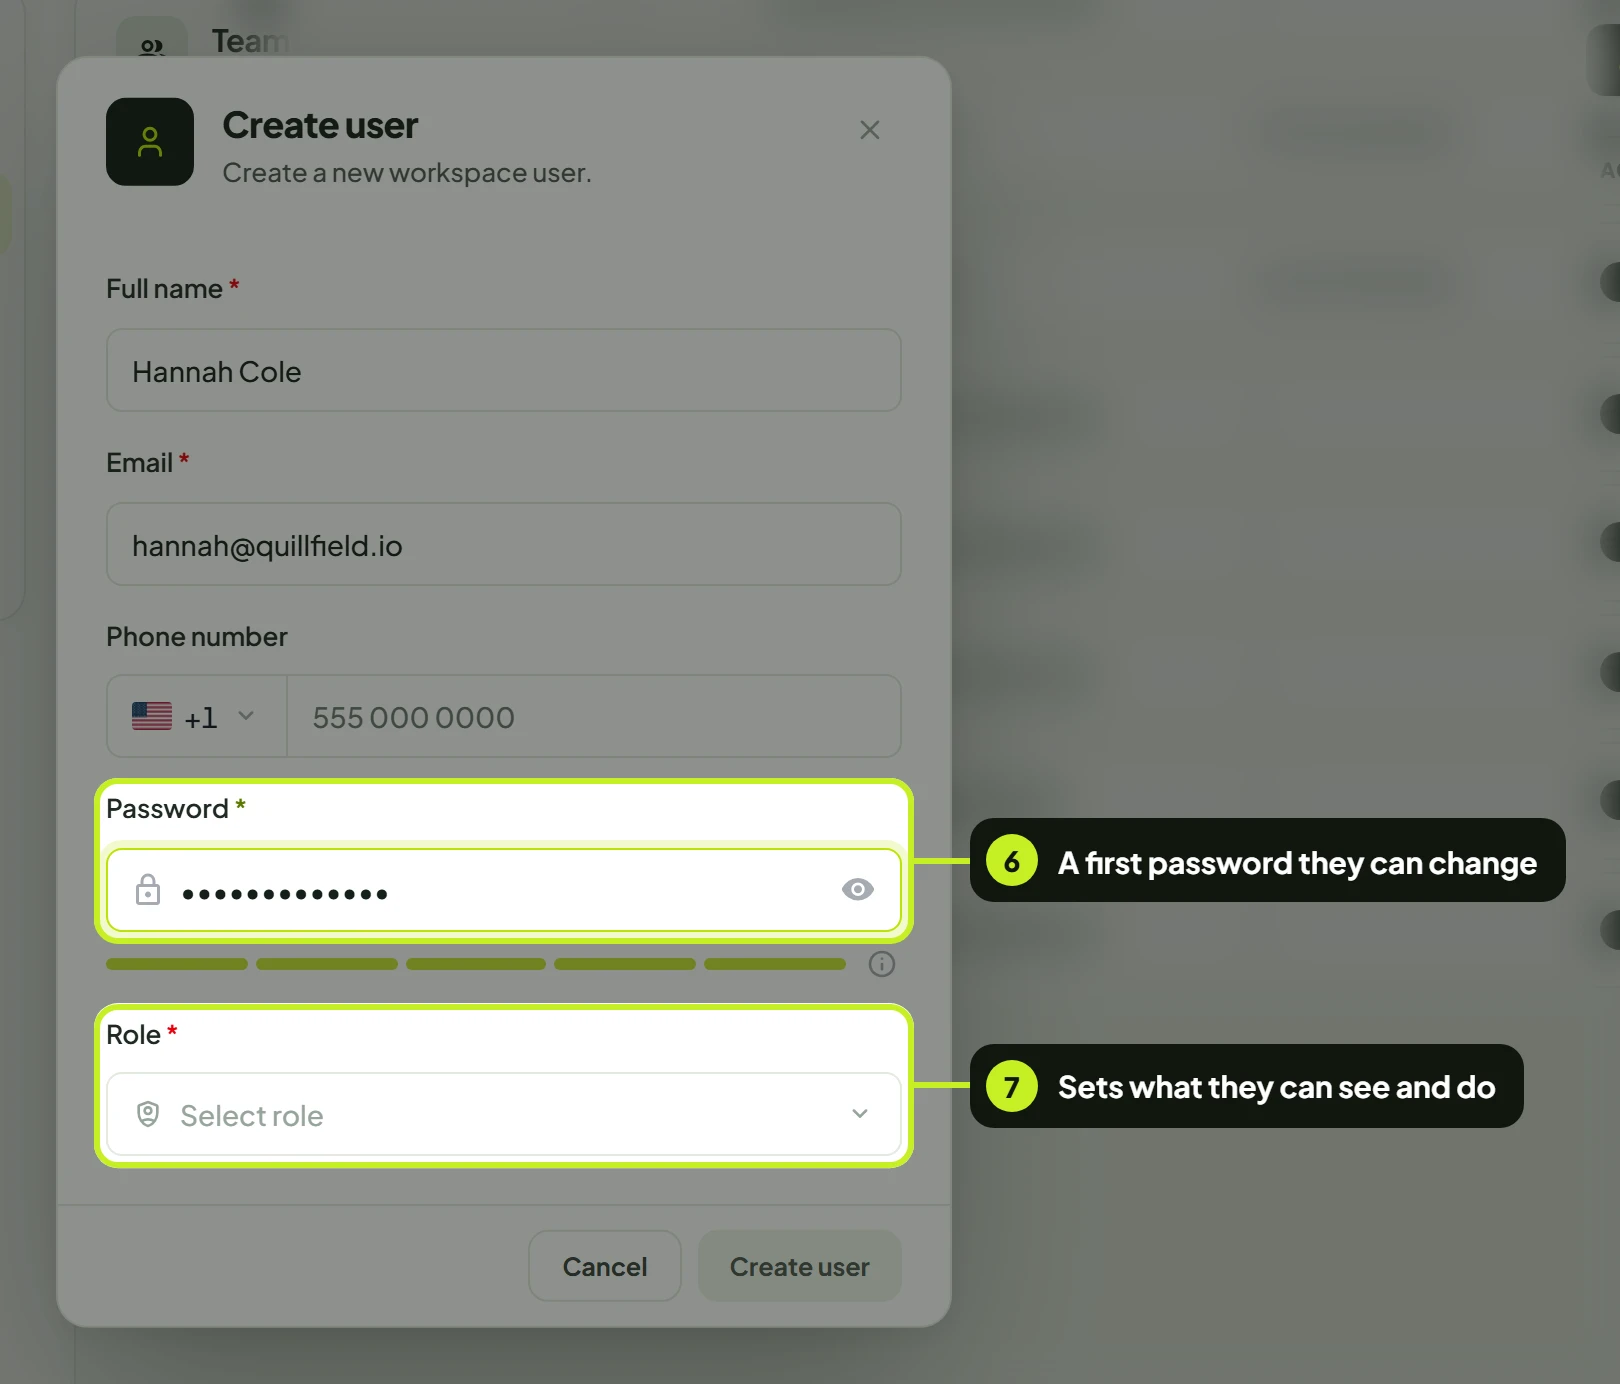
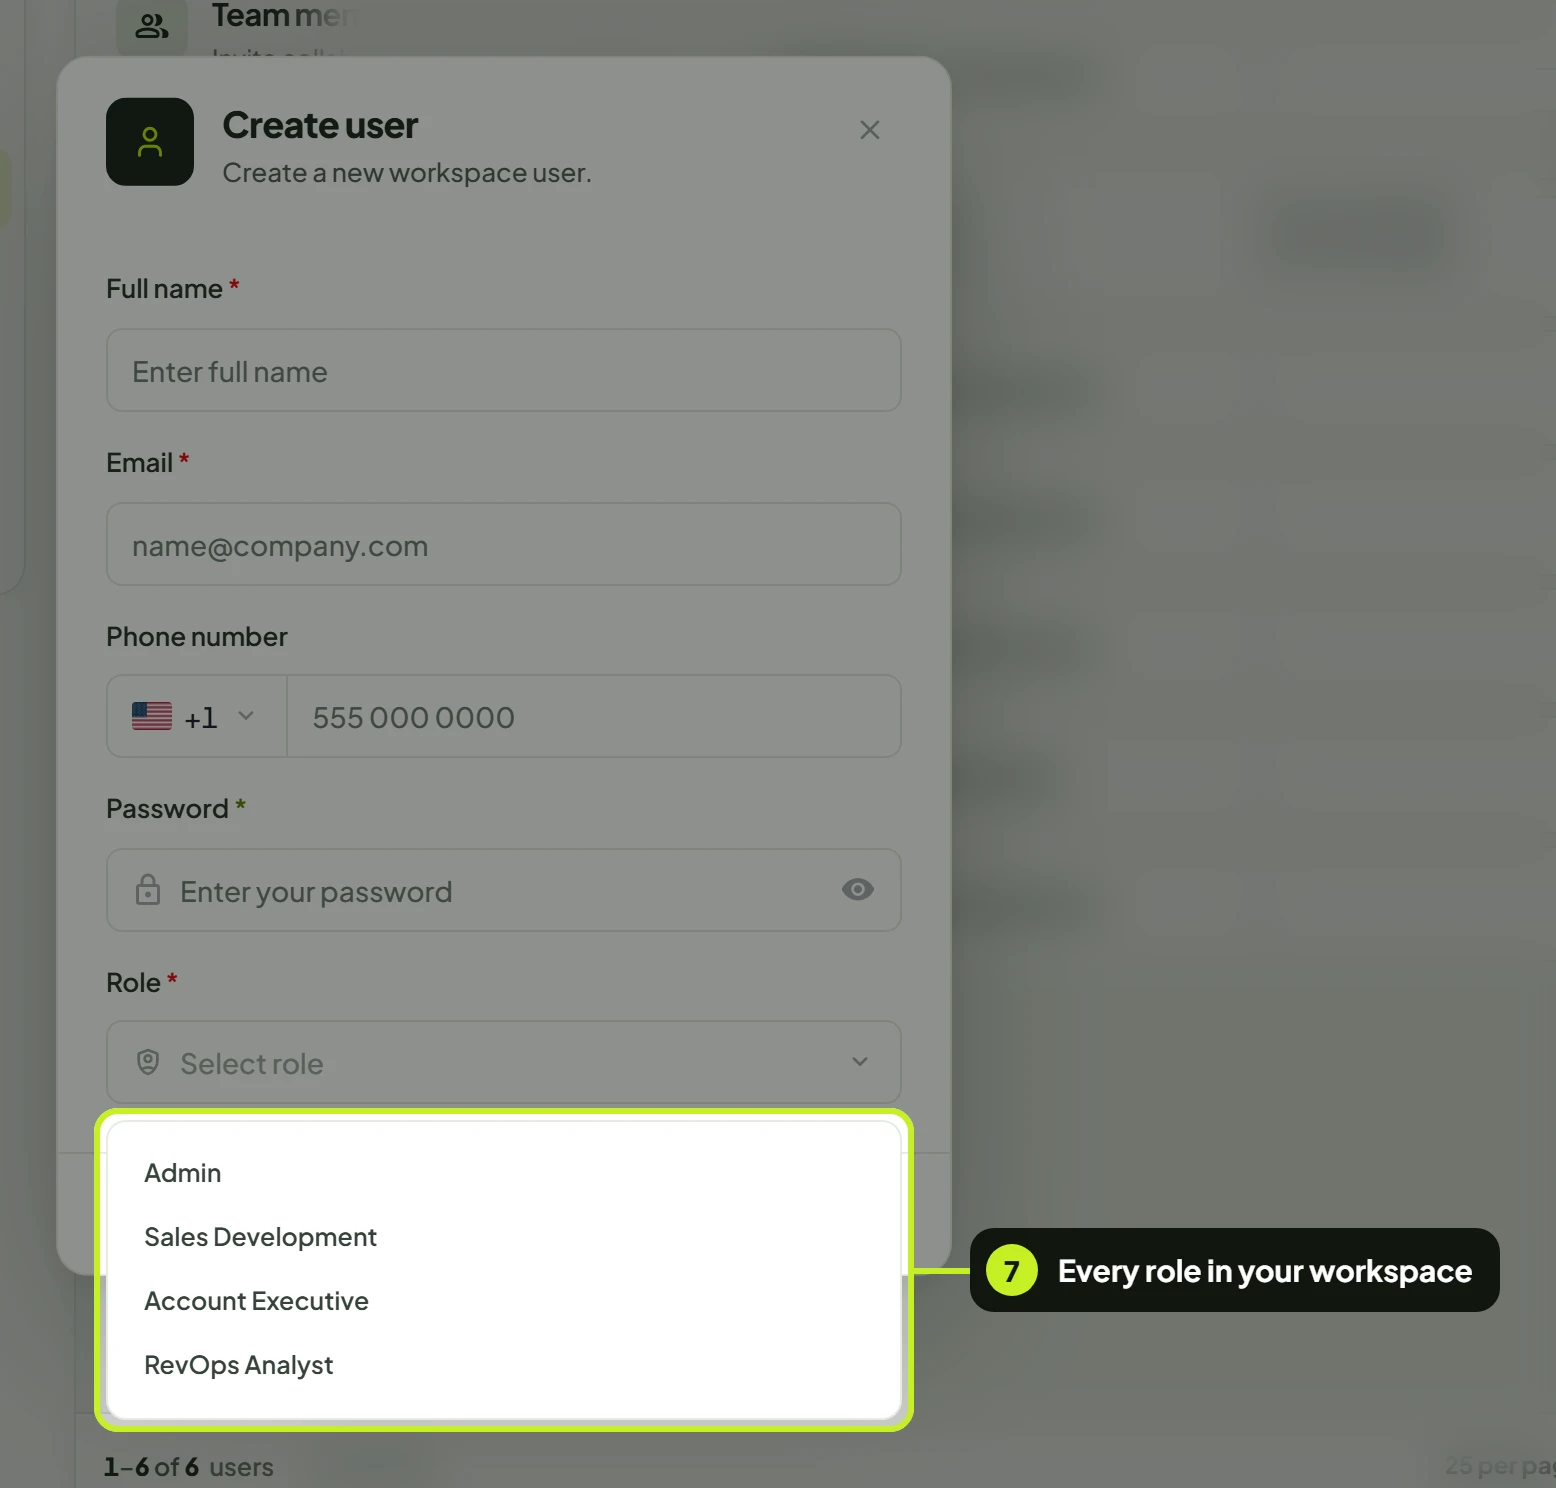
- Click Create user. The button stays disabled until there's a name, a valid email, a password and a role. You'll see User created, and the new person appears in the table.
Then send your teammate the web address they sign in at, their email and the password you set.
Read the team table
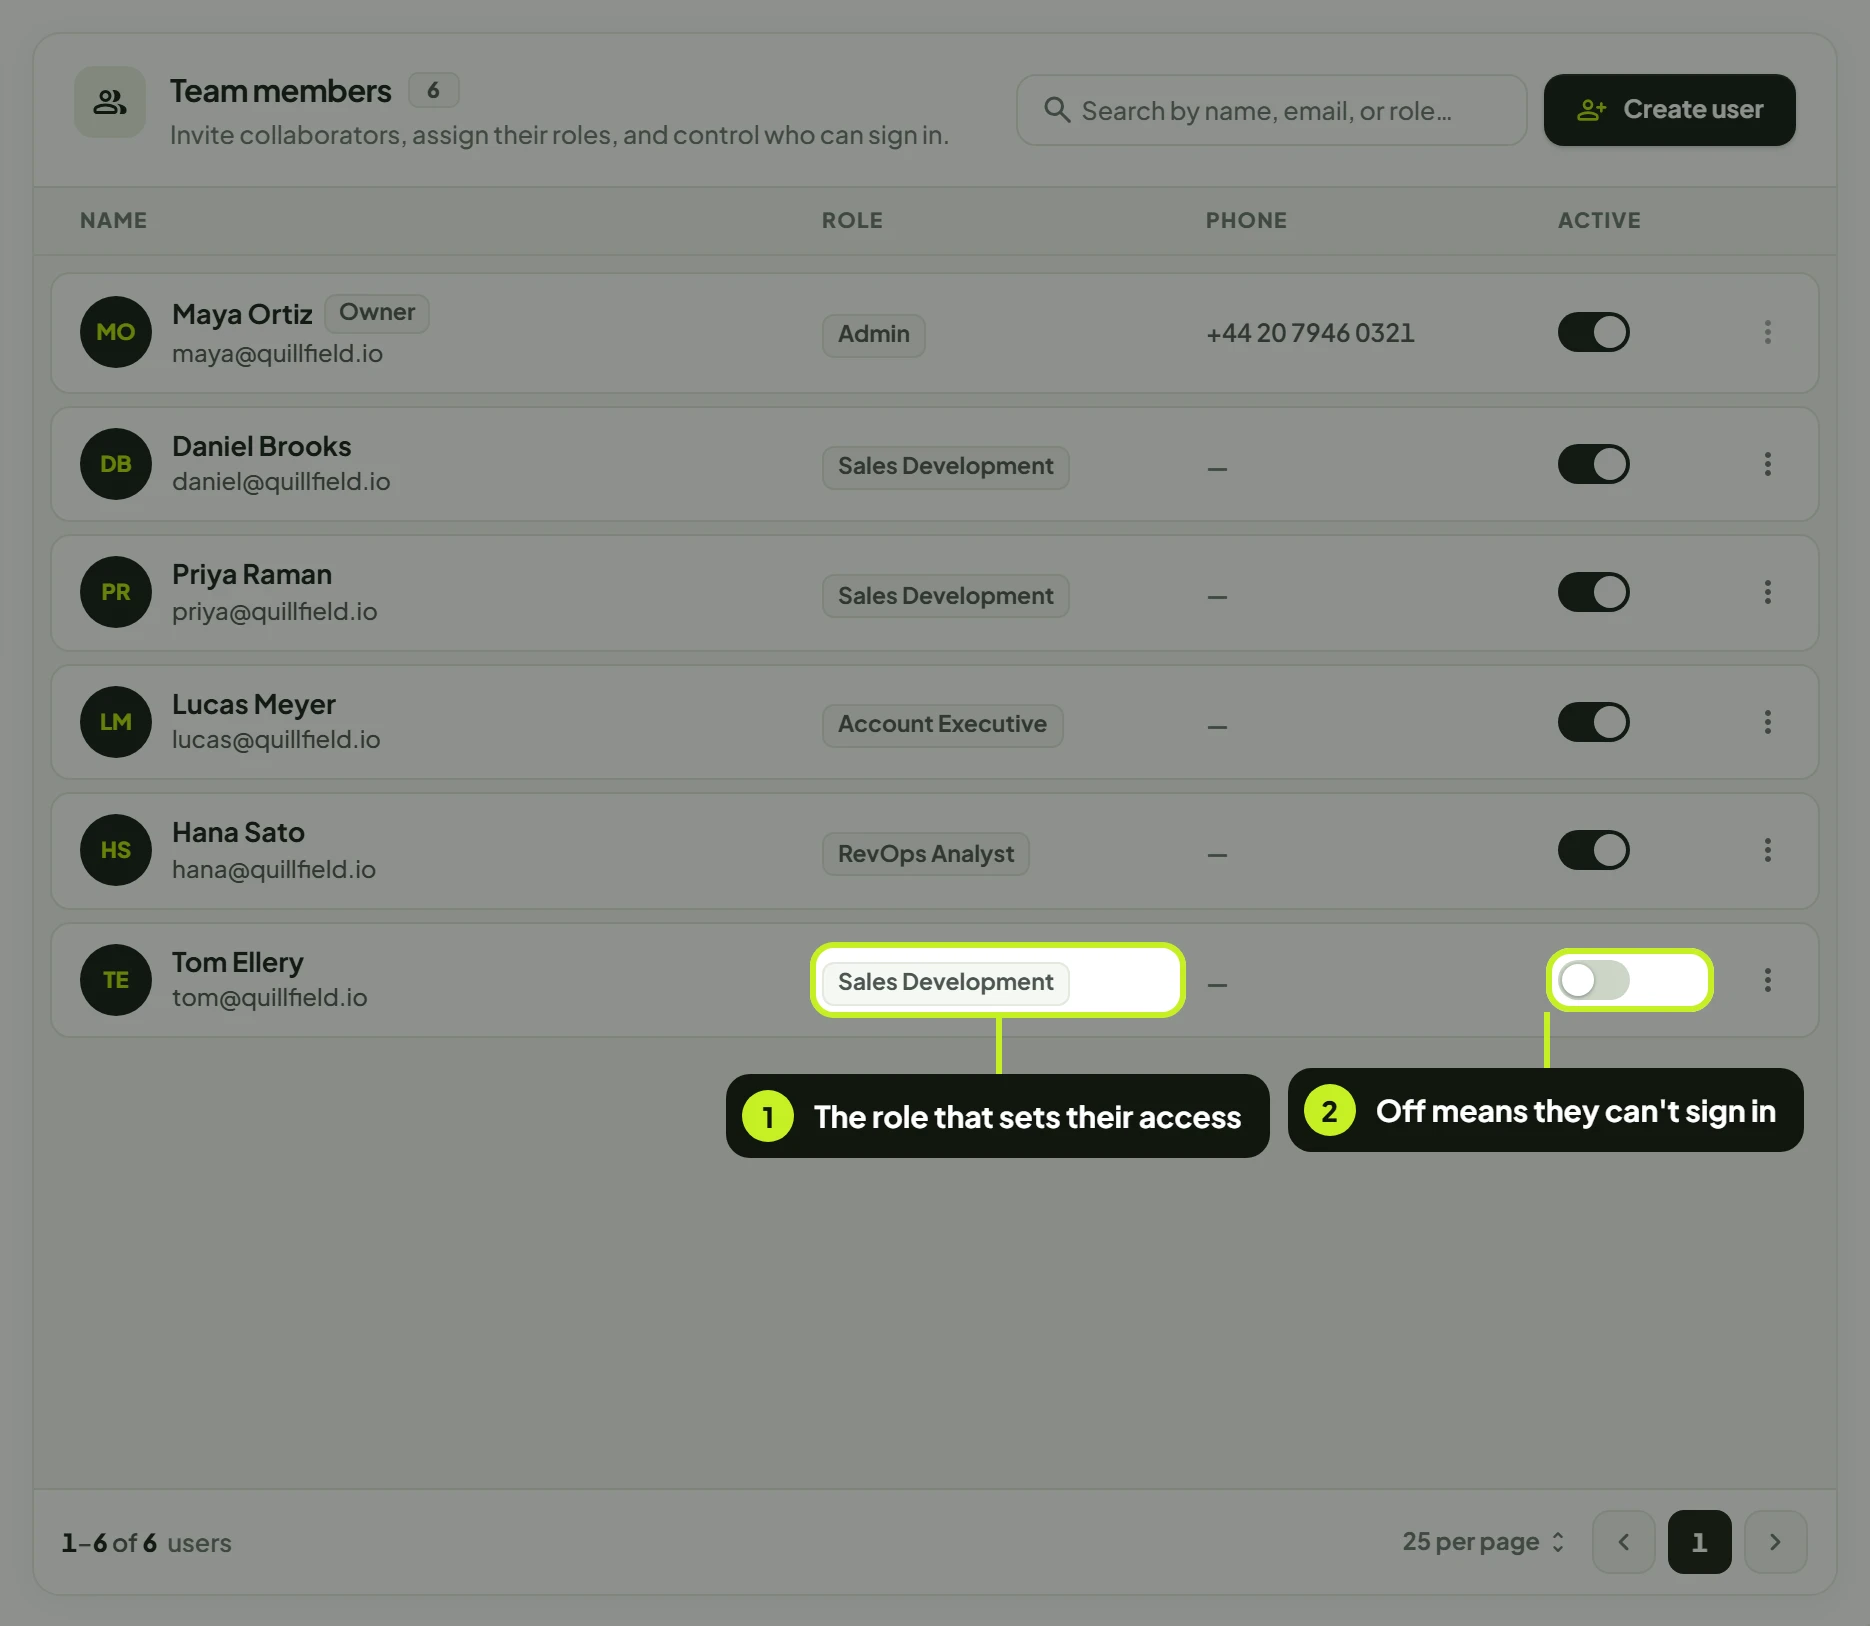
Each row shows the person's Name and email, their Role, their Phone and whether they're Active. Use Search by name, email, or role… to filter the list.
- Role shows what each person can do. The Owner always shows Admin.
- Active controls whether the person can sign in. Turn it off to suspend someone's access without deleting them, for example while they're on leave. Their account and work stay in the workspace, and you can turn the switch back on at any time. You'll see User deactivated or User activated.
Change someone's details or role
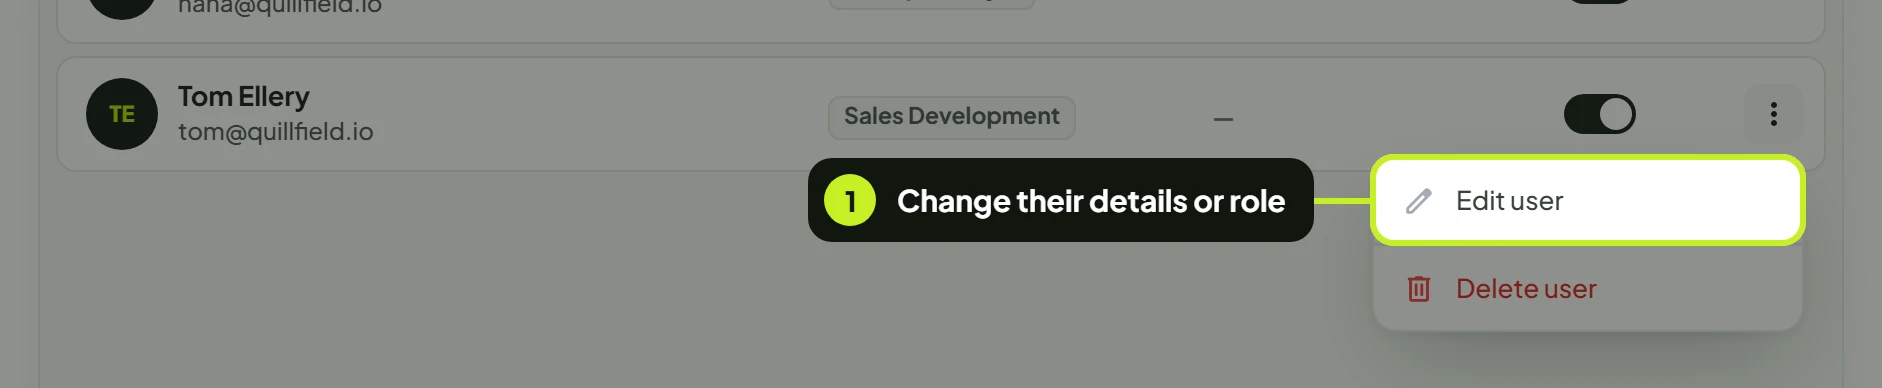
- Open the ⋮ menu at the end of the person's row and click Edit user. You can also click the row.
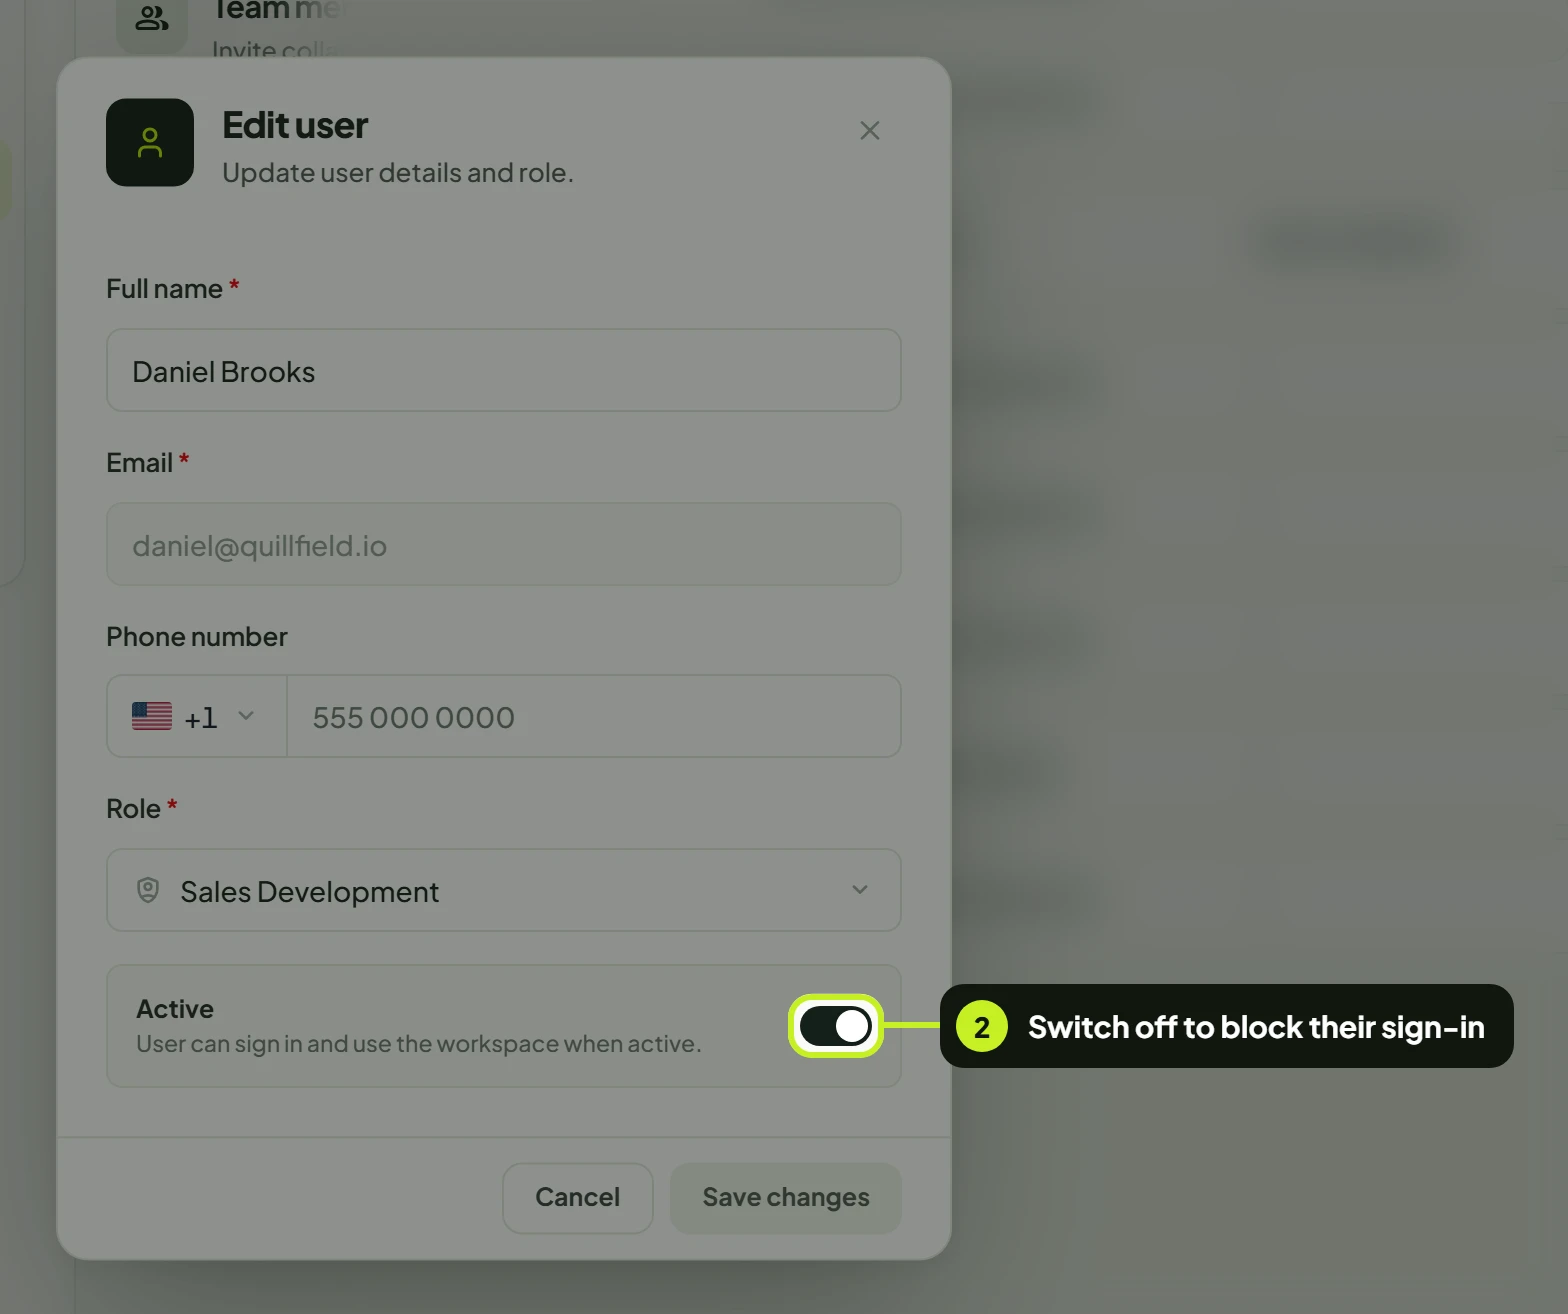
- In Edit user, change the Full name, Phone number or Role, or use the Active switch. (User can sign in and use the workspace when active.) The email can't be changed, and there's no password field here: each person changes their own password.
- Click Save changes. You'll see User updated.
Once the new role applies, their sidebar and Settings tabs only show the pages it allows.
Remove a team member
- Open the ⋮ menu on the person's row and click Delete user.
- Confirm with Delete user in the Are you sure you want to delete…? dialog. You'll see User deleted.
The person can't sign in again. To keep their access available for later, turn off Active instead.
Troubleshooting
| What you see | What it means | What to do |
|---|---|---|
| Create user is greyed out on the Team tab | Your role doesn't include Users: Create | Hover it to see why, or ask the Owner or a workspace admin |
| Create user in the dialog stays disabled | A required field is empty or the email isn't valid | Fill in Full name, Email, Password and Role |
| The Role list is empty | The workspace has no roles yet | Create one on the Roles tab first |
| No actions menu on the Owner's row | The Owner can't be edited, deactivated or removed | Nothing to do. That's expected |
| A teammate can't sign in | Their Active switch is off, or they're using a different email | Turn Active on and check the email in the table |
| A teammate can't find a page | Their role doesn't include View for it | Edit their role, or give them a different one |
| Couldn't load team members | The list didn't load | Click Try again |
Next: Decide what each person can do in Roles and permissions.