Browse docs
Roles and permissions
Create roles that decide what each team member can view, create, update and delete, area by area, then assign them to people on the Team tab.
Updated
On this page
A role is a named set of permissions, such as SDR or Analyst. Every team member has exactly one role, and it decides which pages they can open and what they can change there. You manage roles on the Roles tab in Settings.
How it works
- The Owner has everything. The account that created the workspace always has full access and shows as Admin. You don't give the Owner a role.
- You create roles. Each role is a set of ticks across nine areas: Dashboard, Campaigns, Leads, Conversations, Accounts, Users, API Keys, Webhooks and Organization.
- You give each team member a role when you add them on the Team tab, and you can change it at any time.
- The app follows the role. Pages a role can't view drop out of that person's sidebar and Settings tabs. Buttons it can't use are greyed out, and hovering one says which permission is missing, for example You don't have permission to create campaigns.
Before you start: Roles come under team management, so the Roles tab uses the Users permissions: Users: View to see roles, Users: Create to create them and Users: Update to edit or delete them. To give roles to people, see Invite your team.
Create a role
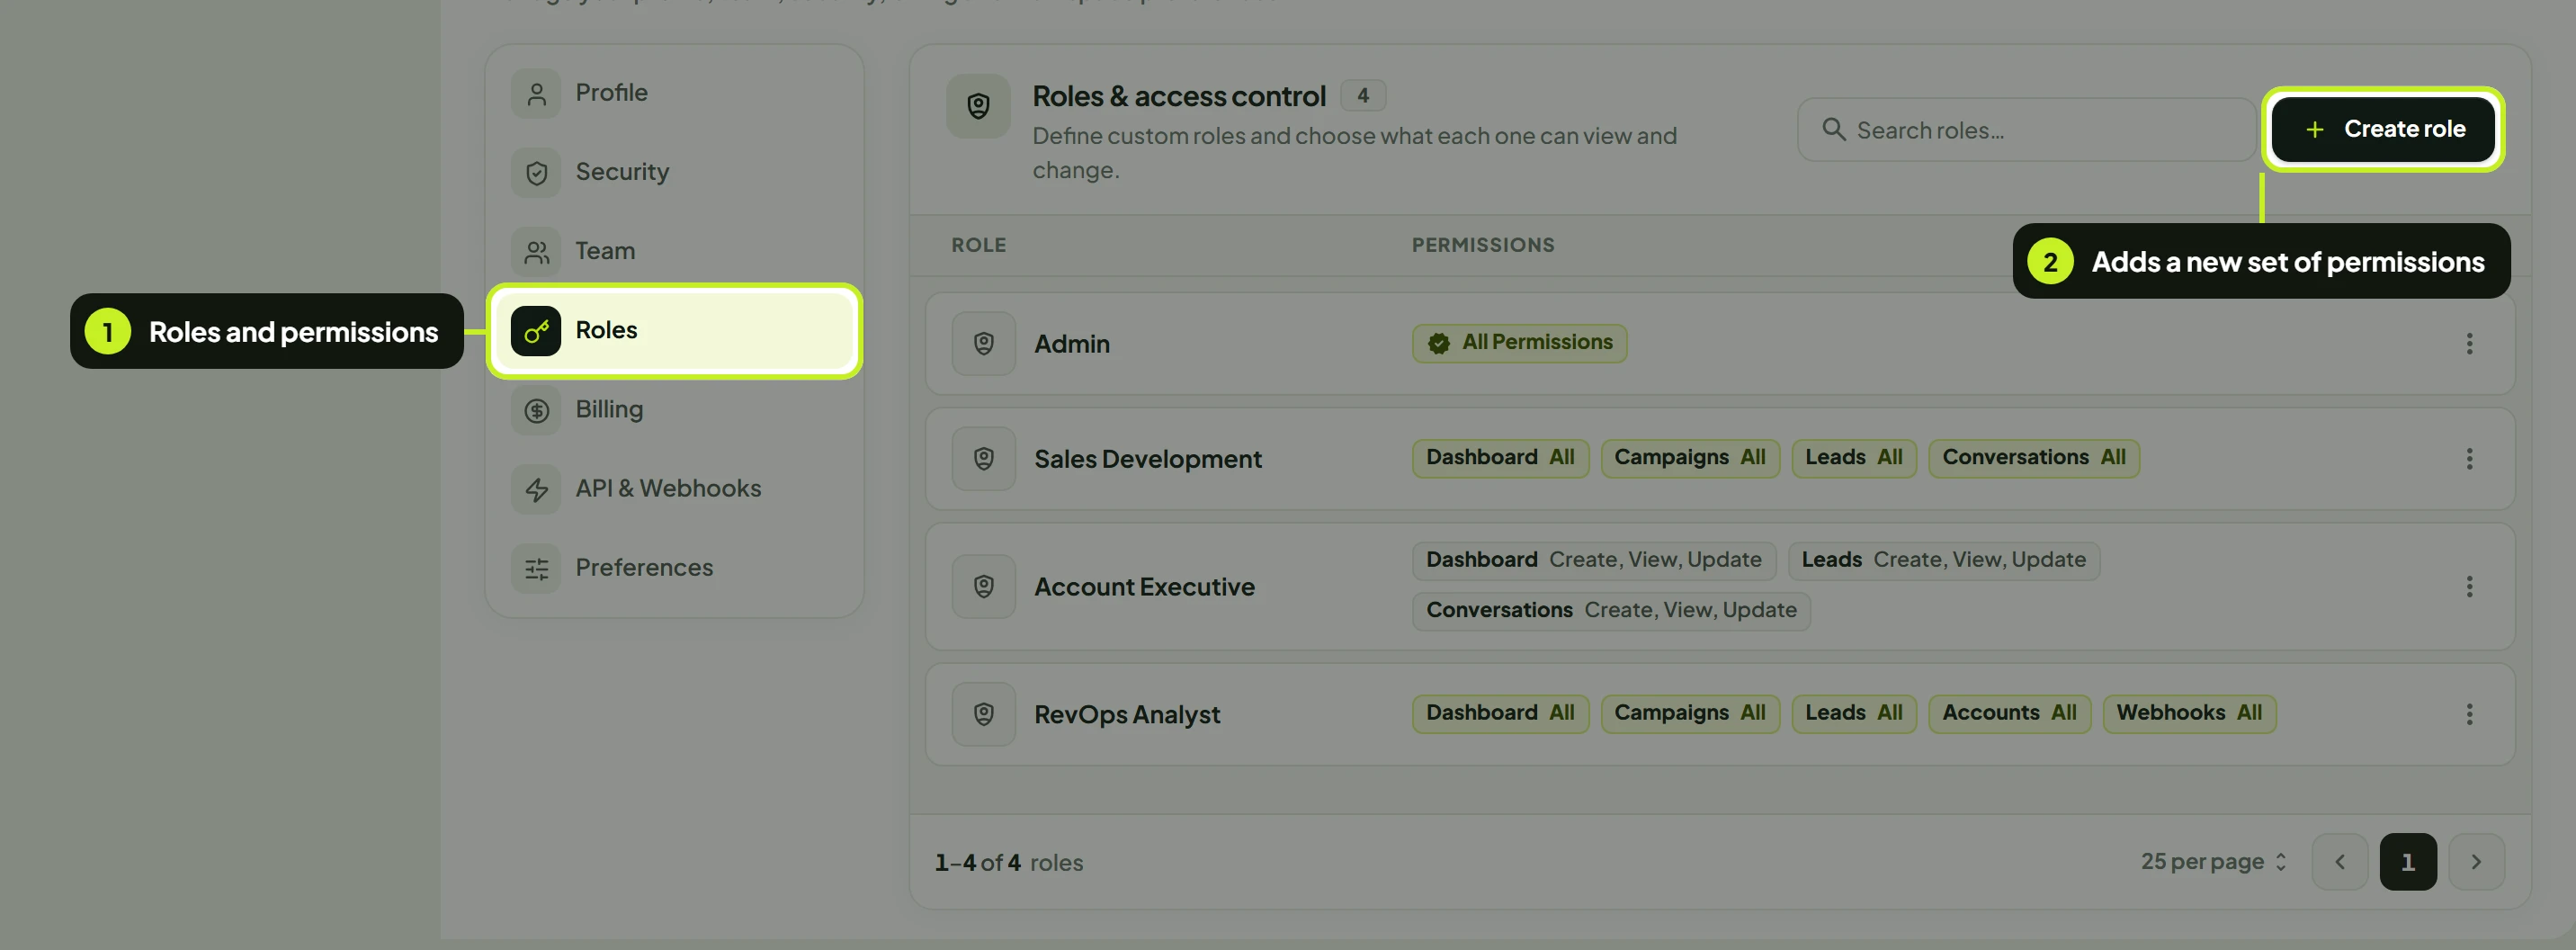
- Go to Settings and open the Roles tab. The Roles & access control table lists every role in the workspace.
- Click Create role. The Create role dialog opens.
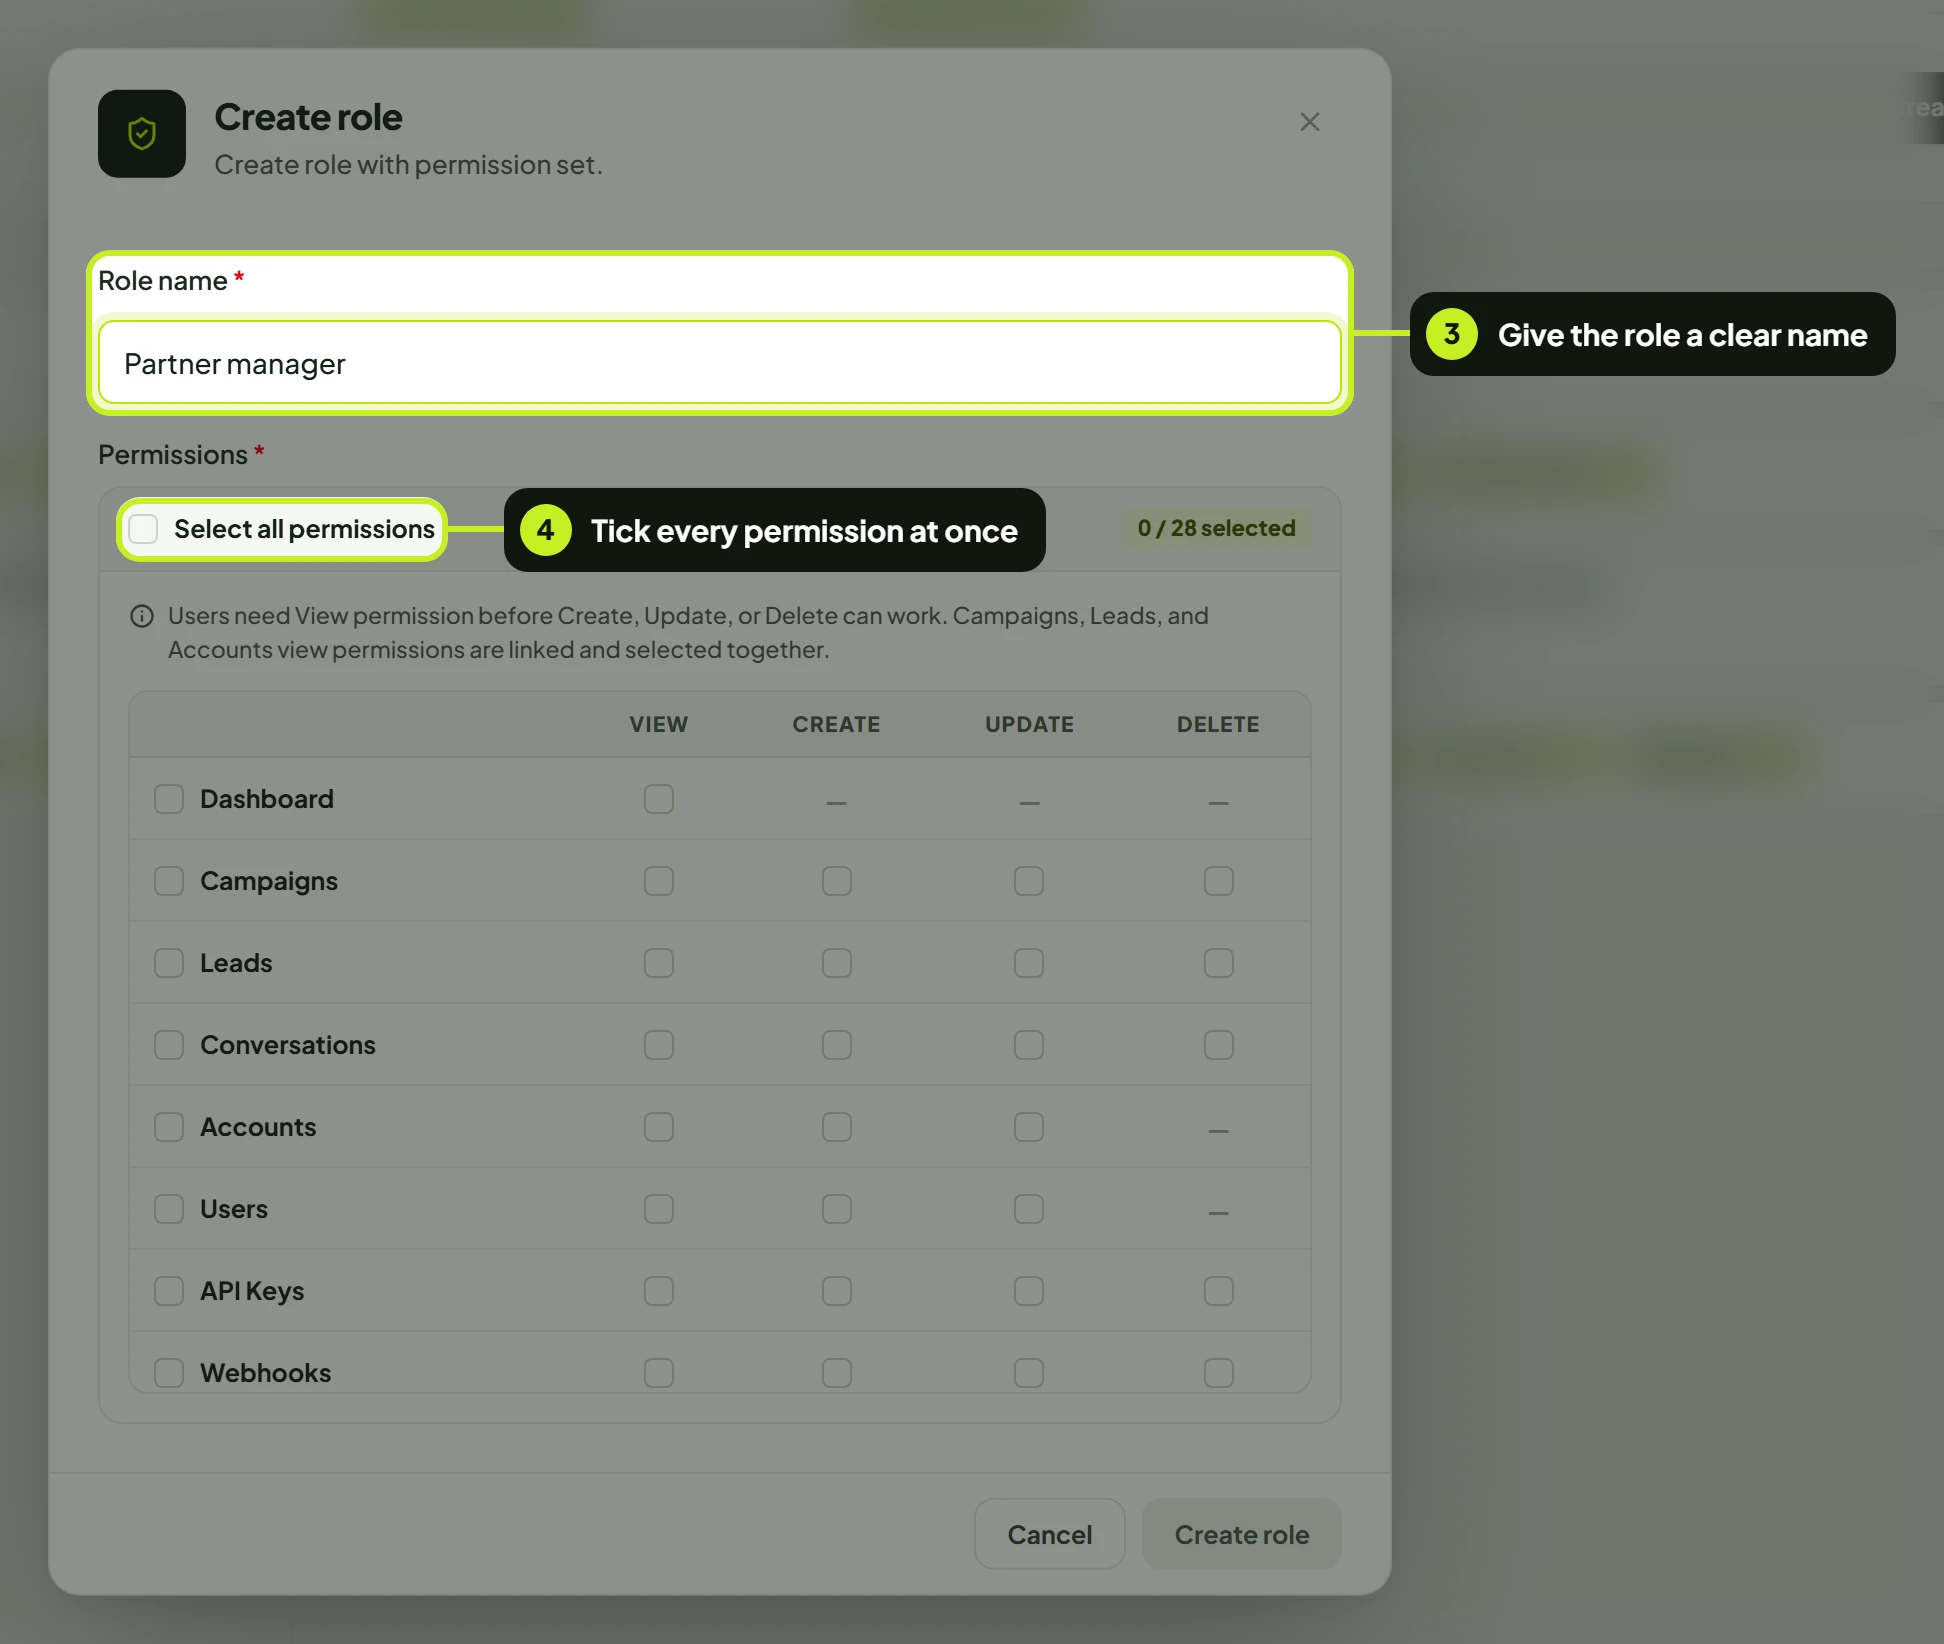
- Enter a Role name that says what the person does, for example Team lead.
- Use Select all permissions to tick everything at once, or leave it off and choose area by area. The counter beside it shows how many are selected, for example 11 / 28 selected.
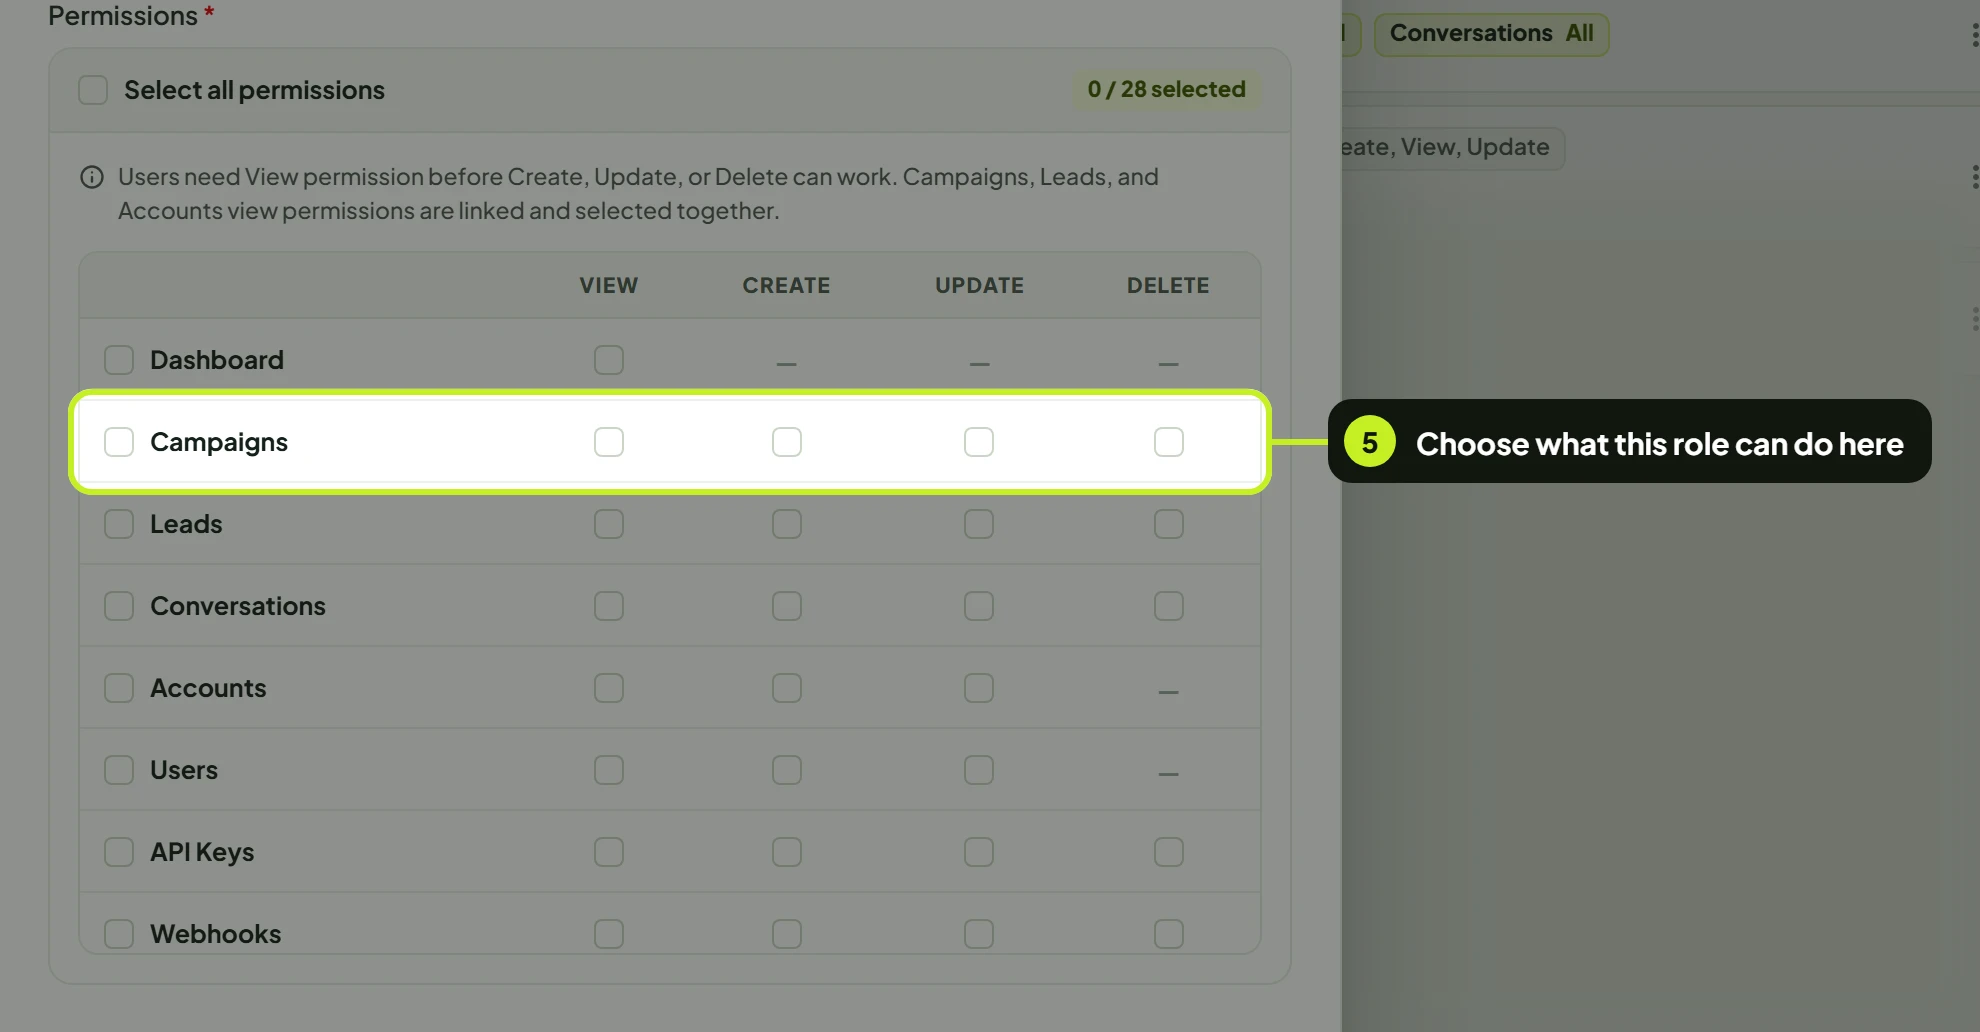
- Tick the actions you want in each area. Clicking an area's name ticks or clears all of its actions at once.
- Click Create role. You'll see Role created, and the role is ready to give to people on the Team tab.
Two rules the picker enforces
- View comes first. Create, Update and Delete only work if the person can also view that area. Tick any of them and ReacherPro ticks View for you. You can't clear View while another action in that area is still ticked.
- Campaigns, Leads and Accounts are viewed together. A campaign needs its lead list and its sender, so View for these three areas is linked: tick one and all three are ticked. If you try to save with only some of them, you'll see Select View for Campaigns, Leads, and Accounts together, or remove all three before saving this role.
What each permission allows
A dash means the action doesn't exist for that area.
| Area | View | Create | Update | Delete |
|---|---|---|---|---|
| Dashboard | Open the Dashboard | — | — | — |
| Campaigns | Open Campaigns and see each campaign | Start a new campaign | Edit, pause, resume and assign campaigns | Delete campaigns |
| Leads | Open Leads and Lead Lists | Import lead lists | Edit lead lists and leads | Delete lead lists |
| Conversations | Open Conversations and read threads | Send messages and replies | Edit your sent messages and add reactions | Delete messages |
| Accounts | Open Accounts and see seats | Connect a LinkedIn account or inbox | Reconnect or disconnect a seat | — |
| Users | Open the Team and Roles tabs | Add users and create roles | Edit, deactivate and delete users; edit and delete roles | — |
| API Keys | See API keys on API & Webhooks | Create API keys | Edit API keys | Delete API keys |
| Webhooks | See webhooks on API & Webhooks | Add webhooks | Edit webhooks | Delete webhooks |
| Organization | — | — | Rename the organization, save Preferences, and change the Do Not Contact list and Prevent duplicate outreach | — |
These pages don't depend on a role:
- Profile and Security in Settings. Everyone manages their own account. See Account and security.
- Billing. It's only for the Owner and workspace admins, whatever a role says. See Billing and credits.
Note: Without Organization: Update, people can still see the organization name, the delivery preferences and the Do Not Contact list. The controls are just locked.
Example roles
These are starting points. Adjust them to fit how your team works.
| Role | Give it | Good for |
|---|---|---|
| Analyst | View on Dashboard, Campaigns, Leads, Conversations and Accounts | Managers and stakeholders who read results but don't change anything |
| SDR | View on Dashboard and Accounts. Create, View and Update on Campaigns, Leads and Conversations | People who build lists, run campaigns and answer replies, but can't delete campaigns or touch seats |
| Sales manager | Everything on Campaigns, Leads and Conversations, Create/View/Update on Accounts, View on Dashboard and Users | Team leads who also connect seats and can see who's on the team |
| Workspace admin | Select all permissions | A second administrator alongside the Owner |
Read the roles table
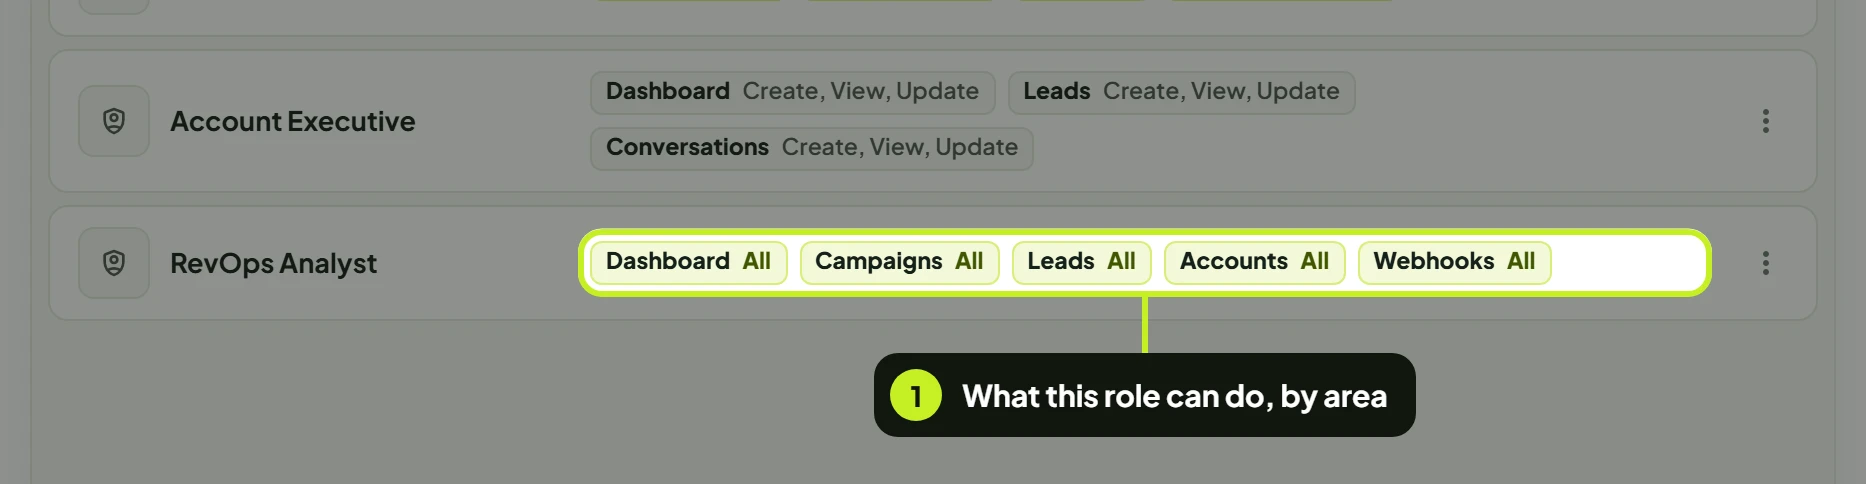
Each row shows the role's name and a summary of its Permissions, one tag per area. A tag reads All when every action in that area is ticked, for example Campaigns: All. Otherwise it lists the actions, for example Leads: Create, View, Update. A role with every permission shows a single All Permissions tag.
- Check a role's tags to see what it allows at a glance.
Use Search roles… to find a role by name.
Edit or delete a role
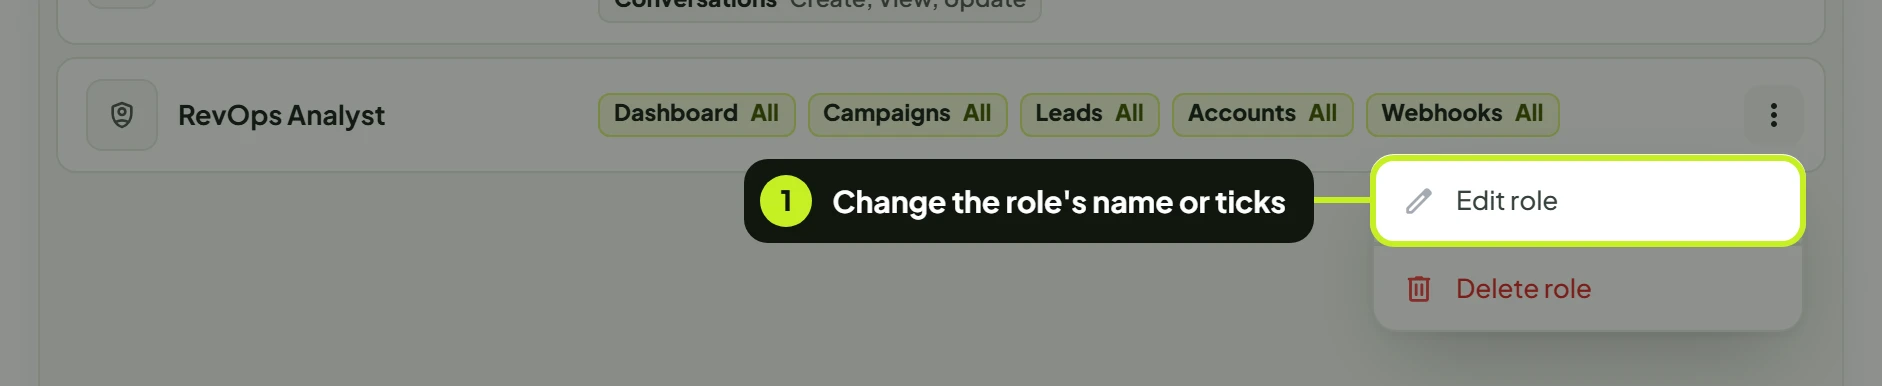
- Open the ⋮ menu at the end of the role's row, then click Edit role or Delete role. You can also click the row to edit it.
- In Edit role, change the name or the ticks.
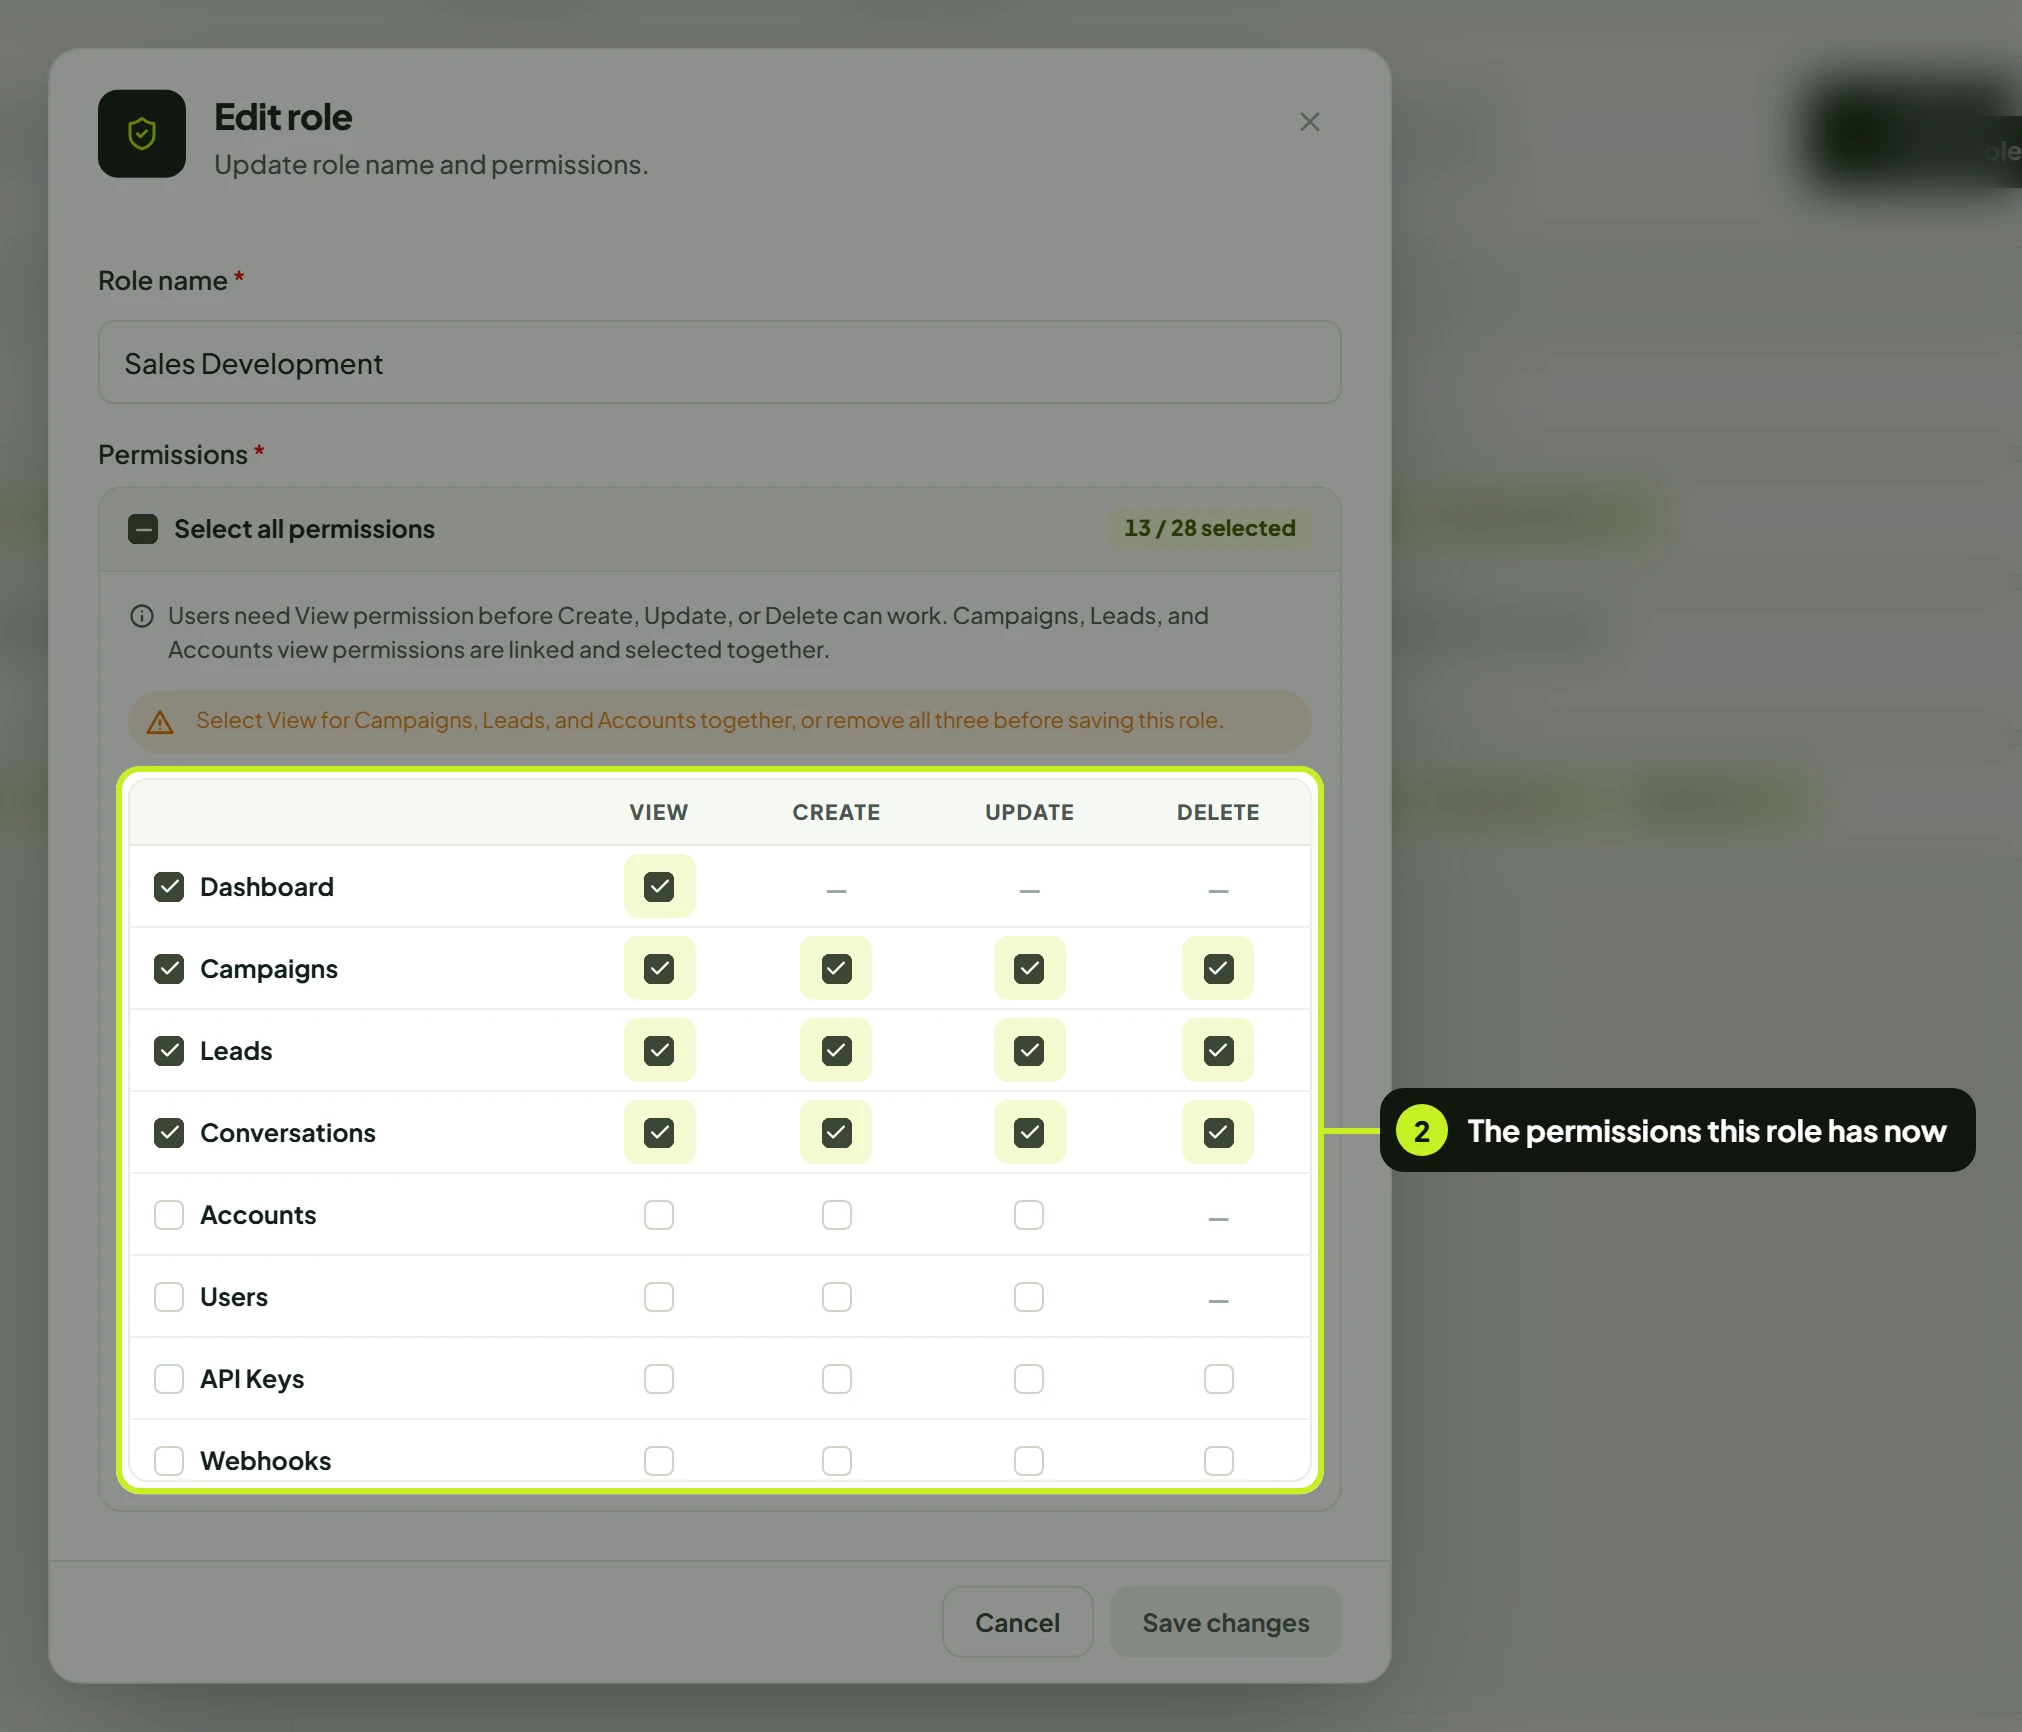
- Click Save changes. You'll see Role updated.
Changes reach everyone with that role. Editing a role changes access for every person who has it, not just one. To change access for one person, give them a different role on the Team tab.
Deleting asks you to confirm. Click Delete role in the confirmation dialog to remove it. Move people onto another role first, so nobody is left without one.
Troubleshooting
| What you see | What it means | What to do |
|---|---|---|
| A greyed-out button with You don't have permission to … | The person's role doesn't include that action | Edit their role, or give them a different one |
| A page is missing from someone's sidebar | Their role doesn't include View for that area | Tick View for the area, or for Campaigns, Leads and Accounts together |
| Select View for Campaigns, Leads, and Accounts together, or remove all three before saving this role. | Only some of the three linked View permissions are ticked | Tick View on all three, or clear all three |
| Remove create, update, or delete for … before removing view. | You tried to clear View while other actions in that area are ticked | Clear Create, Update and Delete first |
| View was enabled for … so create, update, and delete can work. | You ticked an action without View, so ReacherPro added it | Nothing to do. That's expected |
| Create role is greyed out | Your role doesn't include Users: Create | Ask the Owner or a workspace admin |
| Company name is locked on someone's Profile | Their role doesn't include Organization: Update | Add it if they should rename the workspace |
Next: Give the role to someone in Invite your team.