
Browse docs
Find your way around
Sign in, learn what each sidebar page is for, jump anywhere with Ctrl K or ⌘ K, read notifications, sign out and collapse the sidebar.
Updated
On this page
Everything in ReacherPro hangs off one sidebar on the left of the screen. This guide shows you how to sign in, what each page in the sidebar is for, and the controls you'll use every day: search, notifications, your account card and the collapse button.
How it works
- You sign in with your email and password, and ReacherPro opens your Dashboard.
- The sidebar lists every page you can open, grouped by what it's for.
- Search (or Ctrl K / ⌘ K) jumps to any page, setting or common action without leaving the keyboard.
- The foot of the sidebar shows who's signed in, the notifications bell and the button that signs you out.
Before you start: You need a ReacherPro account. Accounts are set up for you by the ReacherPro team, so ask your workspace admin or ReacherPro contact for your sign-in email if you don't have one yet. Teammates are added from Settings → Team (see Invite your team).
Sign in
- Open the ReacherPro sign-in page. It says Welcome back.
- Enter your Email address and Password.
- Click Sign in. ReacherPro opens your Dashboard.
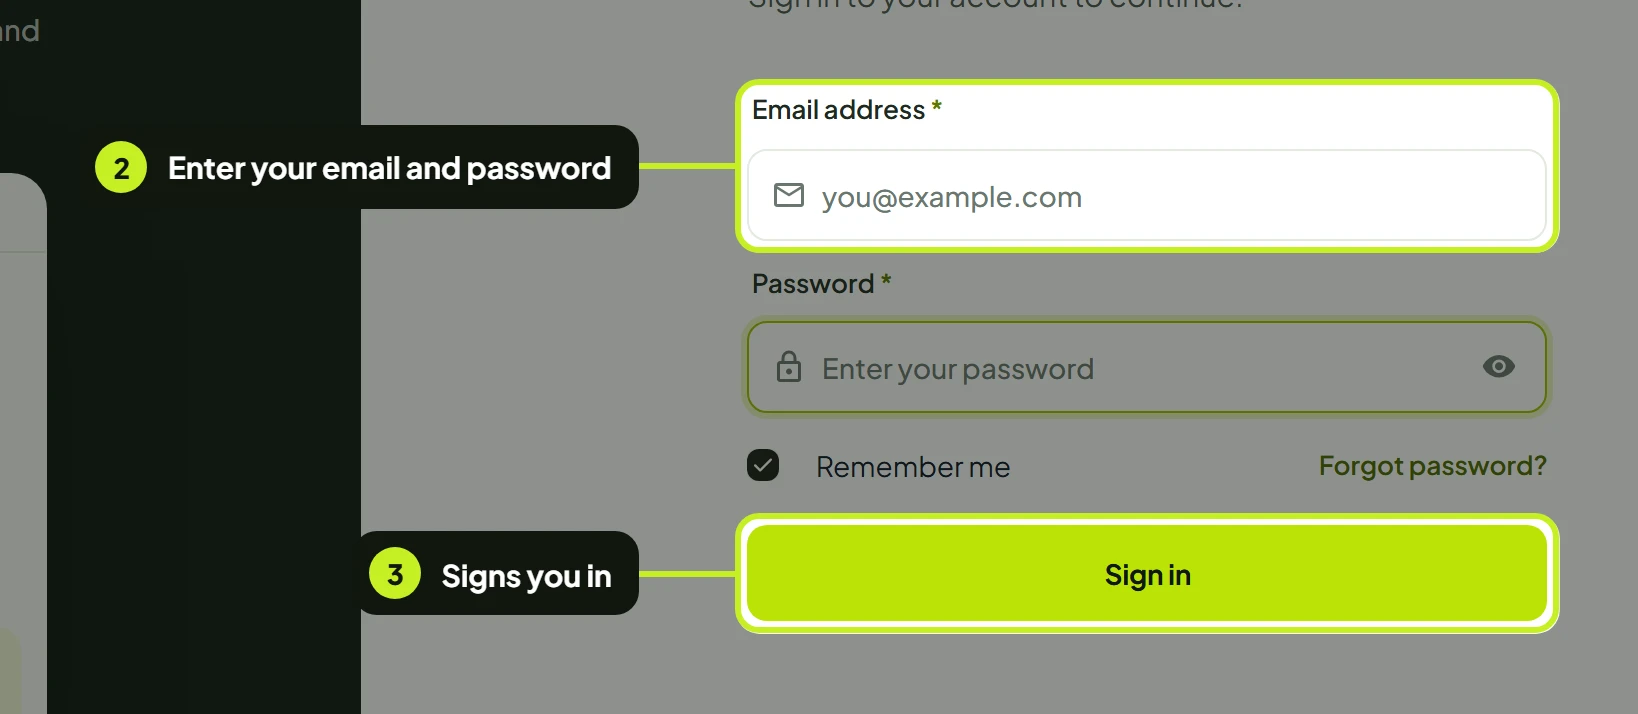
- Remember me is ticked by default, so you stay signed in on this computer. Untick it on a shared computer.
- Forgot password? opens Reset password. Enter your email and click Send reset link; ReacherPro emails you a link to choose a new password.
- The language menu in the top right of the sign-in page (it reads English) switches the language of the app.
If you use two-step verification
If two-step verification is turned on for your account, a second screen called Two-step verification appears after you click Sign in.
- Open your authenticator app and find the 6-digit code for ReacherPro.
- Type it under Authentication code.
- Click Verify and sign in.
To start again with a different account, click Back to email and password. You turn two-step verification on or off in Settings → Security (see Account and security).
The sidebar
The sidebar groups its pages under three headings, with Settings pinned at the bottom so it's always in reach, even when the list scrolls.
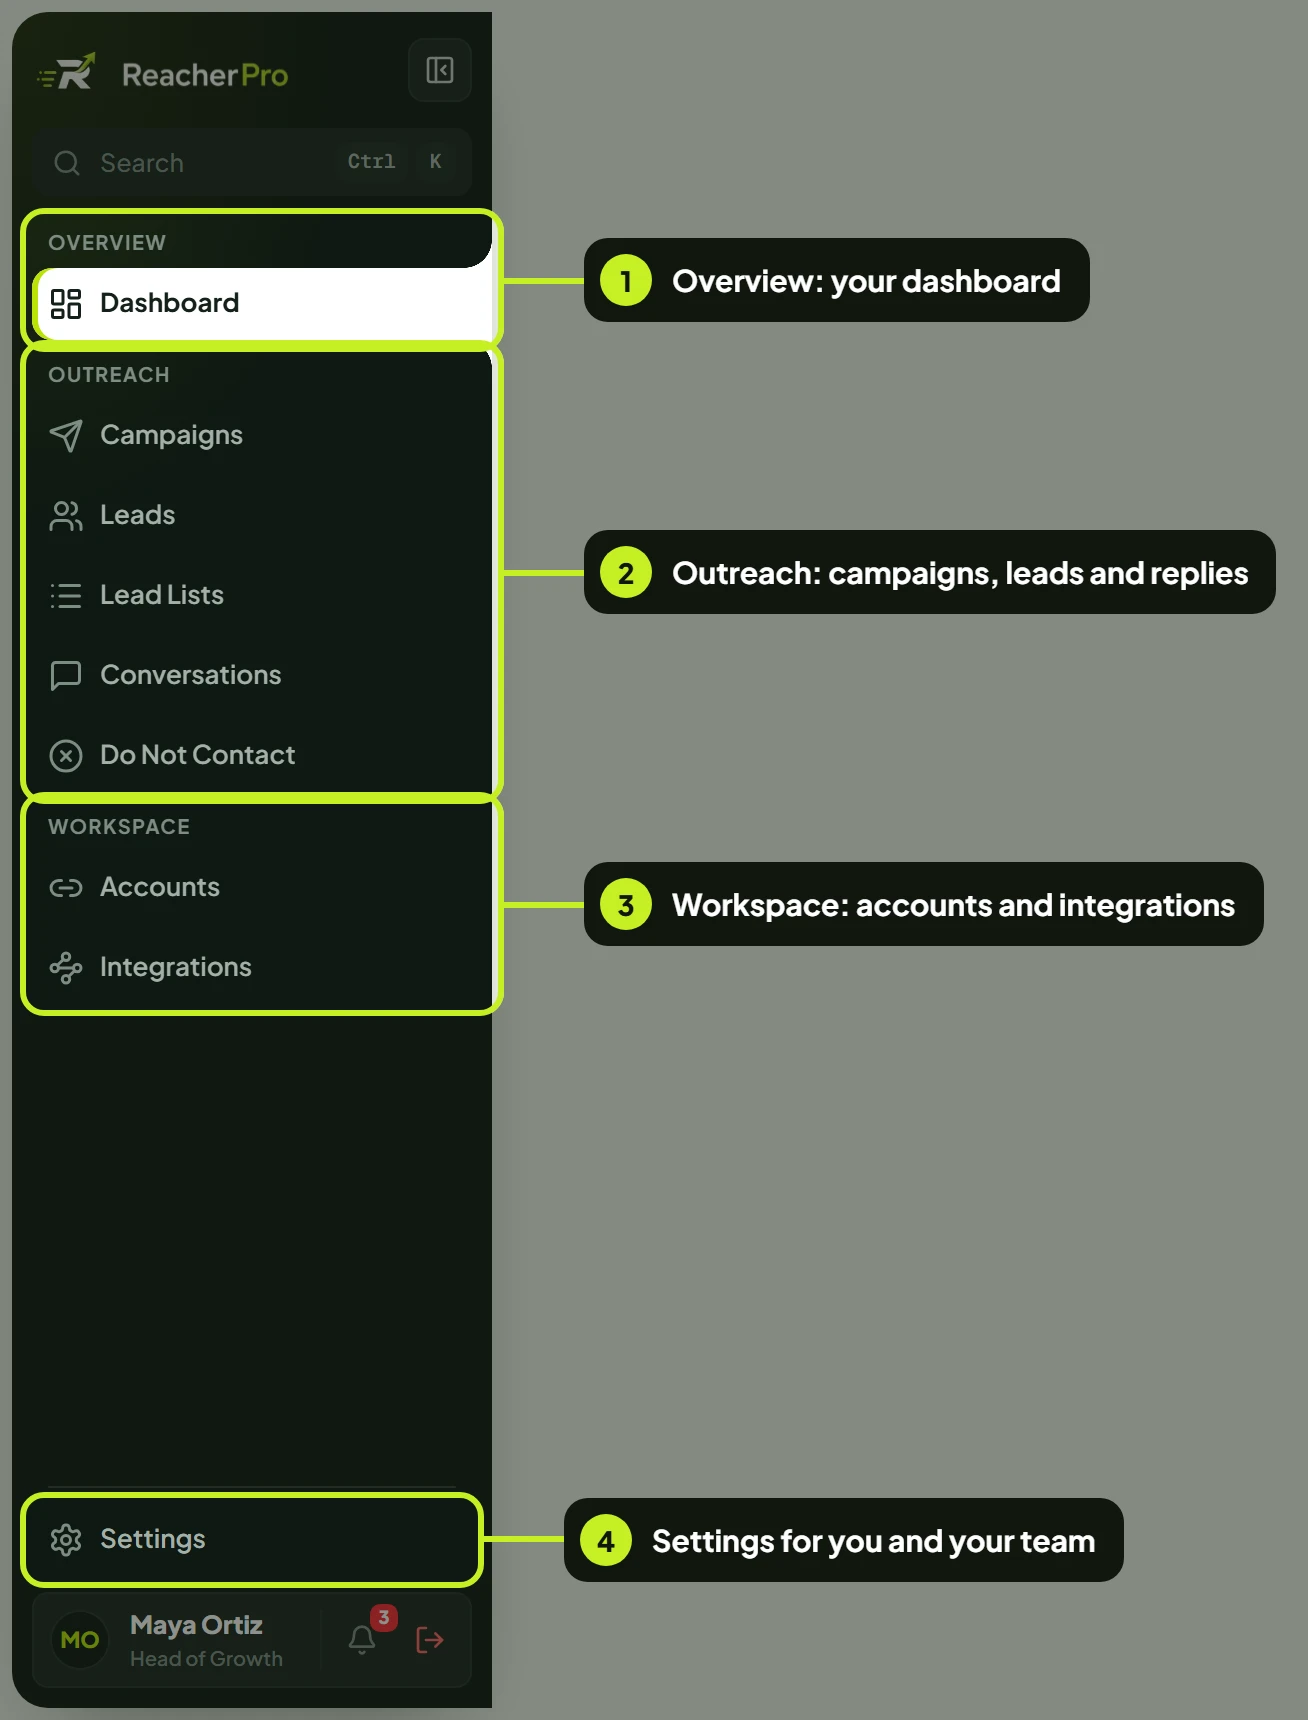
| Group | Page | What it's for |
|---|---|---|
| Overview | Dashboard | Your outreach at a glance: results for the period you pick, and what needs you today. See Read your dashboard. |
| Outreach | Campaigns | Build and run LinkedIn and email sequences, or send a single instant email. See Build and launch a campaign. |
| Leads | Every person enrolled in your campaigns, with their status, tags and each step sent to them. | |
| Lead Lists | The audiences your campaigns reach, imported from a LinkedIn or Sales Navigator search or a CSV file. See Create a lead list. | |
| Conversations | One inbox for replies from all your LinkedIn seats and email inboxes. | |
| Do Not Contact | The people, companies and email addresses your campaigns must never reach, and the setting that stops two campaigns contacting the same lead. | |
| Workspace | Accounts | The LinkedIn accounts and email inboxes your campaigns send from. |
| Integrations | The channels, CRMs and automations you can connect ReacherPro to. | |
| (pinned) | Settings | Your profile, security, team and roles, billing, preferences, and API keys and webhooks. |
The page you're on is highlighted in the sidebar, and it stays highlighted on the pages inside it (for example, while you edit a campaign, Campaigns stays lit).
Note: You only see the pages your role allows. If a teammate's sidebar has fewer pages than yours, their role doesn't include the missing ones. A group with no pages you can open is hidden with its heading. See Roles and permissions.
Search with Ctrl K or ⌘ K
Search is the fastest way to reach a page, a settings tab or a common action.
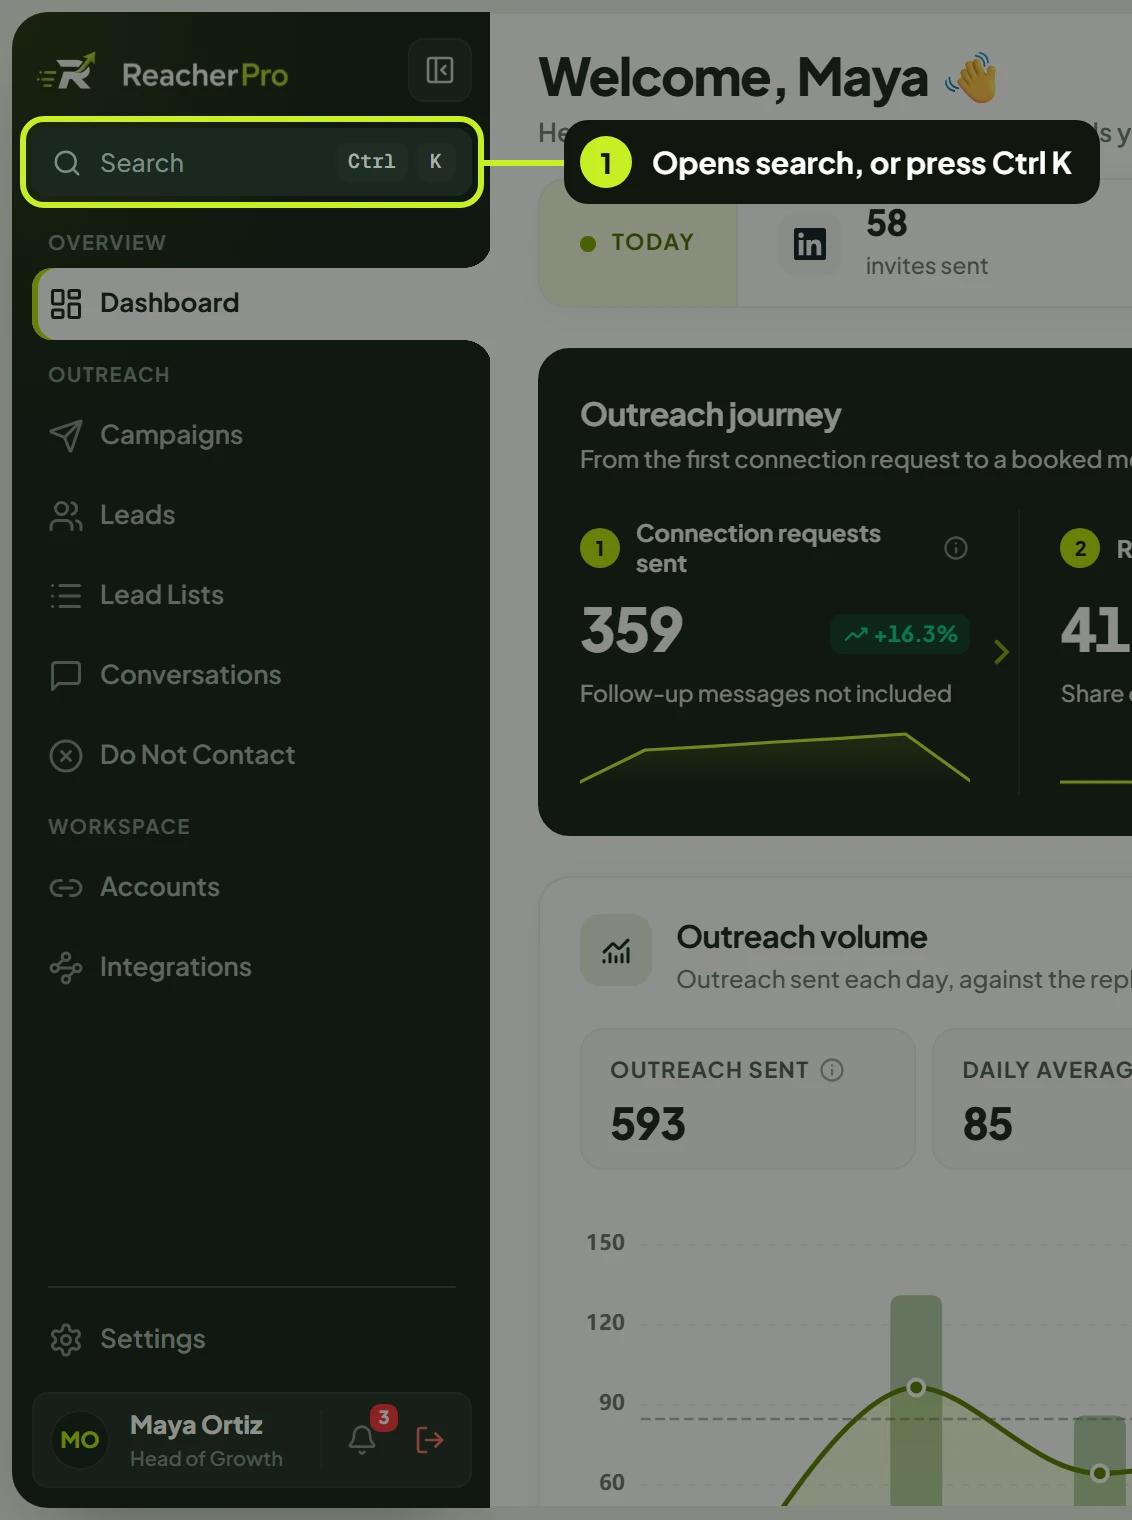
- Click Search at the top of the sidebar, or press Ctrl K on Windows (⌘ K on a Mac) from anywhere in the app. The search window opens.
- Start typing in Search commands, pages, and actions…. The list narrows as you type.
- To see one kind of result only, click Quick Actions, Navigation or Settings above the list. All shows everything.
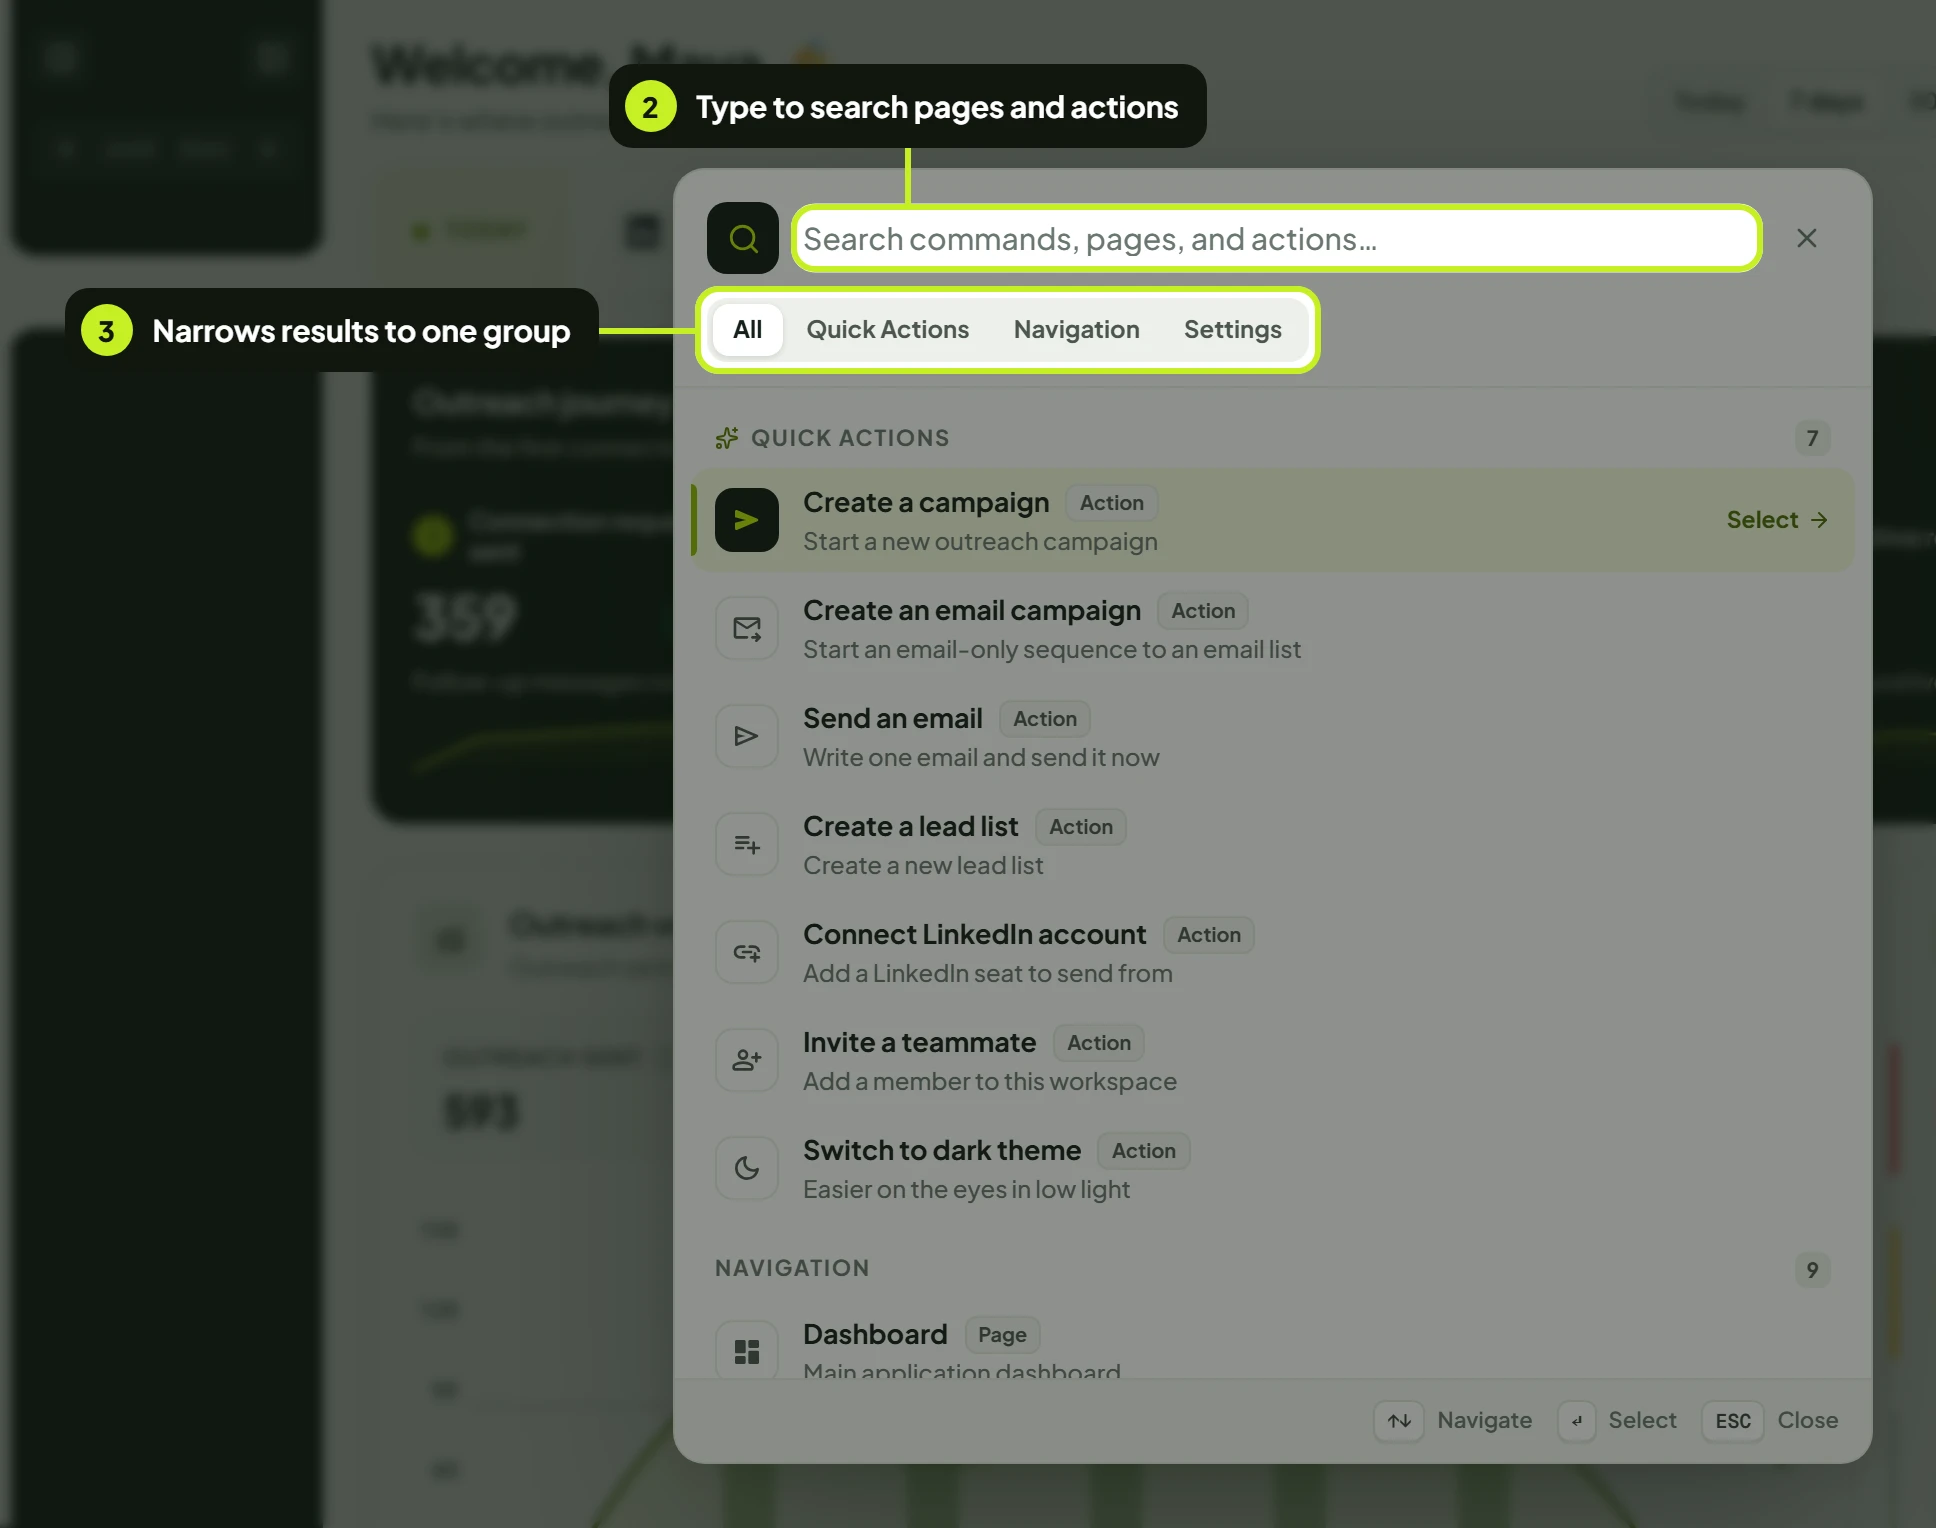
- Use the ↑ and ↓ keys to move through the results and press Enter to open one, or click it. Press Esc to close the window without choosing.
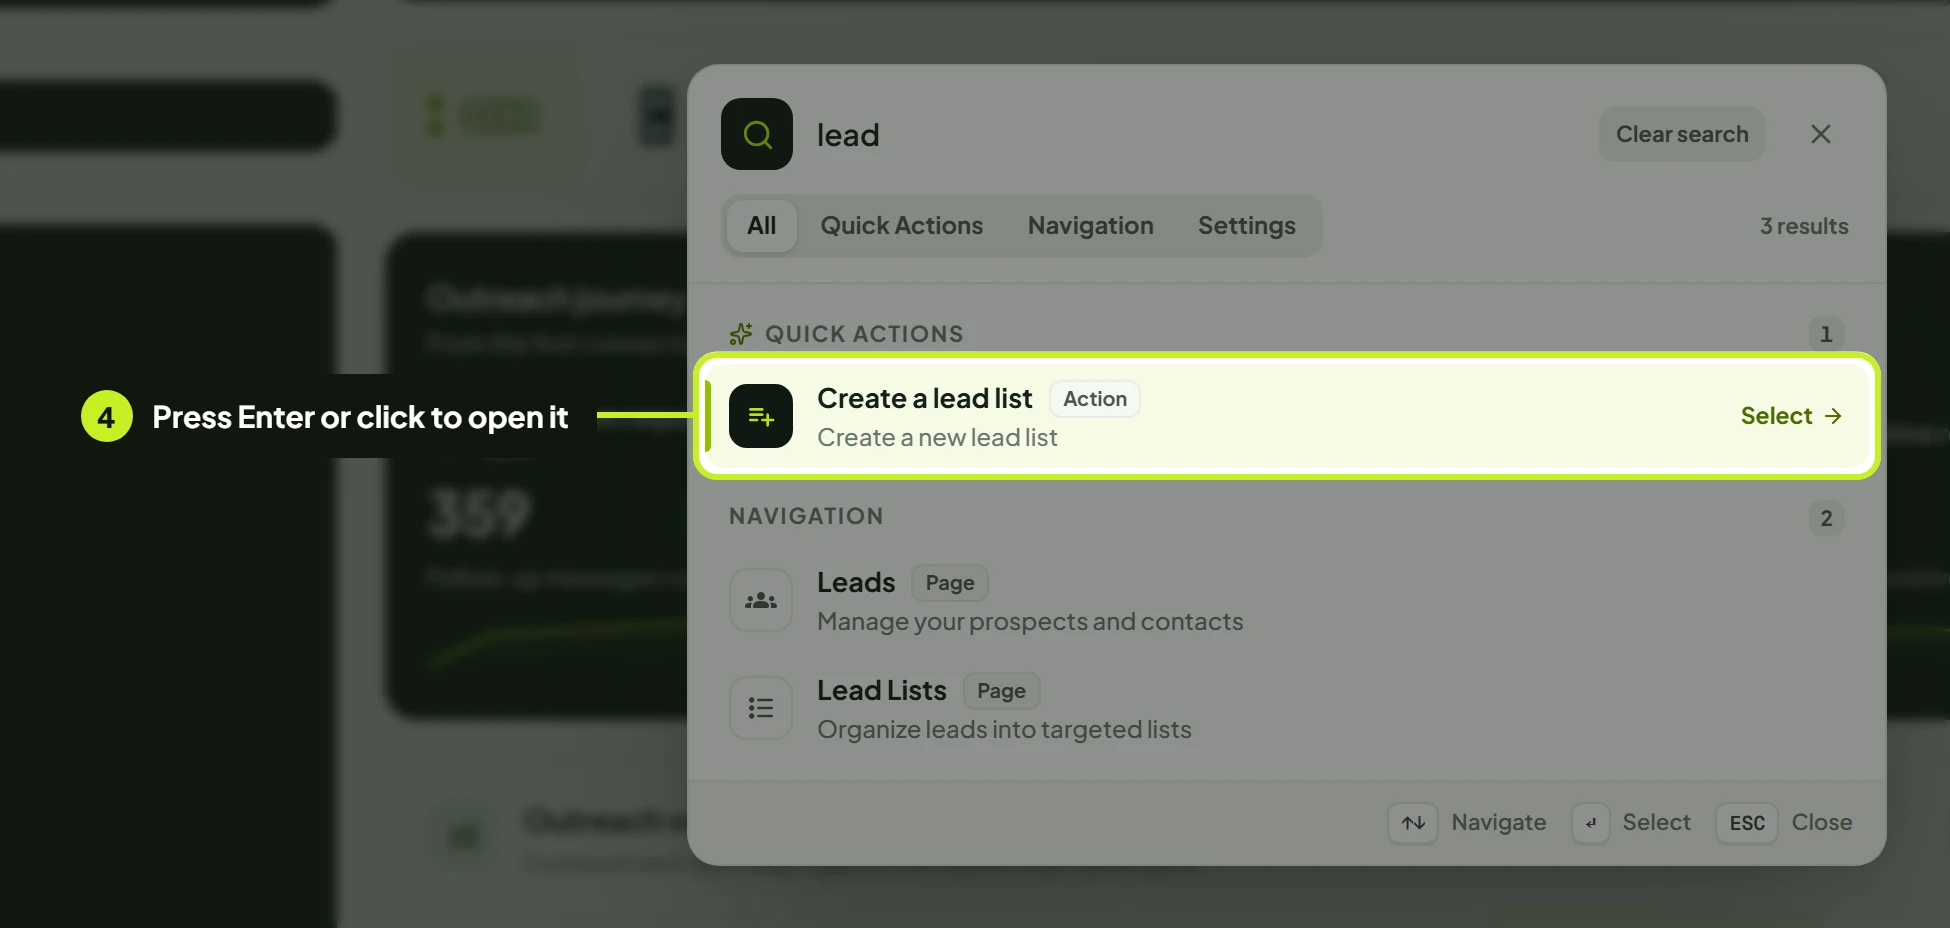
Each result carries a label saying what it is:
| Label | What happens when you pick it | Examples |
|---|---|---|
| Action | Starts something straight away | Create a campaign (opens the campaign type chooser), Create an email campaign, Send an email, Create a lead list, Connect LinkedIn account, Invite a teammate, Switch to dark theme / Switch to light theme |
| Page | Opens a sidebar page | Dashboard, Campaigns, Leads, Lead Lists, Conversations, Do Not Contact, Accounts, Integrations, Settings |
| Setting | Opens that tab of Settings | Profile, Security, Team, Roles, Billing, API & Webhooks, Preferences |
| Account | Opens your connected accounts | LinkedIn Account |
Tip: Search also matches related words, not just the names on screen. Typing blocklist finds Do Not Contact, invoices finds Billing and 2fa finds Security.
Search looks through these pages, settings and actions. It doesn't search inside your campaigns, leads or conversations; use the search box on each of those pages for that.
Notifications
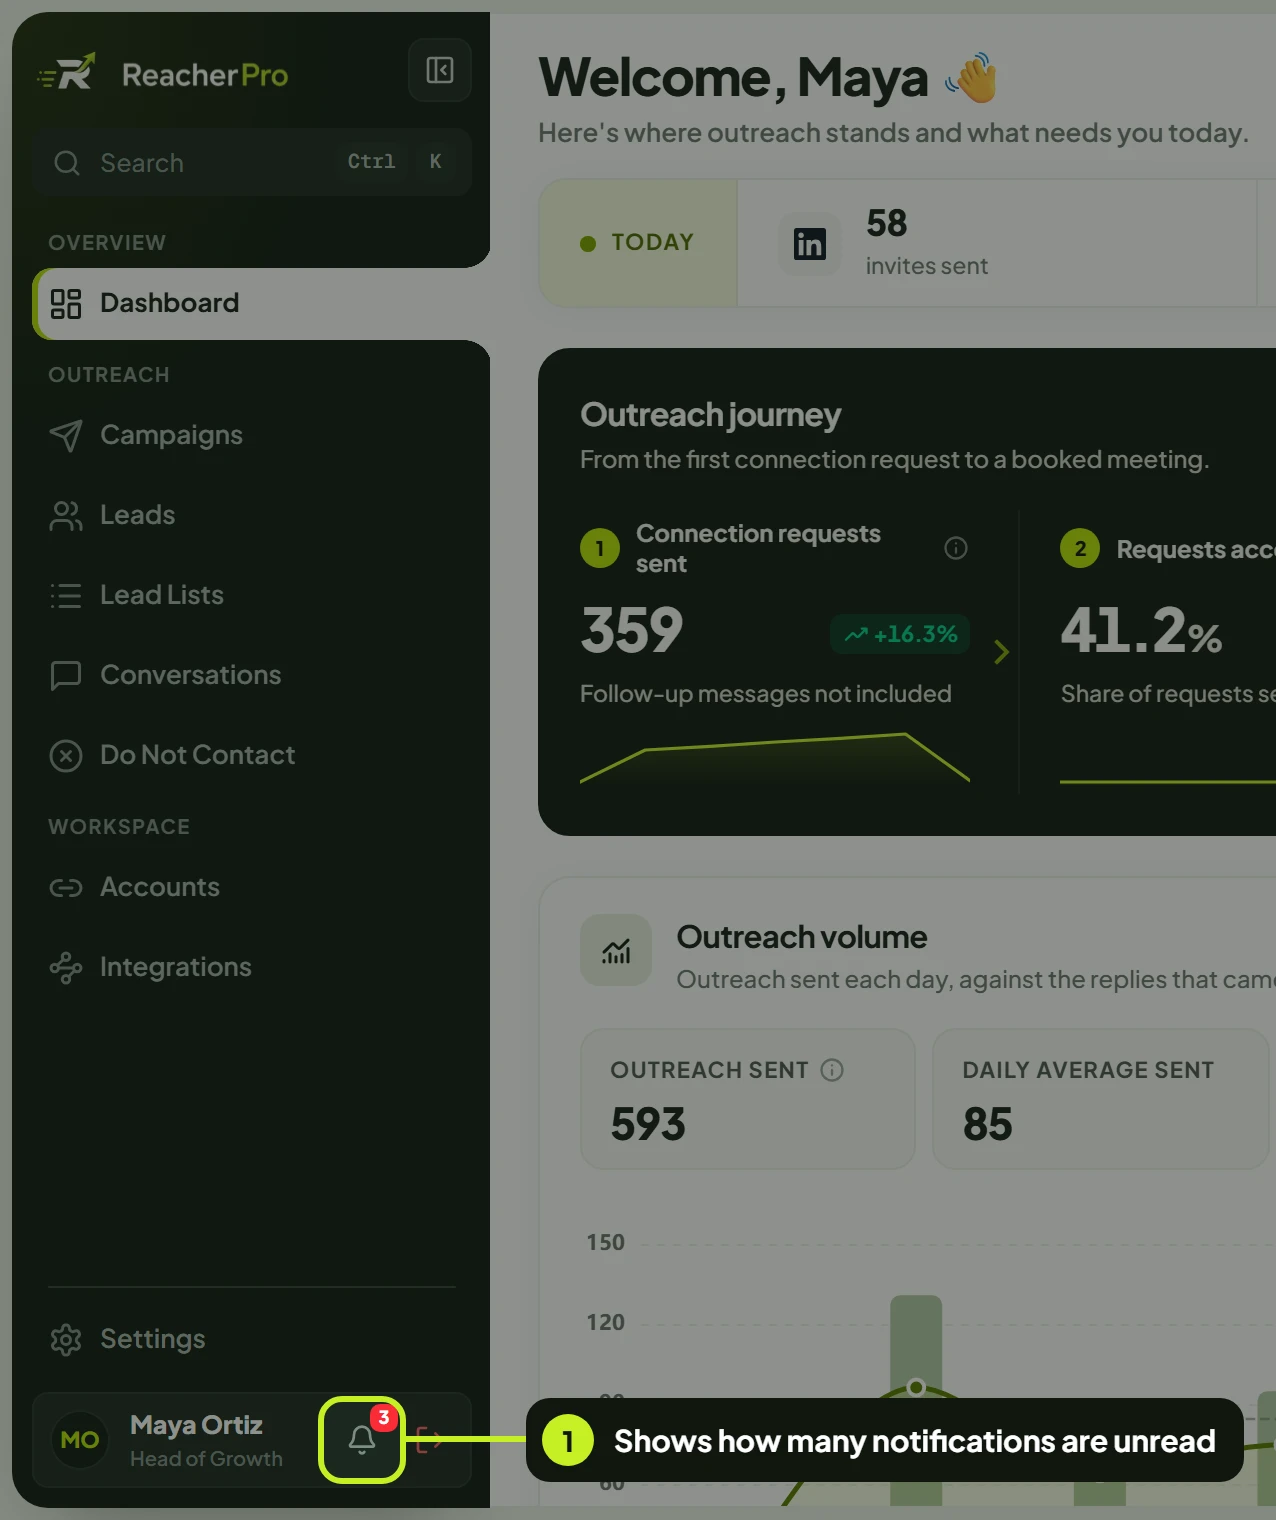
The bell at the bottom of the sidebar collects new replies, campaign updates and account alerts. A red number on the bell is how many you haven't read yet.
- Click the bell. The Notifications panel opens beside the sidebar.
- Click Mark all read to clear the unread count in one go.
- Click Unread to show only what you haven't read, or All to show everything. To show one kind of event, open All events and pick a type, such as New message or Account disconnected.
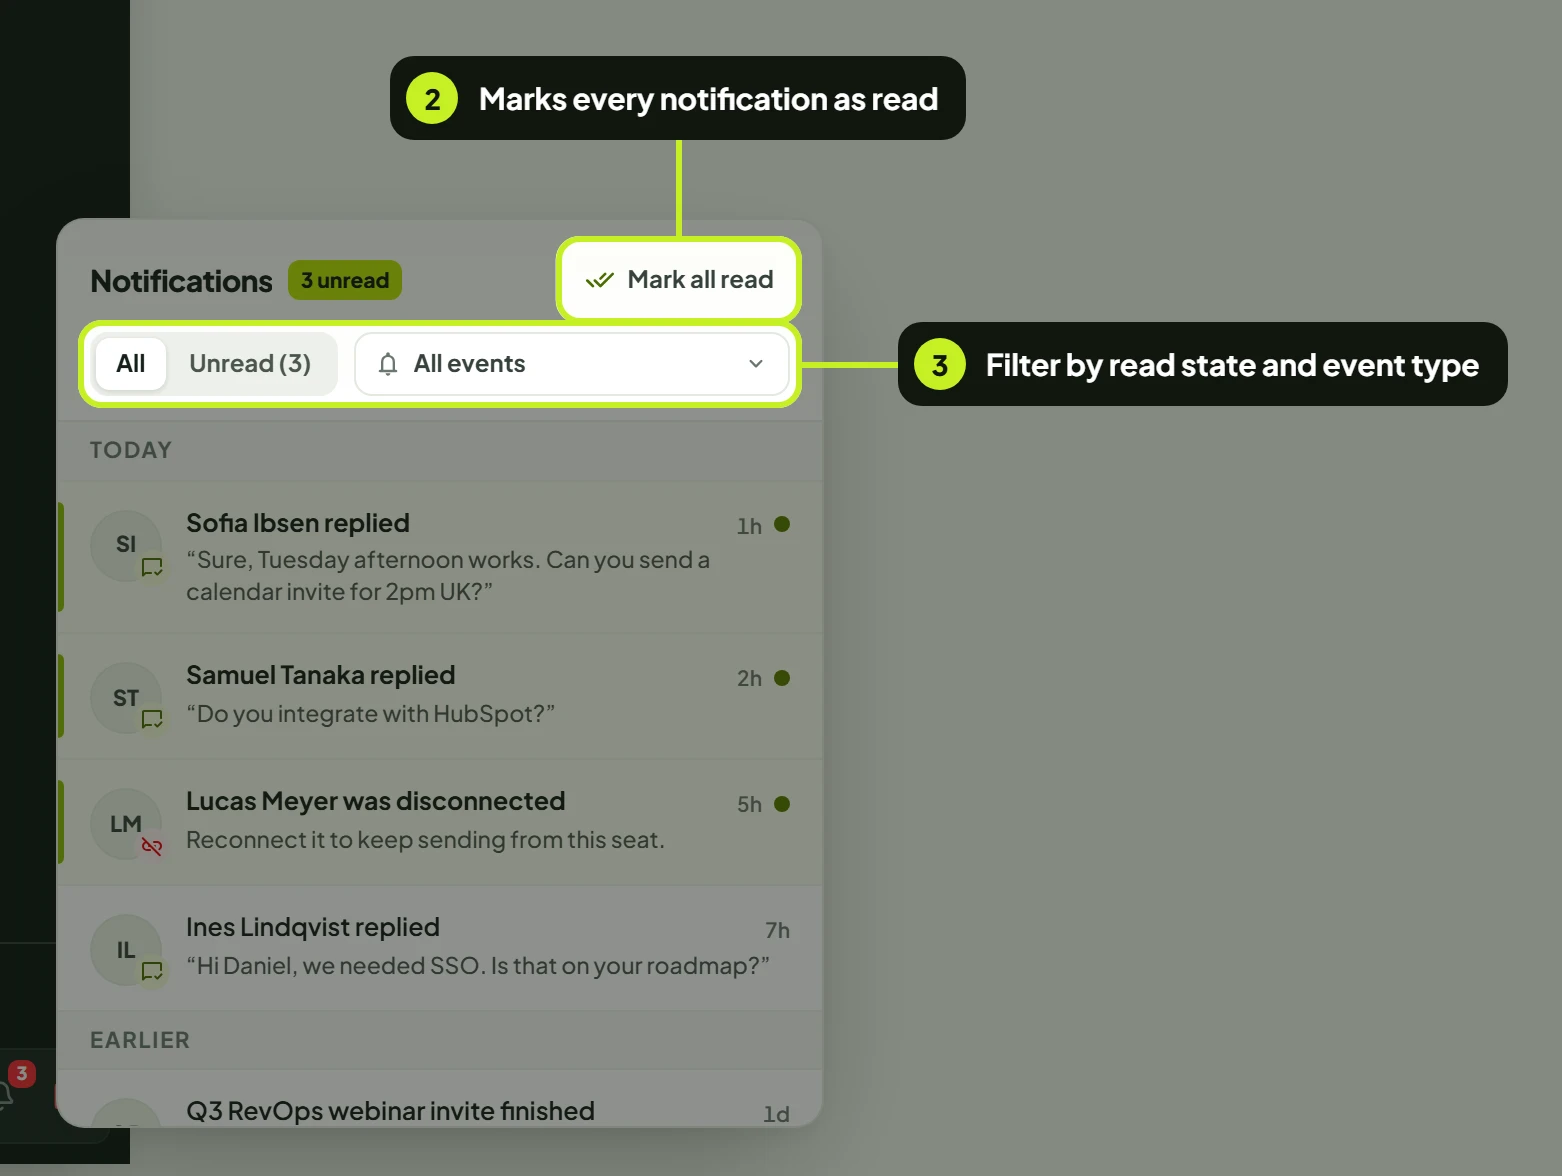
- Click a notification to open what it's about. A new message opens its thread in Conversations; an account alert opens that channel on the Accounts page. Clicking a notification also marks it as read.
Notifications are listed newest first, under Today and Earlier. Unread ones have a tinted background and a small green dot. Scroll down to load older ones. The event type filter resets each time you close the panel.
Tip: ReacherPro can also send browser alerts when the app isn't in front of you. When the bar Get browser alerts for new replies, campaign updates, and more. appears, click Enable notifications and allow notifications in your browser, or click × (Not now) to skip it. You can change notification settings later in Settings → Preferences.
Your account card and signing out
The card at the very bottom of the sidebar shows who is signed in: your initials or photo, your name, and your role or job title (a workspace owner without one shows Admin). Beside it are the bell and the sign-out button.
- To sign out, click the sign-out button (the arrow icon on the right of the card).
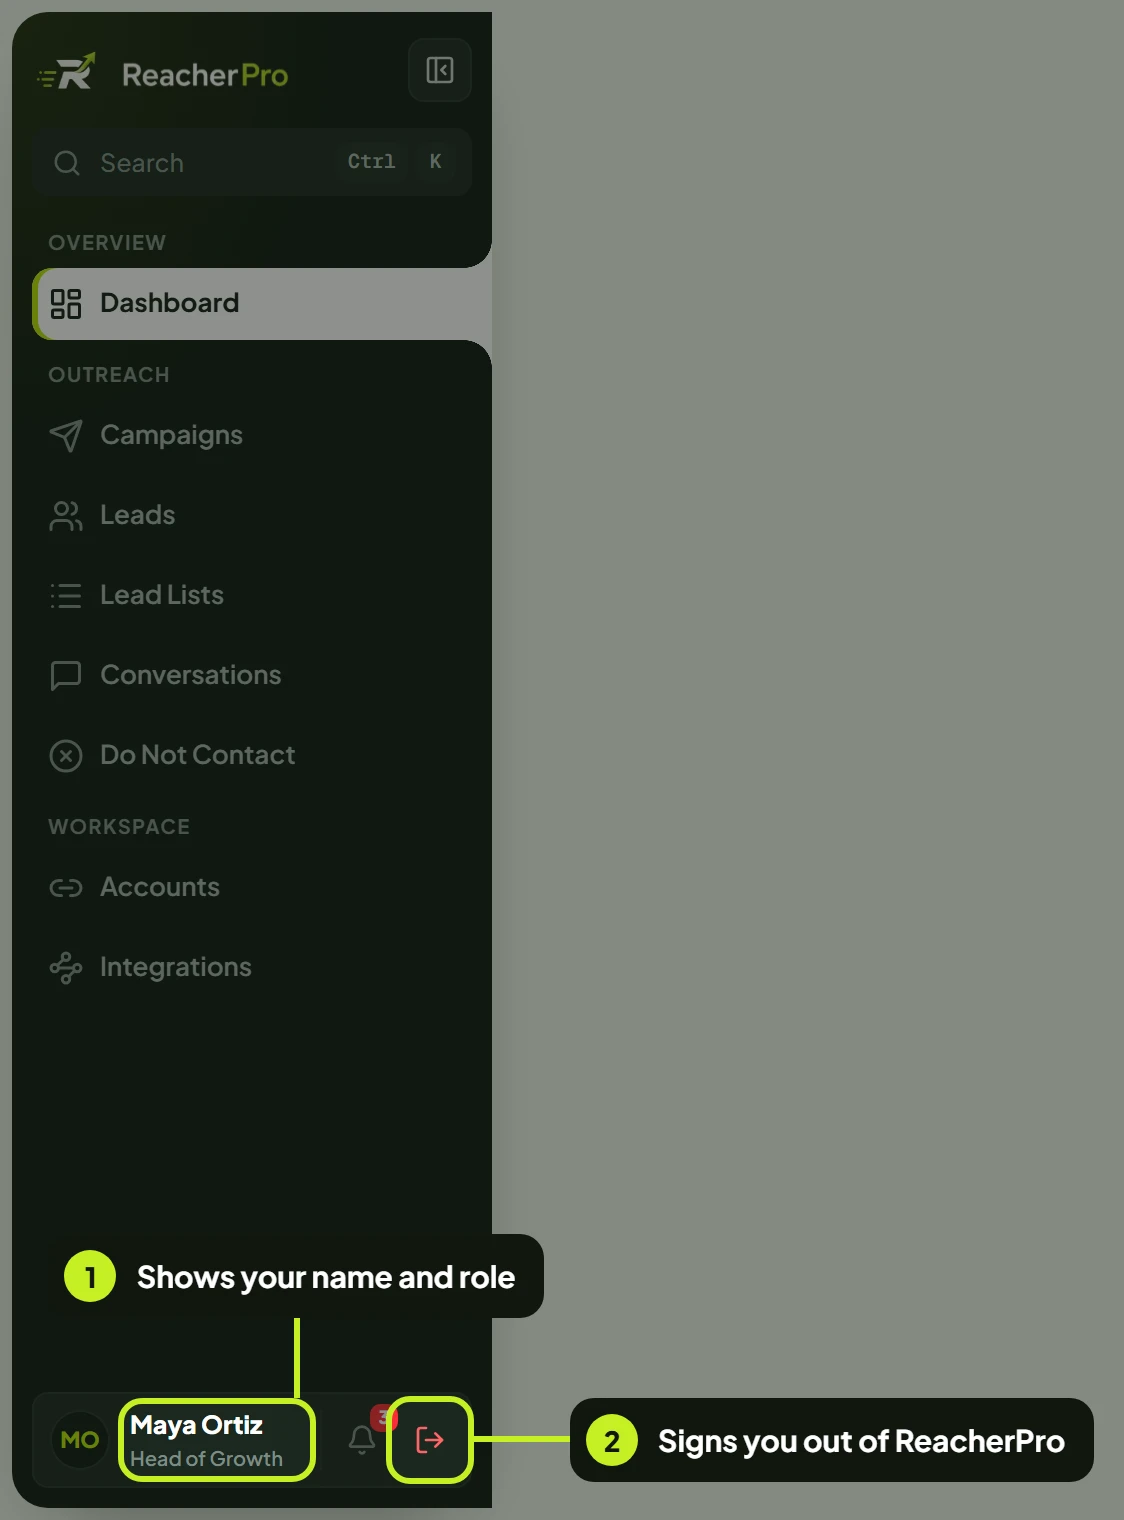
- In Sign out?, click Sign out to confirm. Click Cancel to stay signed in.
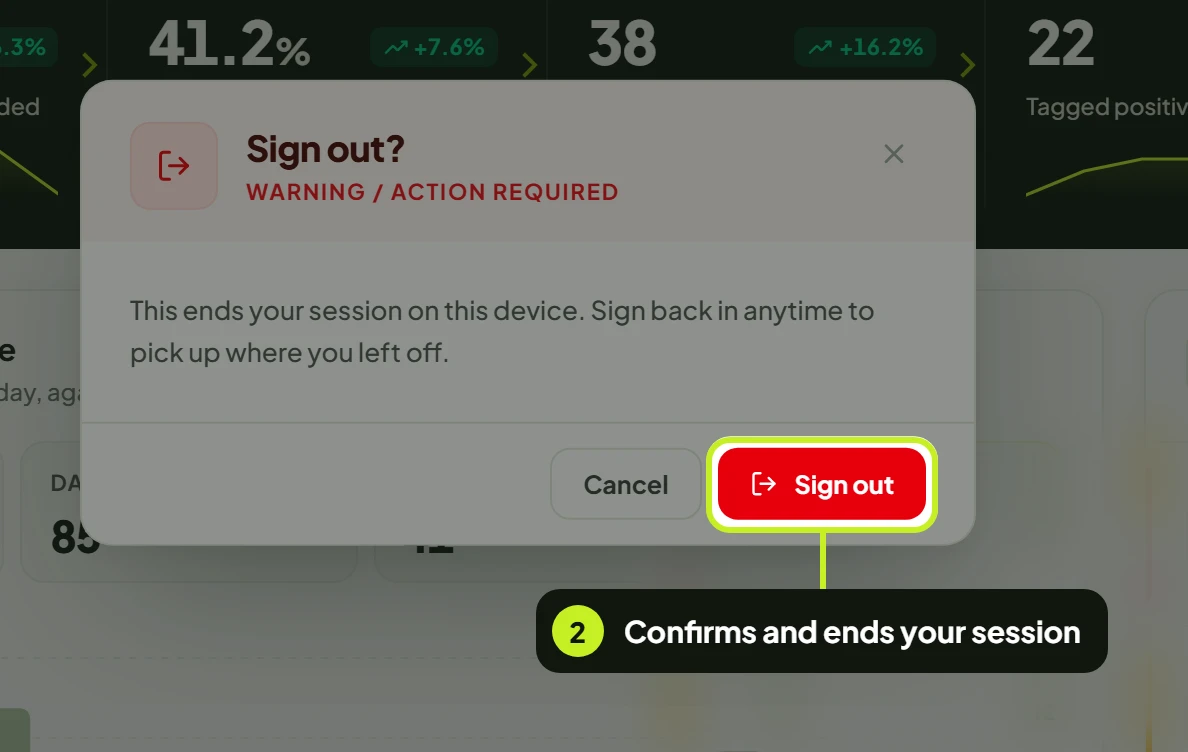
Signing out ends your session on this computer only. Your campaigns keep running on their schedules, and you're signed in again where you left off the next time you sign in.
Your name, photo, job title and timezone are edited in Settings → Profile.
Collapse the sidebar
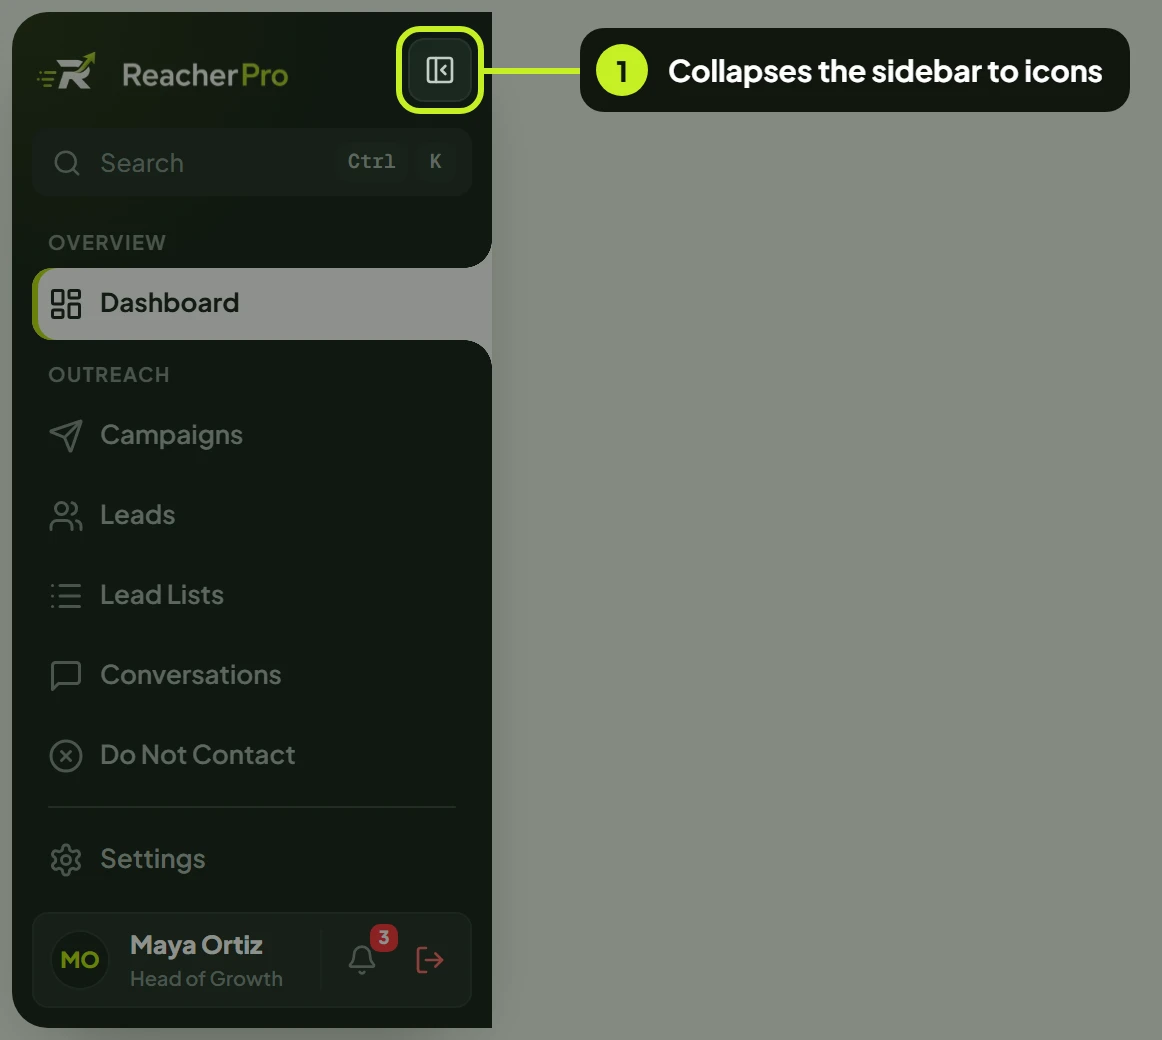
Collapse the sidebar to a narrow strip of icons when you want more room, for example on a campaign's sequence flow.
- Click the Collapse sidebar button next to the ReacherPro logo.
- To bring it back, click the ReacherPro logo at the top of the strip. Its tooltip reads Expand sidebar.
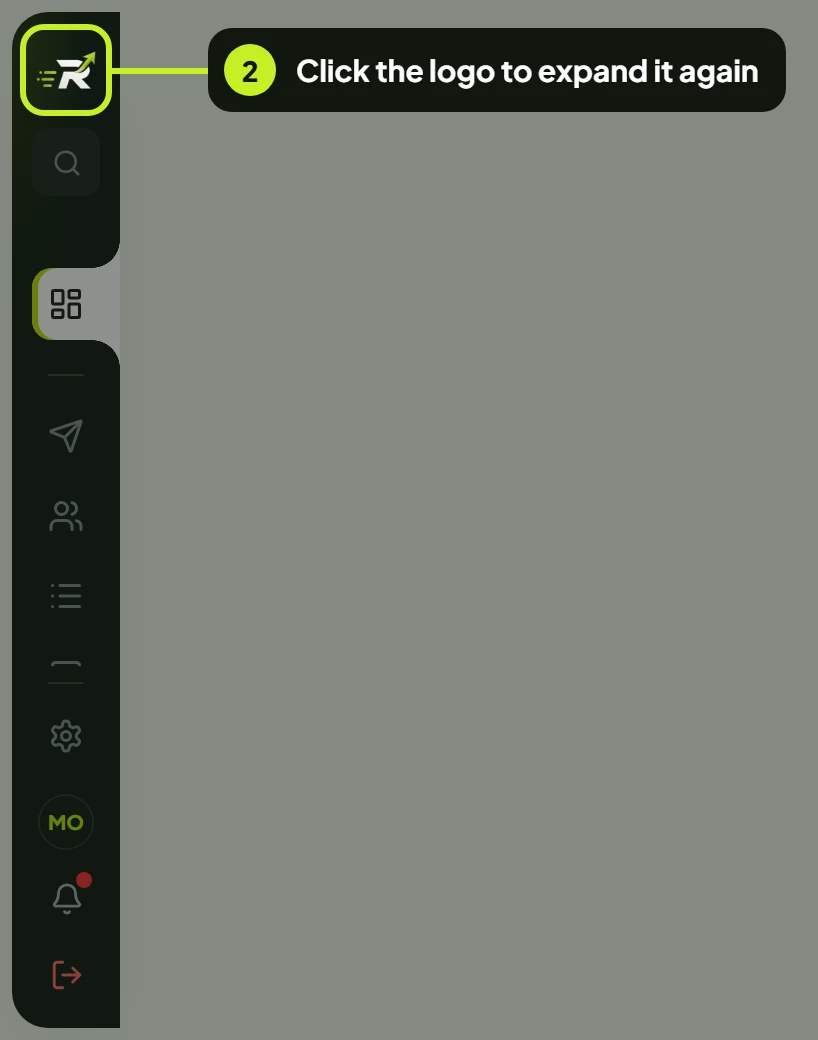
While the sidebar is collapsed, hover any icon to see its name. Search, the bell (a red dot means unread notifications) and sign out all still work from the strip.
On smaller screens the sidebar collapses by itself. On a phone it's hidden: tap the menu button at the top left of the screen (Open menu) to slide it out.
Common problems
| What you see | What it means | What to do |
|---|---|---|
| Email is required. or Password is required. under a field | A field was left empty. | Fill in both fields and click Sign in again. |
| Please enter a valid email address. | The email isn't in a valid format. | Check for typos or spaces, for example [email protected]. |
| Sign-in fails after you click Sign in | The email or password doesn't match an account. | Check both, or click Forgot password? to set a new password. |
| That code was not accepted. Check your authenticator app and try again. | The 6-digit code was wrong or had expired. | Wait for a fresh code in your authenticator app and type it again. |
| You're sent back to the email and password screen while entering a code | The sign-in attempt timed out. | Sign in again with your email and password. |
| A page is missing from your sidebar | Your role doesn't include that page. | Ask your workspace admin to change your role. |
| Nothing found for … in search | No page, setting or action matches what you typed. | Try a shorter or different word, or click All. |
| You're all caught up in Notifications | There's nothing to show for the filter you picked. | Click All and choose All events to see everything. |
Next: See what the numbers on your home page mean in Read your dashboard.