
Browse docs
AI writing settings
How the AI writes connection notes, LinkedIn messages, InMails and emails for each lead: every setting, its defaults, and what Generate Example shows.
Updated
On this page
Message steps can be written by the AI, one message per lead, from that lead's profile. You don't write the message — you set its style, and the AI writes it when the step runs. This page covers every AI setting on every step that has one.
How it works
- You add a message step and leave its AI switch on. It's on by default on every new message step.
- You pick the style: tone, length, language, what to personalise, and any guidelines.
- When the step runs for a lead, the AI writes that lead's message from their profile and your settings.
- Each lead gets a different message. Nothing is written in advance, so there's nothing to review per lead.
Generate Example shows the kind of message a step sends, not the real one. It fills a sample message with a made-up lead (Sarah Chen, Head of Growth at Northwind Labs). The sample doesn't change with every setting; the real messages, written when the step runs, do. See Generate an example.
| Step | AI switch | What the AI writes |
|---|---|---|
| Send Connection Request | Configure With AI | The invite note |
| Send Message | Configure With AI | The LinkedIn follow-up |
| Send Inmail | AI Writing Assistant | The InMail and its subject |
| Send Email | AI Writing Assistant | The email body and its subject |
| Comment on Post | Configure With AI | The comment (see Steps and conditions) |
Before you start
- Add the step first. See Steps and conditions.
- Click the step on the canvas to open its settings in the panel on the right. Changes apply as you edit; click Done, then Save draft or Save changes.
Settings every AI step shares
| Setting | What it does | Default |
|---|---|---|
| Language | The language the message is written in: English, Spanish, French, German, Chinese, Japanese, Portuguese, Latin American Spanish, Hindi, Dutch, Arabic or Urdu | English |
| Guidelines box | Anything the AI should know: your offer, words to avoid, a link to mention. Called Additional Custom Guidelines on LinkedIn steps and Custom Guidelines on InMail and email. Up to 1,000 characters | Empty |
| Generate Example … | Shows a sample message | — |
Write guidelines as instructions. For example: We help fintech sales teams book more meetings. Mention our free pipeline review. Never mention pricing. The more specific, the more on-target each message.
Connection request note
The note sent with a LinkedIn invite. Open Send Connection Request and look under Message Content.
- Leave Configure With AI on.
- Set the note's style with the eight menus, from Tone to Language.
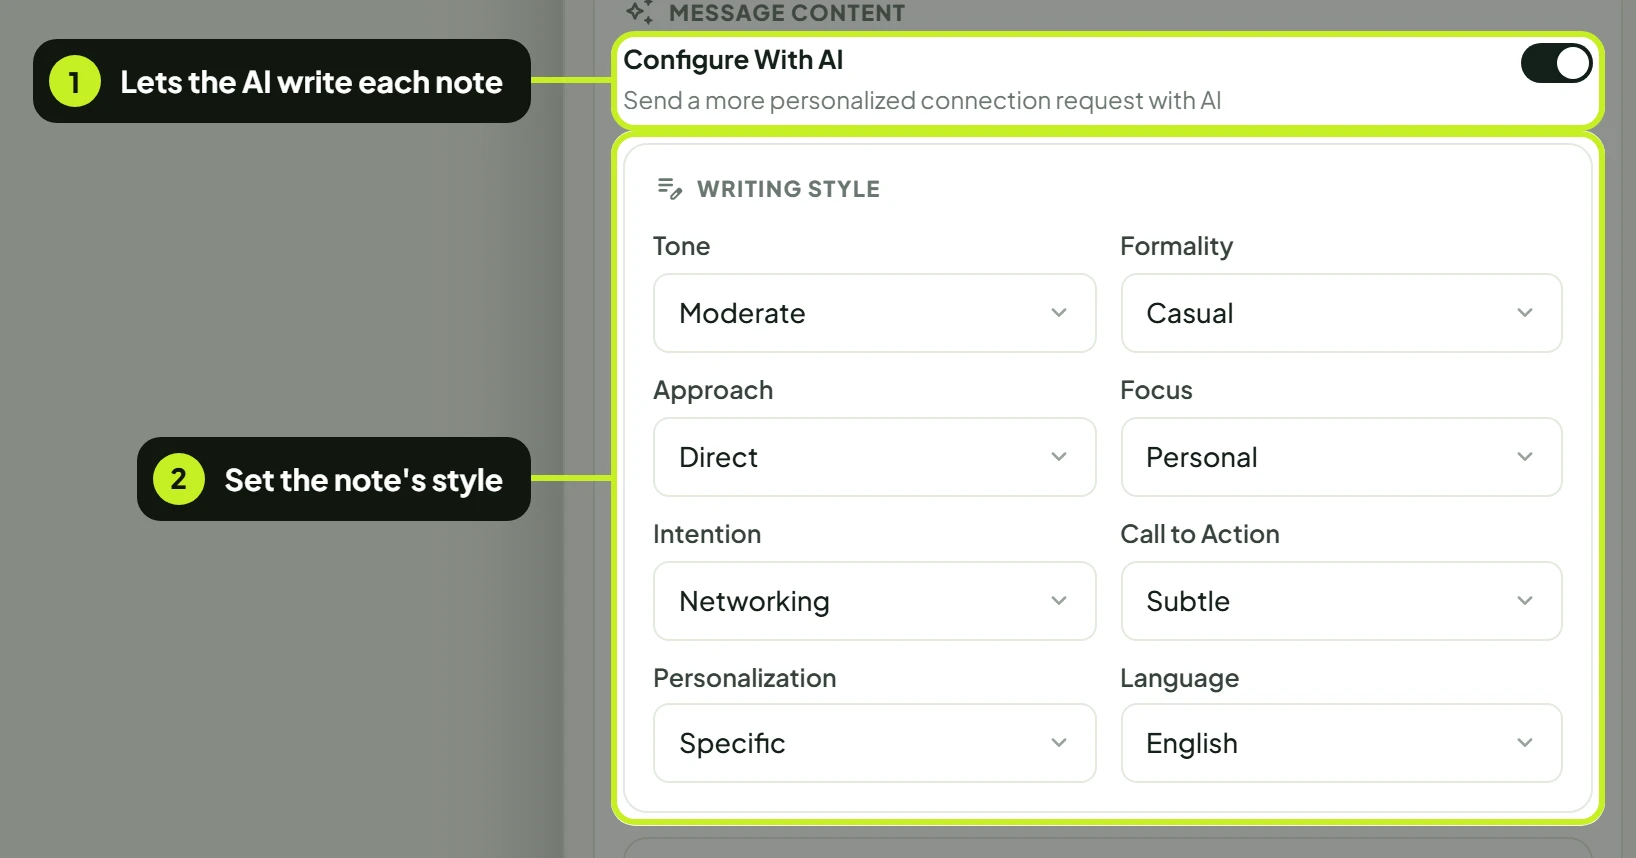
| Setting | Options | Default | What it changes |
|---|---|---|---|
| Tone | Moderate, Cold, Warm | Moderate | How friendly the note sounds |
| Formality | Casual, Approachable, Professional | Casual | How formal the wording is |
| Approach | Direct, Diplomatic, Indirect | Direct | How quickly it gets to the point |
| Focus | Personal, Relational, Business | Personal | Whether it leads with the person, your shared ground, or business |
| Intention | Networking, Collaboration, Partnership | Networking | Why you say you're connecting |
| Call to Action | Subtle, Confident, Strong | Subtle | How firmly it asks for something |
| Personalization | Specific, General | Specific | Whether it refers to details from the lead's profile |
| Language | 12 languages | English | — |
- Turn on Engage with Recent Activity to reference the lead's recent LinkedIn activity in the note.
- Add anything else in Additional Custom Guidelines.
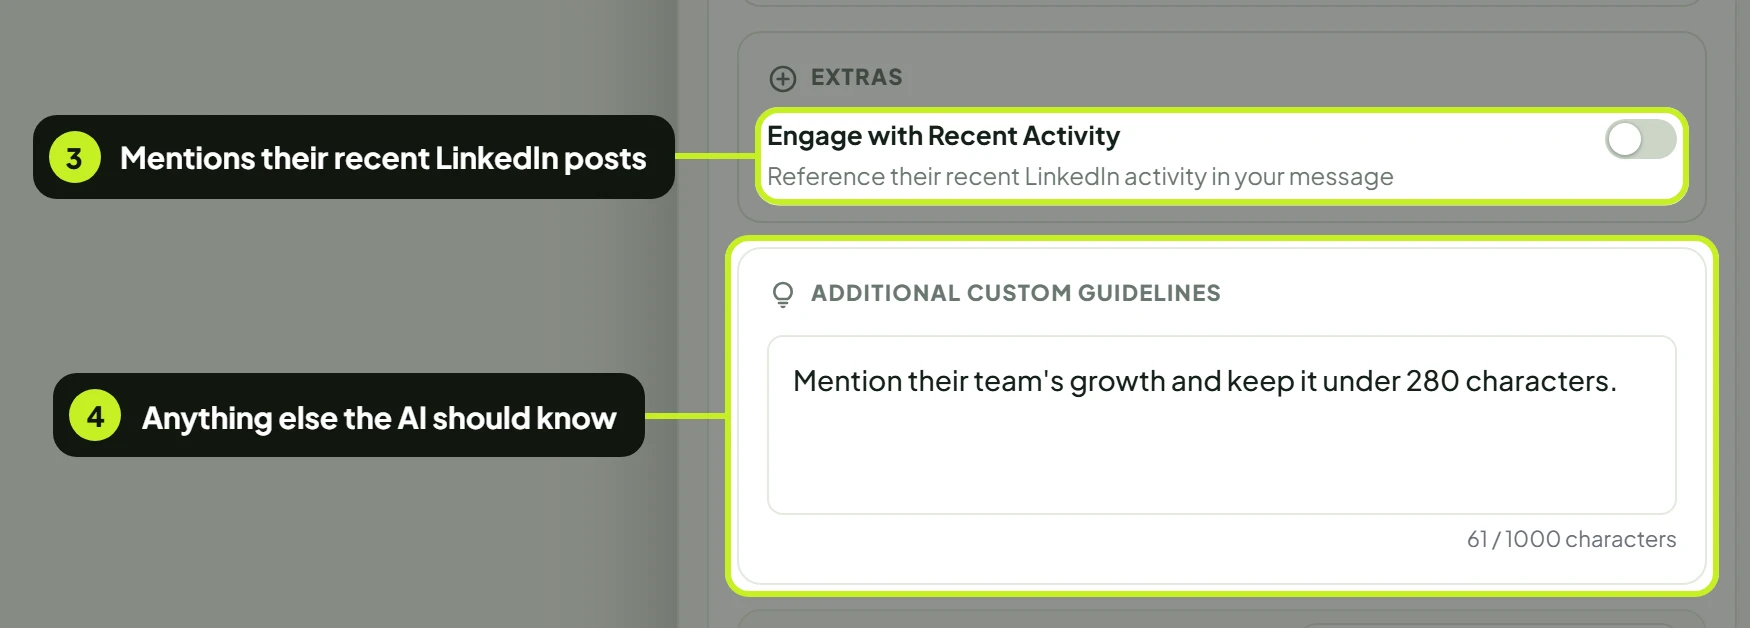
Keep invites low-pressure. A Subtle call to action with a Networking intention reads like a genuine connection request. Save the pitch for the message after they accept.
Write the note yourself
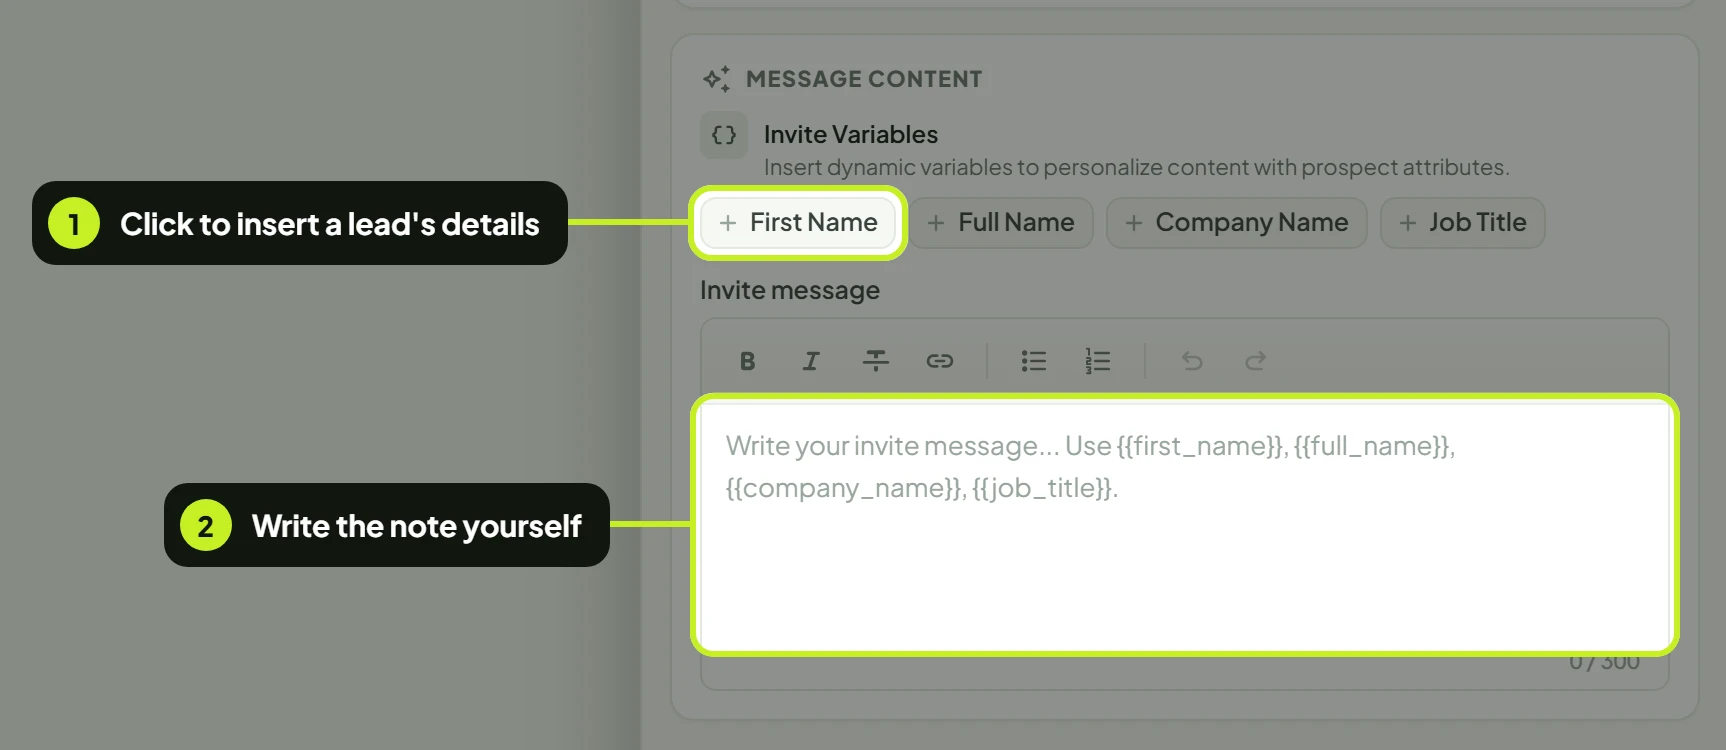
Turn off Configure With AI to write one note for everyone.
- Under Invite Variables, click First Name, Full Name, Company Name or Job Title to insert it where your cursor is, for example
{{first_name}}. - Write the note in Invite message. It can be up to 300 characters.
LinkedIn message
The follow-up sent to a connection. Open Send Message.
- Under Message Settings, leave Configure With AI on, and keep Smart Follow-up on so the message Will only send if they haven't replied to you yet.
- Under Message Content, set Message Length, Tone and Language.
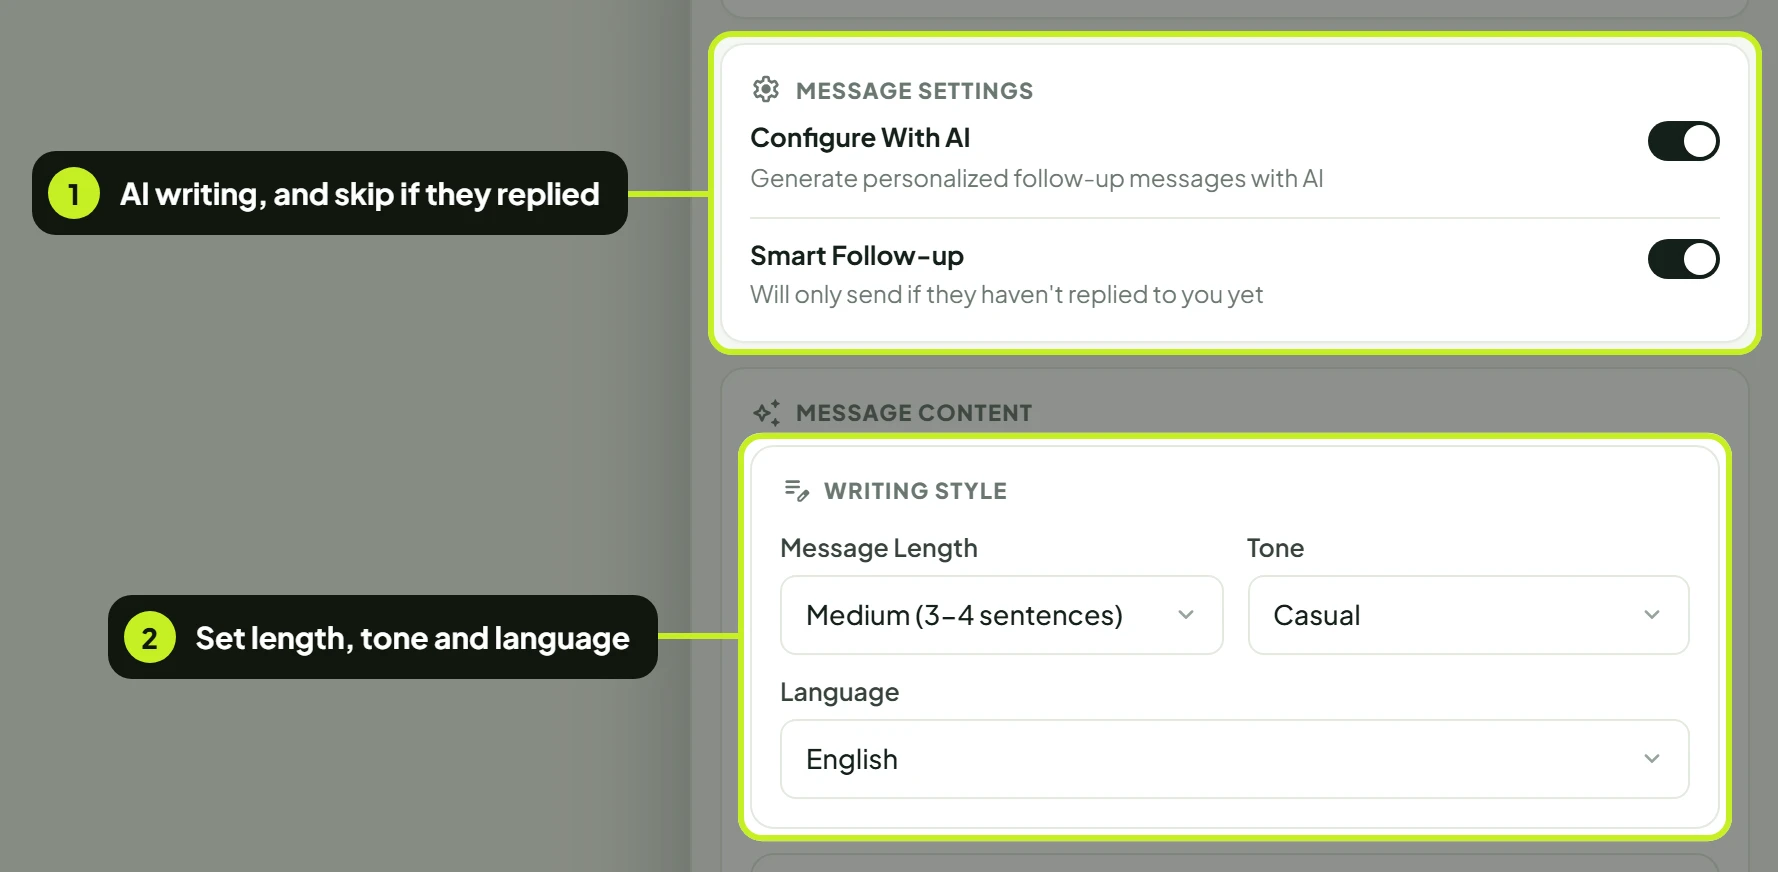
| Setting | Options | Default | What it changes |
|---|---|---|---|
| Smart Follow-up | On / off | On | On: the message is skipped for anyone who has already replied |
| Message Length | Short (2 sentences), Medium (3-4 sentences), Long (5+ sentences) | Medium | How long the message is |
| Tone | Casual, Professional, Friendly | Casual | How it sounds |
| Language | 12 languages | English | — |
| Engage with Recent Activity | On / off | Off | Mentions the lead's recent LinkedIn activity |
| Additional Custom Guidelines | Free text, 1,000 characters | Empty | Your offer, the next step you want |
Turning Smart Follow-up off means people who replied still get this message. Leave it on unless the message is meant for everyone.
Write the message yourself
Turn off Configure With AI to write one message for everyone.
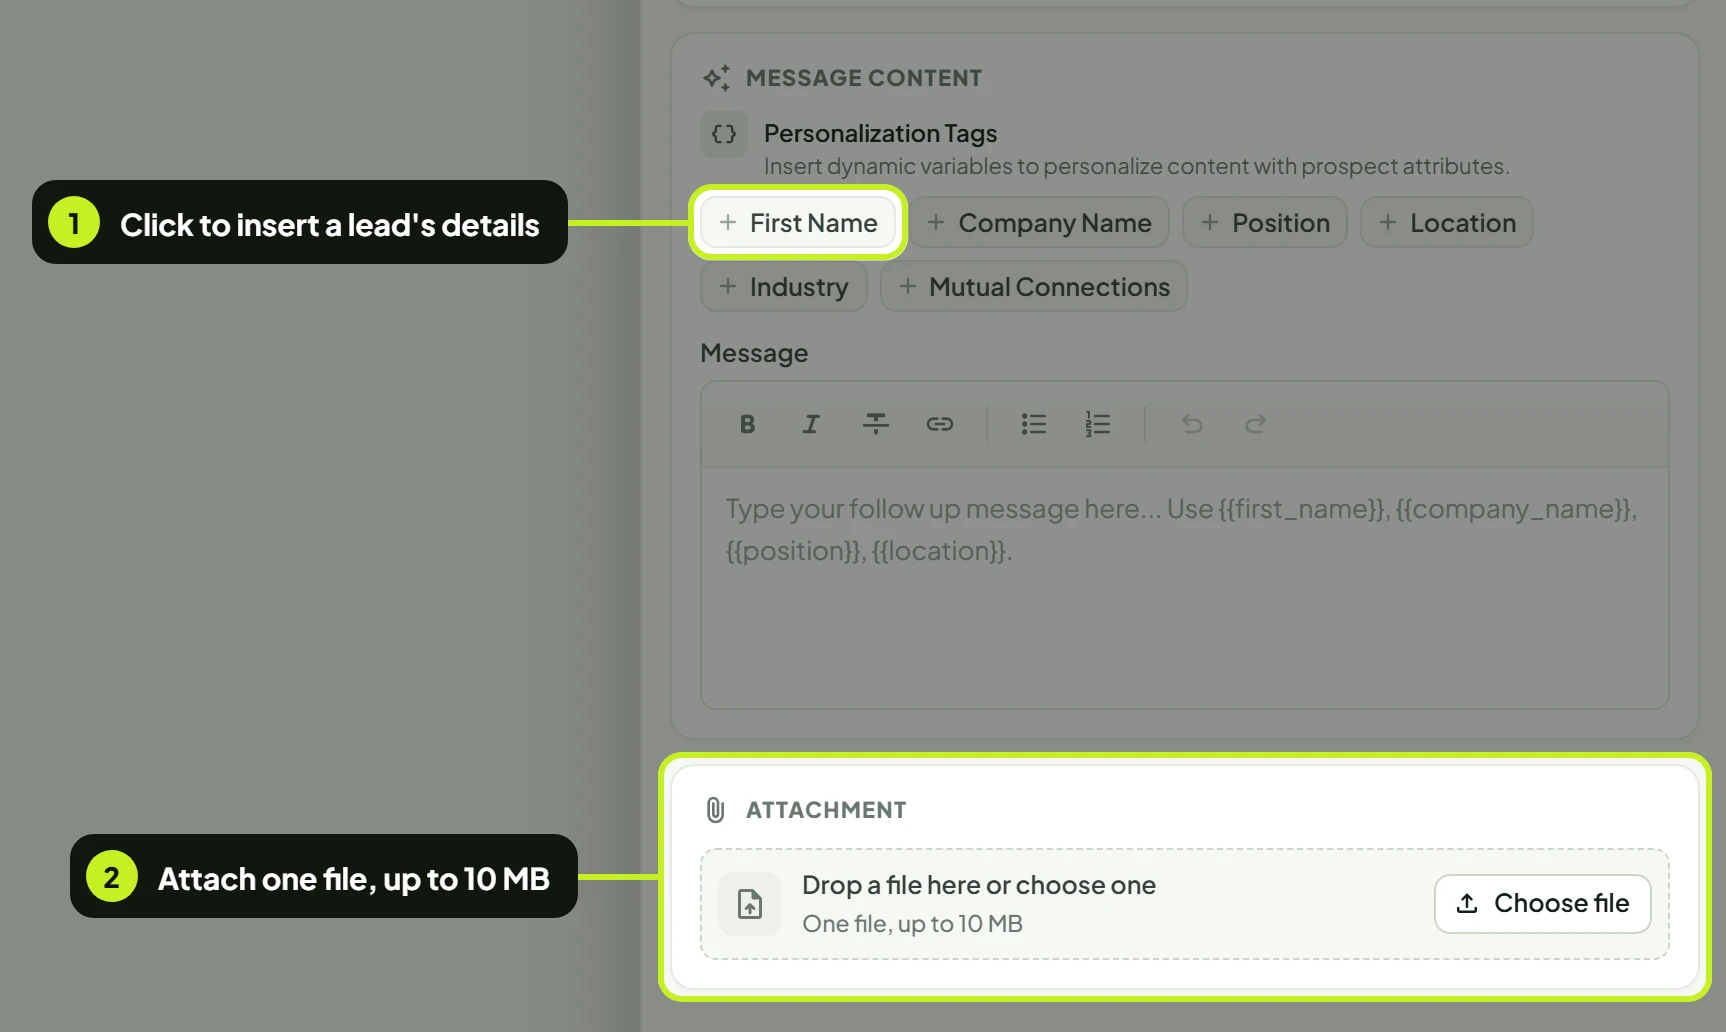
- Click a tag under Personalization Tags to insert it: First Name, Company Name, Position, Location, Industry or Mutual Connections.
- Optionally attach one file under Attachment (up to 10 MB).
InMail
Open Send Inmail. Its switches are under Message Content.
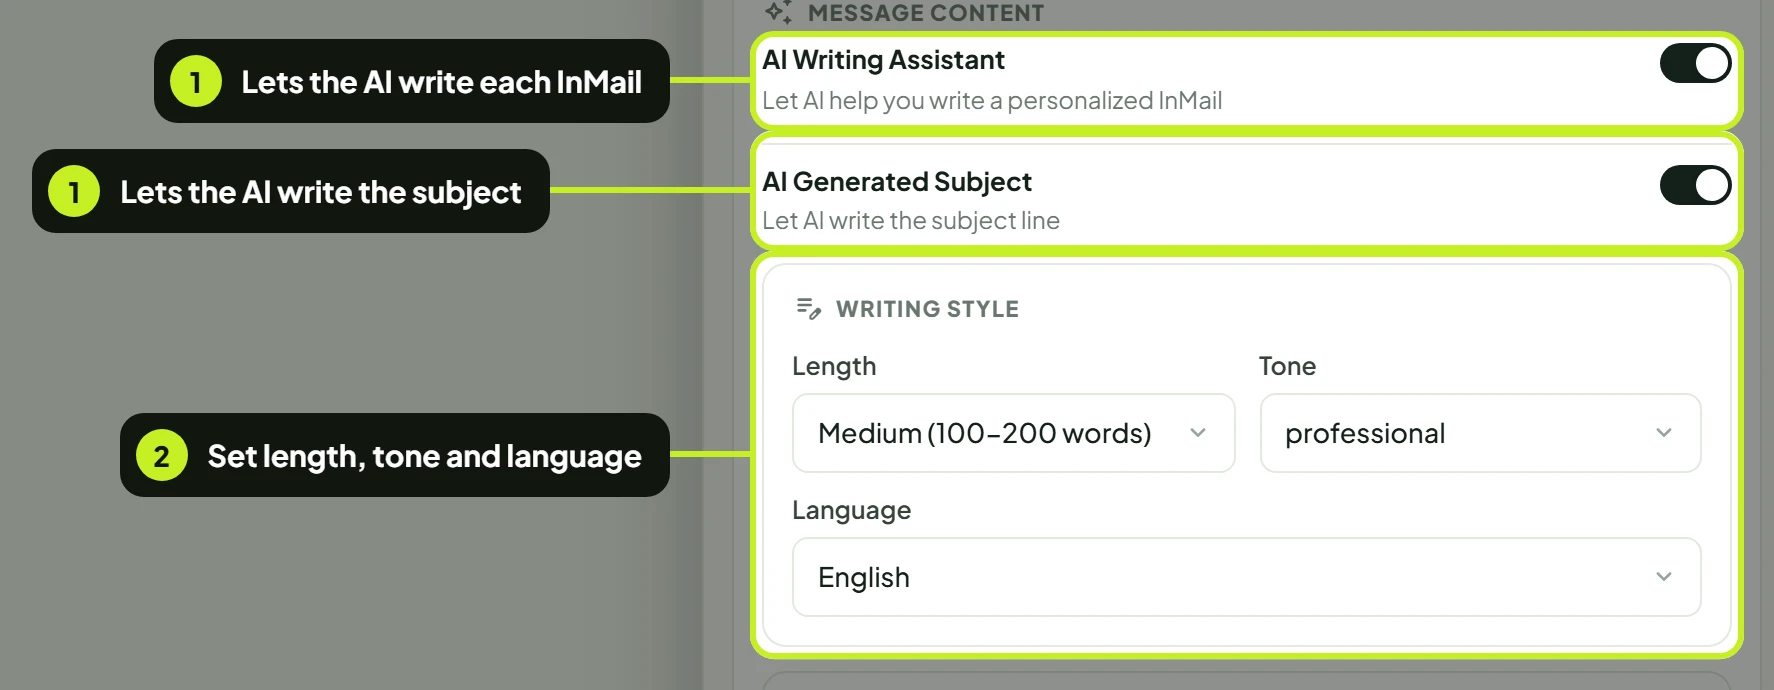
- Leave AI Writing Assistant on to have each InMail written for you, and AI Generated Subject on to have the subject written too.
- Set Length, Tone and Language.
| Setting | Options | Default | What it changes |
|---|---|---|---|
| AI Generated Subject | On / off | On | Off shows InMail Subject (up to 200 characters) to write one subject yourself |
| Length | Short (<100 words), Medium (100-200 words), Long (200+ words) | Medium | How long the InMail is |
| Tone | Casual, Formal, Friendly | Casual | How it sounds |
| Language | 12 languages | English | — |
| Custom Guidelines | Free text, 1,000 characters | Empty | — |
Turn off AI Writing Assistant to write InMail Subject and InMail Message yourself. InMails can be longer than regular LinkedIn messages (up to 2000 characters). Tags: First Name, Full Name, Company Name, Job Title.
Open Send Email. Email has the most settings, because the AI writes both the subject and the body.
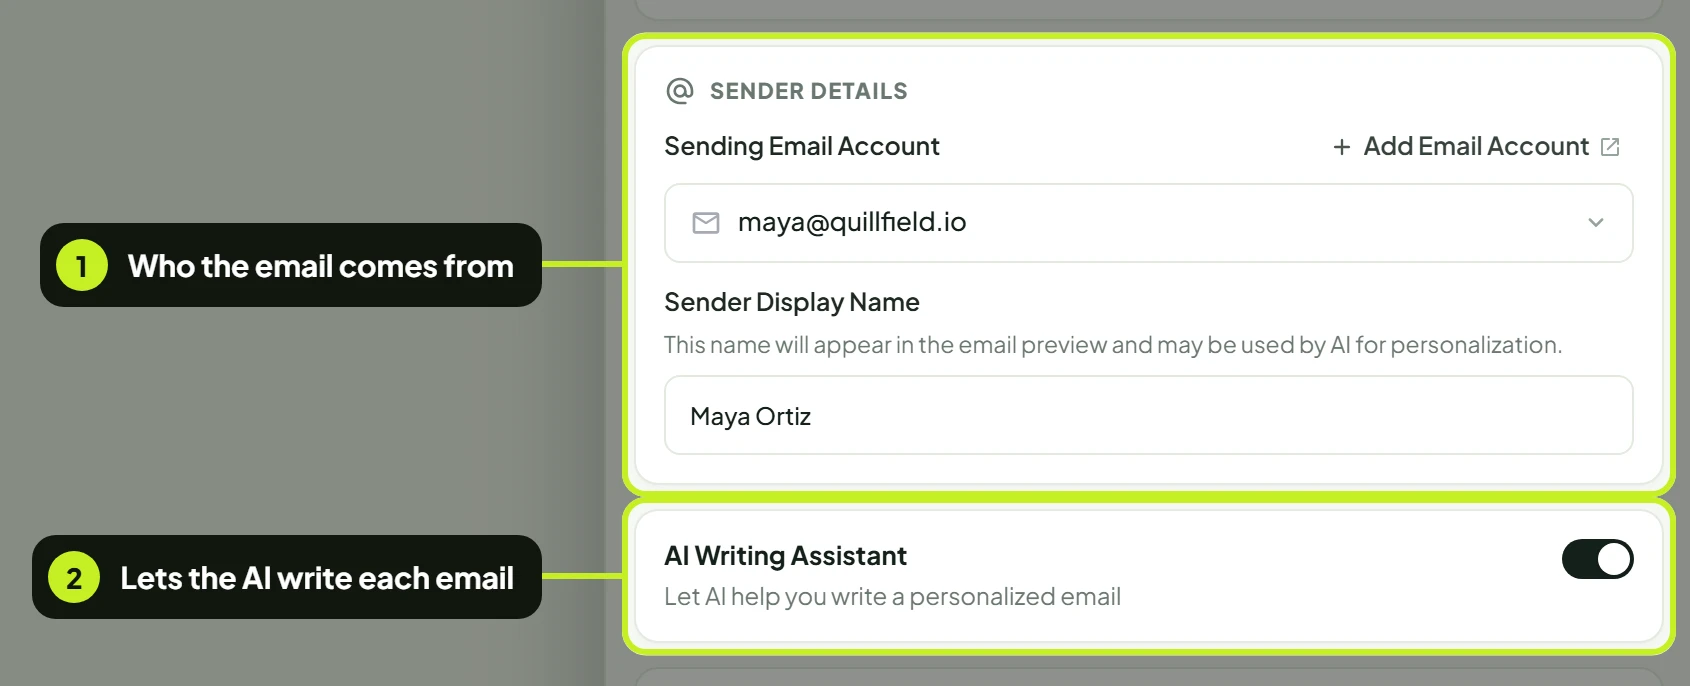
- Under Sender Details, choose the Sending Email Account and enter a Sender Display Name. The AI may use the name in the email.
- Leave AI Writing Assistant on.
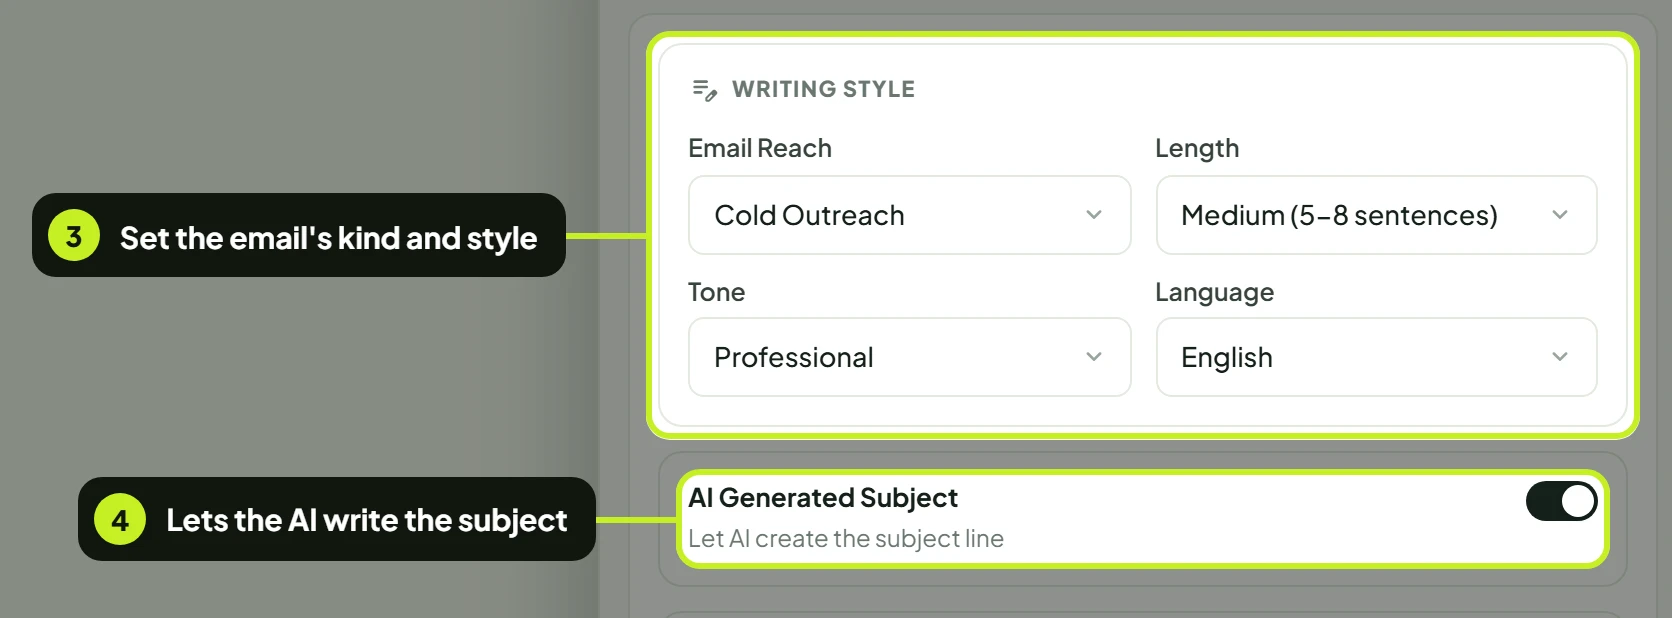
- Choose Email Reach, Length, Tone and Language.
- Leave AI Generated Subject on, or turn it off to write one Subject for everyone.
| Setting | Options | Default | What it changes |
|---|---|---|---|
| Email Reach | Cold Outreach, Follow-up, Meeting Request, Value Proposition, Case Study, Custom | Cold Outreach | What kind of email the AI writes. Use Follow-up on later emails in a sequence |
| Length | Very Short (1-2 sentences), Short (2-4 sentences), Medium (5-8 sentences), Long (9-12 sentences), Very Long (13+ sentences) | Medium | Length of the whole email |
| Tone | Professional, Friendly, Casual, Formal, Enthusiastic | Professional | How it sounds |
| Language | 12 languages | English | — |
| AI Generated Subject | On / off | On | Off shows a Subject field |
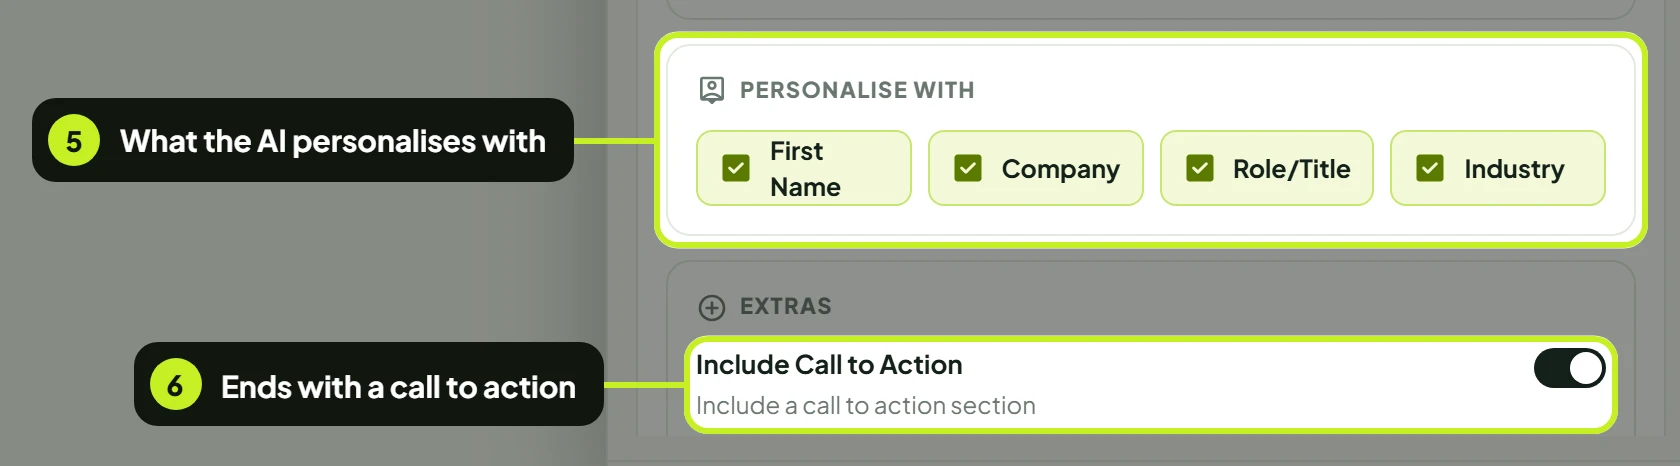
- Under Personalise with, choose what the AI personalises with: First Name, Company, Role/Title and Industry.
- Leave Include Call to Action on and pick a Call to Action Style.
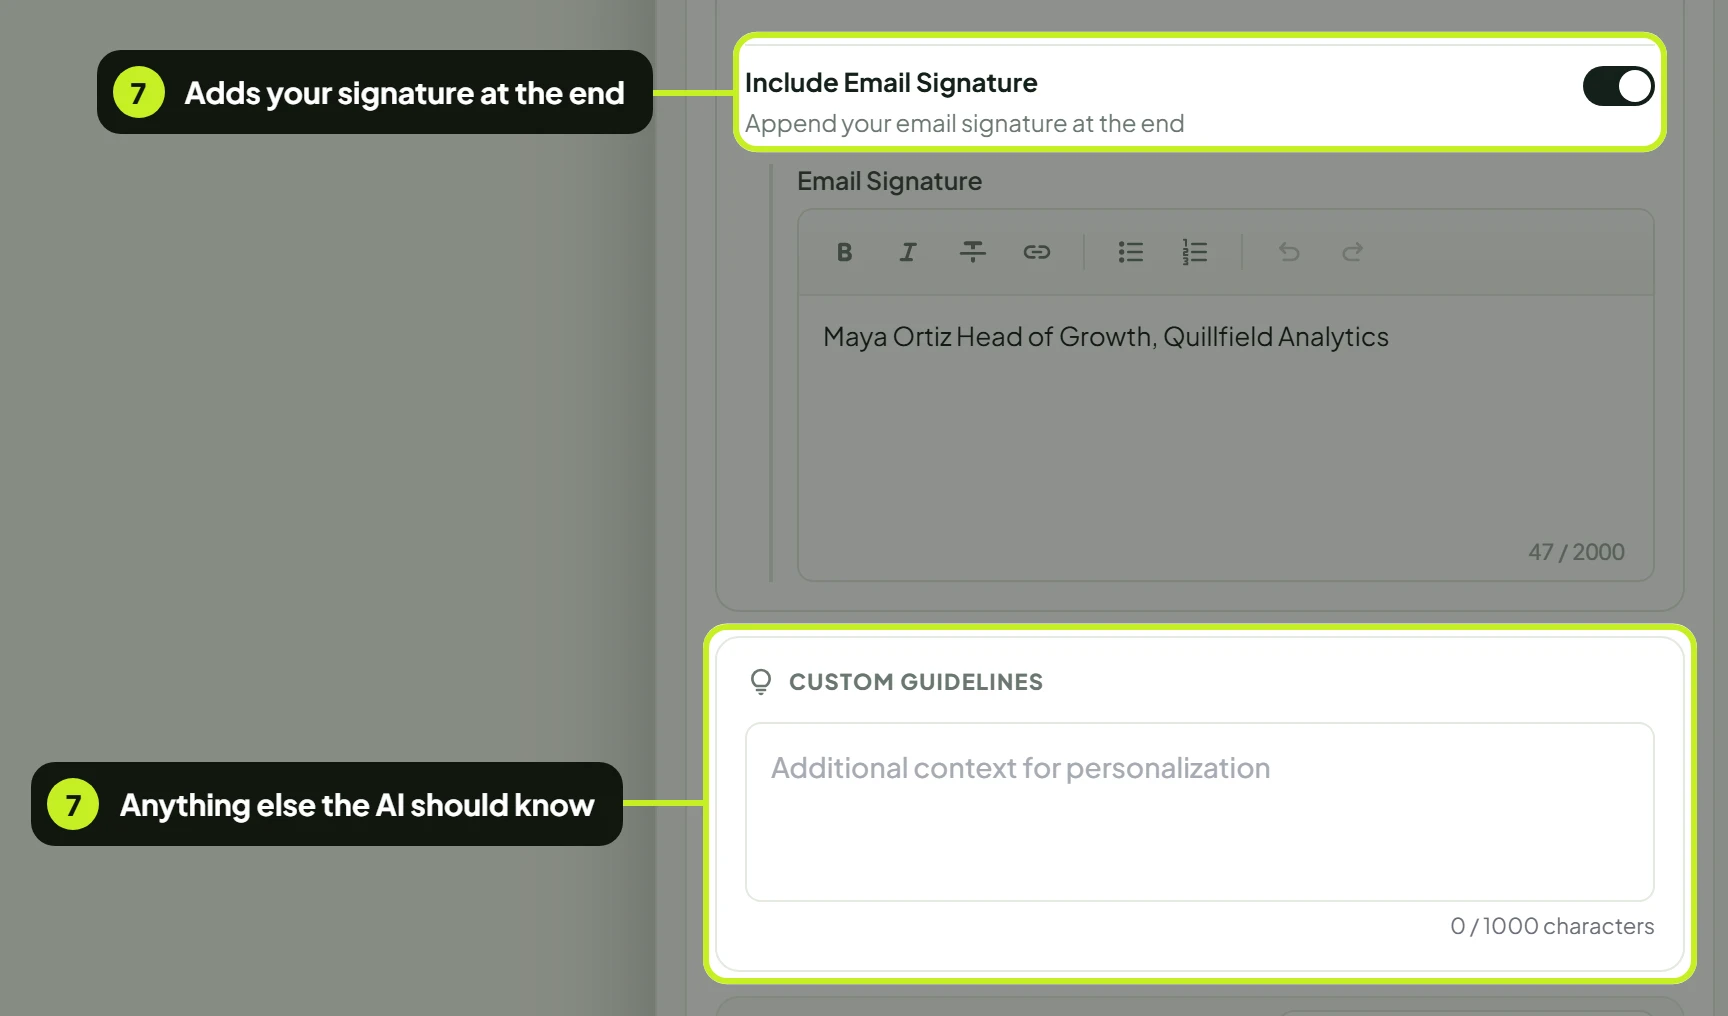
- Leave Include Email Signature on and write your Email Signature, then add Custom Guidelines.
| Setting | Options | Default | What it changes |
|---|---|---|---|
| First Name / Company / Role/Title / Industry | On / off each | All on | Which of the lead's details the AI may use |
| Include Call to Action | On / off | On | Whether the email ends with an ask |
| Call to Action Style | Schedule a Meeting, Book a Call, Request a Demo, Free Consultation, Simple Response, Custom CTA | Simple Response | What the email asks for. For Custom CTA, describe the ask in Custom Guidelines |
| Mention LinkedIn Connection | On / off | Off | Mentions that you're connected on LinkedIn. Only in LinkedIn campaigns |
| Include Email Signature | On / off | On | Adds your signature at the end |
| Email Signature | Formatted text, up to 2,000 characters | Empty | — |
| Custom Guidelines | Free text, 1,000 characters | Empty | Your offer, proof points, words to avoid |
Ask for one thing. Simple Response is the lightest ask for a first cold email. Save Book a Call or Request a Demo for later emails, or for people who opened or clicked.
Write the email yourself
Turn off AI Writing Assistant to write Subject and Email Content yourself. Insert First Name, Full Name, Company Name, Role or Industry from Personalization Tags. Each step can carry one Attachment (up to 10 MB).
Generate an example
Every AI step has a Generate Example button: Generate Example Invite, Generate Example Message, Generate Example InMail, Generate Example Email, or Generate Example on comments.
- Click it. After a moment (Writing an example…) a preview card opens: Invite Preview, Message Preview, InMail Preview or Email Preview.
- Click Generate another to see the next sample. Copy copies the text; it ticks and reads Copied.
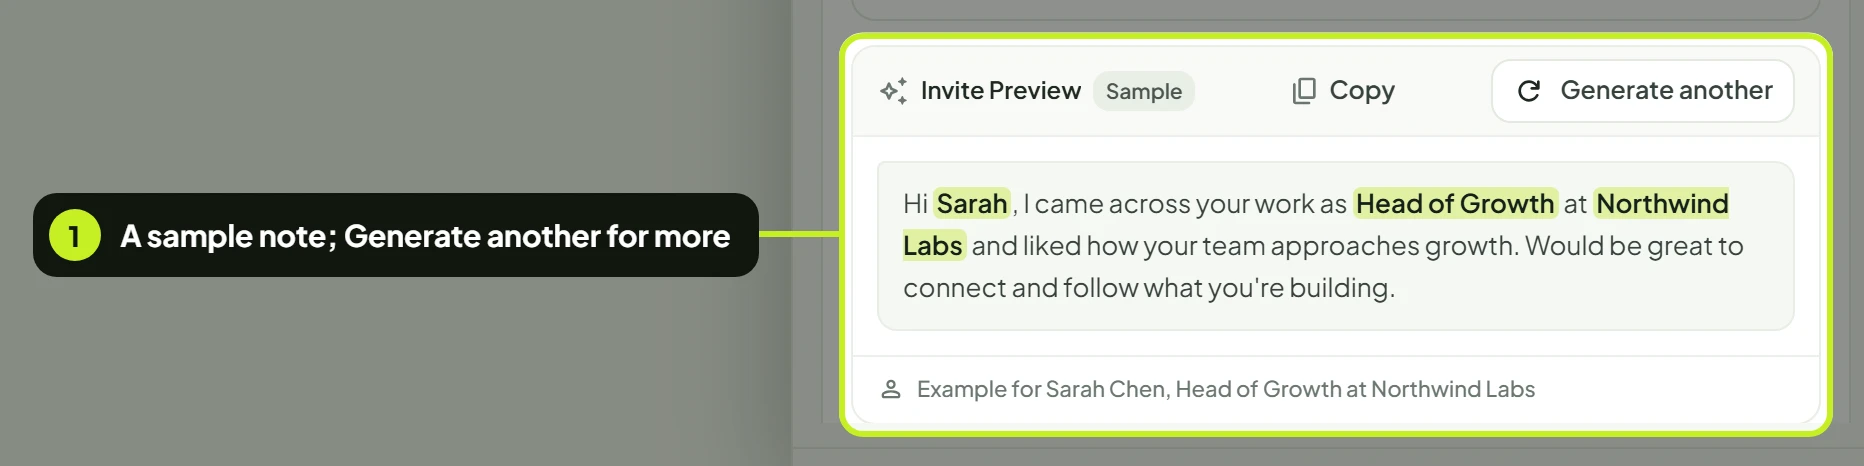
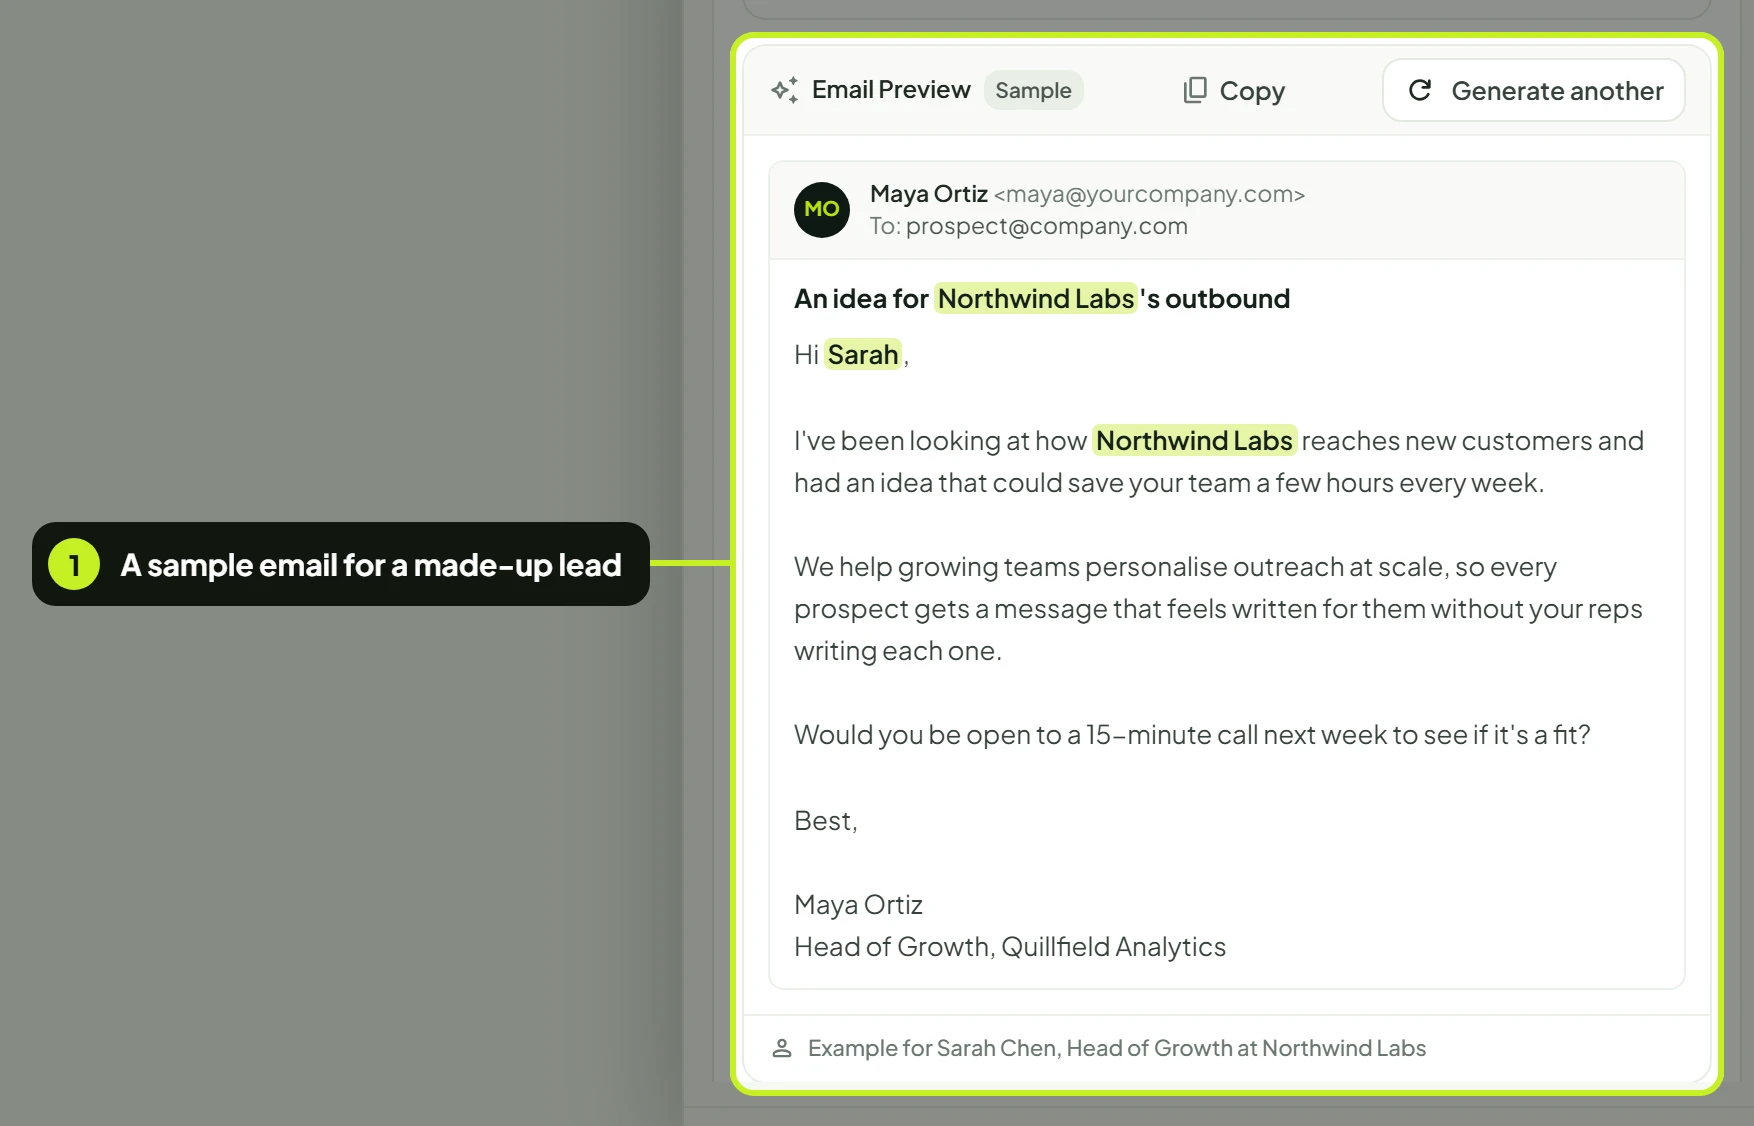
The preview reads Example for Sarah Chen, Head of Growth at Northwind Labs. The highlighted words are the lead's details, filled in from that sample lead.
On email, the preview shows the sender, the recipient, the subject and the body:
| What to expect | Why |
|---|---|
| The sample doesn't change when you change Tone or Length | Samples show the kind of message the step sends. Your settings shape the real messages |
| The preview disappears when you change a setting | Changing a setting clears the sample. Click the button again |
| The sample uses a lead you don't know | It's a made-up lead, so you can preview without picking a real one |
Common problems
| What you see | What it means | What to do |
|---|---|---|
| The guidelines counter stops at 1000 | Guidelines are limited to 1,000 characters | Shorten them. Keep the most important instructions first |
| The invite counter stops at 300 | Invite notes are limited to 300 characters | Shorten the note, or turn on Configure With AI |
| Subject field appears on an email | AI Generated Subject is off | Write a subject, or turn it back on |
| Mention LinkedIn Connection is missing | It's only offered in LinkedIn campaigns | — |
| Select email account on Send Email | No inbox chosen for this step | Choose one under Sending Email Account, or click Add Email Account |
| A follow-up wasn't sent to someone | Smart Follow-up skipped them because they had replied | That's expected |
Next: Set the schedule and pace in Launch settings and daily limits.