
Browse docs
Build and launch a campaign
Create a LinkedIn campaign, pick its lead list and sender, build the sequence on the canvas, set the schedule and daily pace, and launch it.
Updated
On this page
A campaign sends a sequence of steps to everyone on one lead list, from one sender. Everything is set up on one screen, the campaign workspace: a setup sentence at the top (lead list, sender, schedule and pace) and the sequence canvas below it.
Before you start: You need a connected LinkedIn seat (or an inbox, for an email campaign) and a published lead list. See Create a lead list.
Start a new campaign
- In the sidebar, under Outreach, click Campaigns.
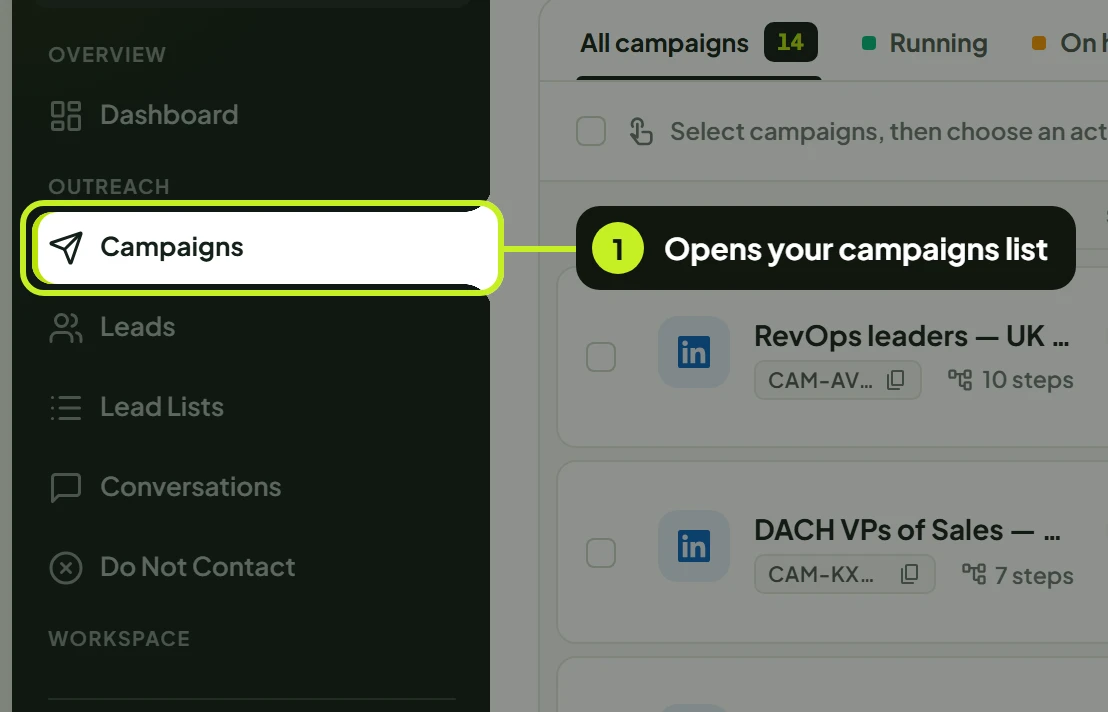
- Click New campaign.

- In What do you want to send?, pick a type:
- LinkedIn campaign: a multi-step sequence on LinkedIn, with optional email steps.
- Email campaign: an automated email sequence sent to an email list.
- Instant email: one email sent right now, with no sequence to set up.
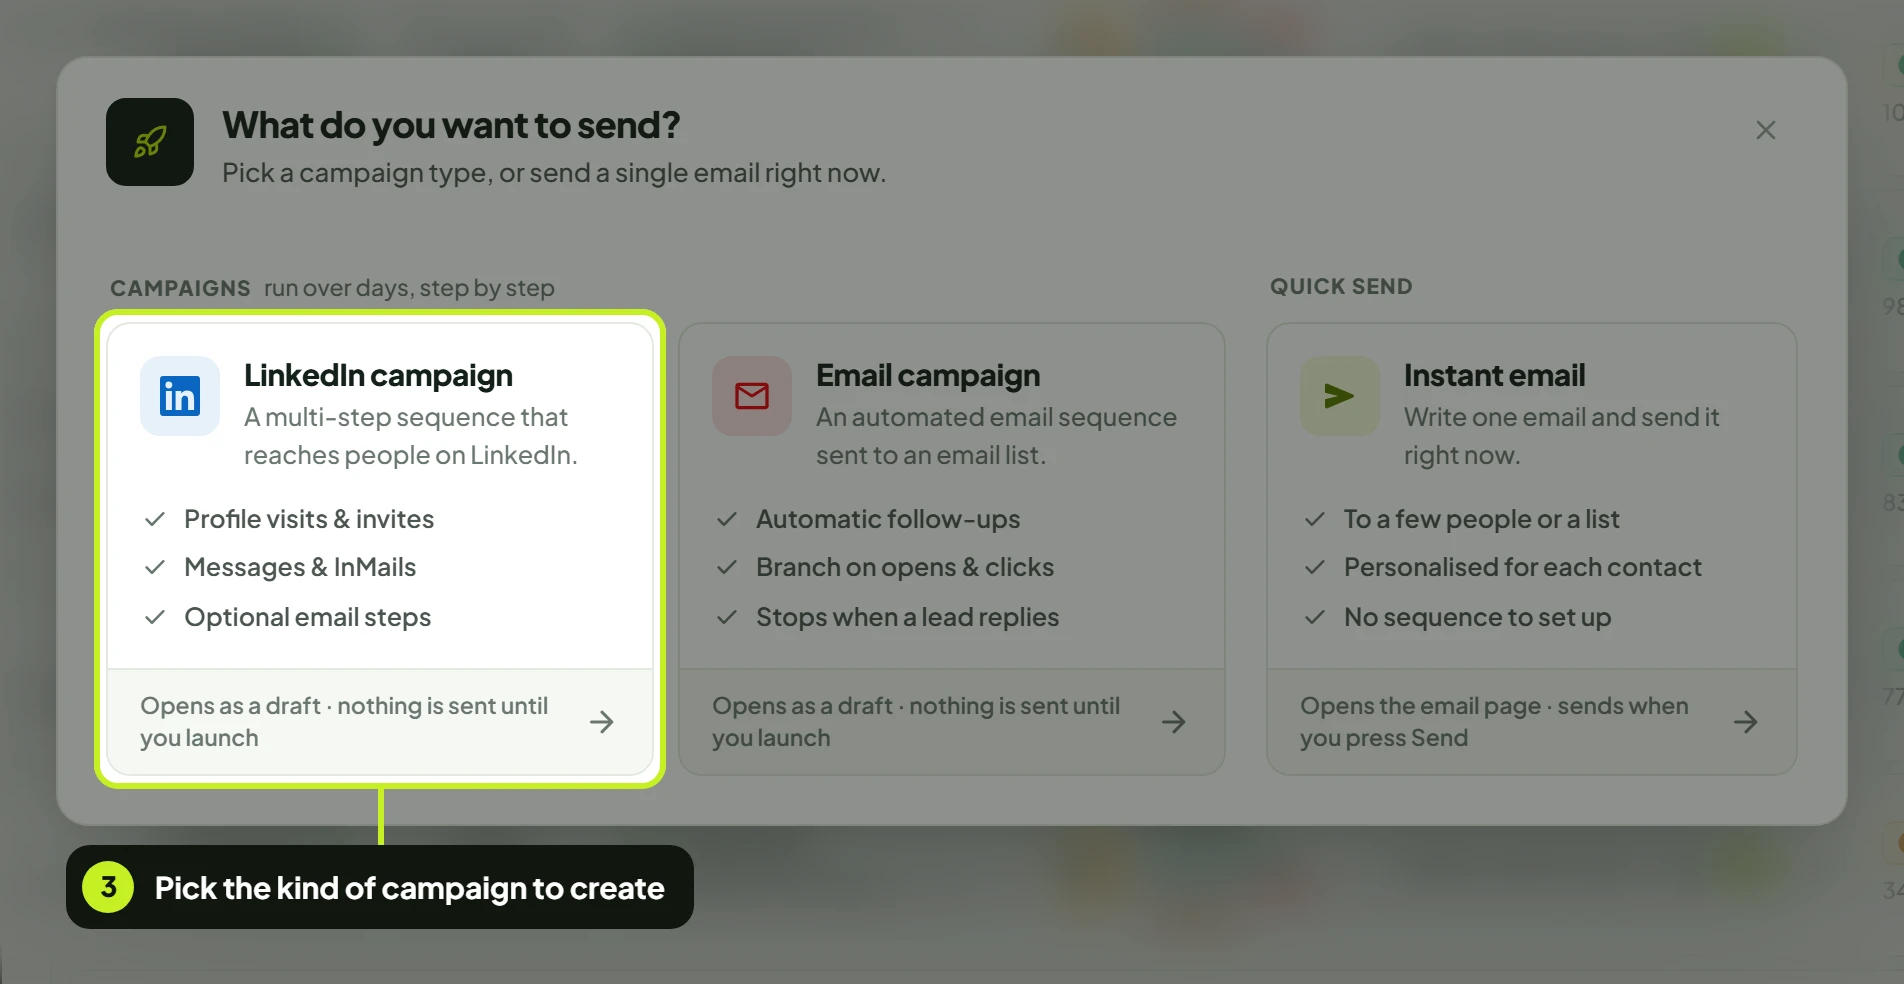
The campaign opens as a draft. Nothing is sent until you launch. The rest of this guide follows a LinkedIn campaign; an email campaign works the same way, with a sending inbox in place of a LinkedIn seat.
Name the campaign
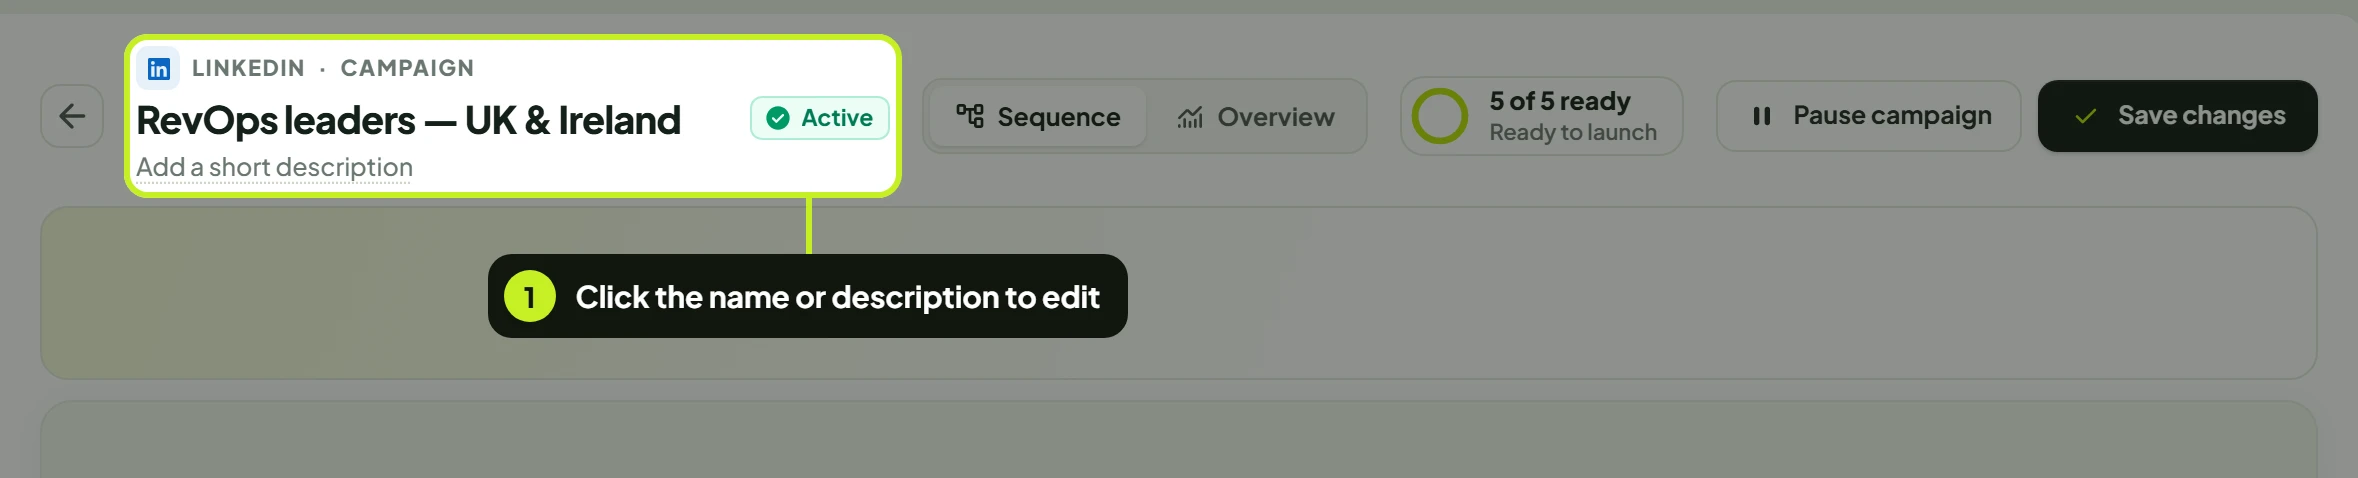
At the top of the workspace, click Name this campaign, type a name and press Enter (or click the ✓). Click Add a short description to note what the campaign is for; your team sees it, your leads don't.
Set it up in the setup sentence
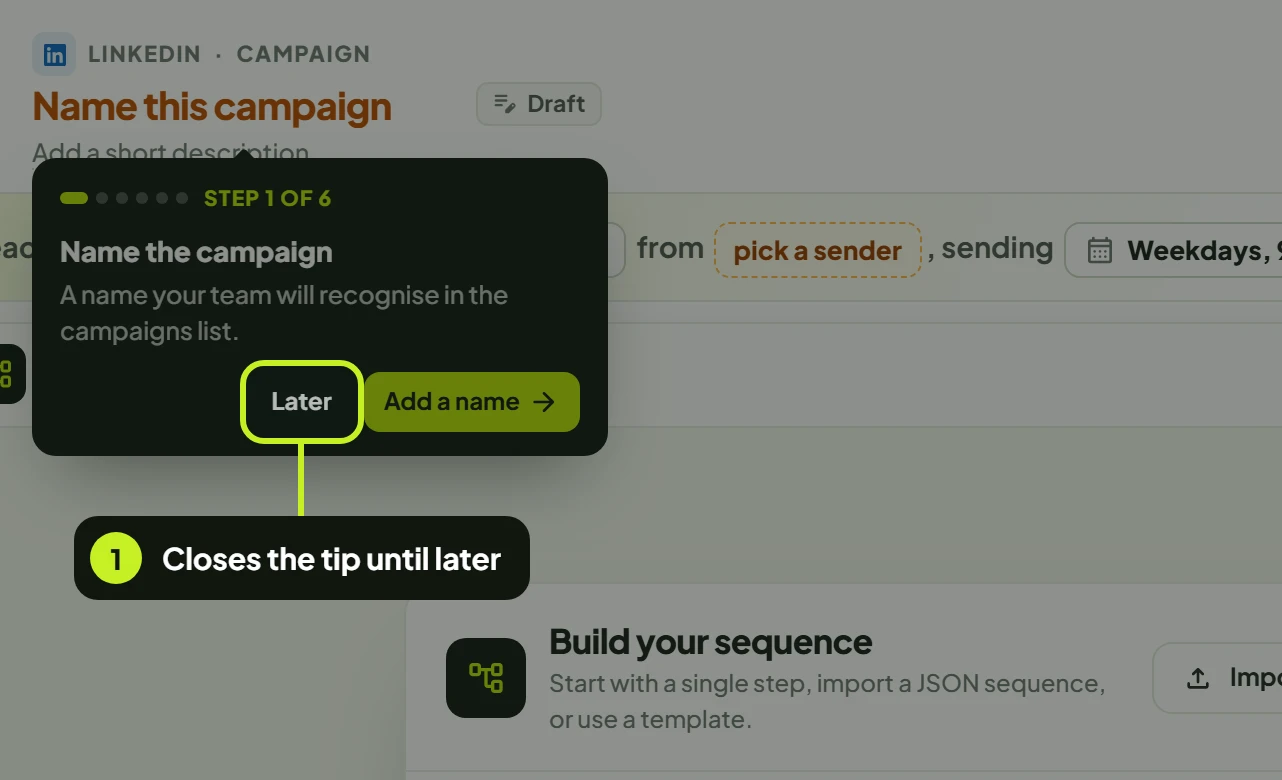
Under the header, a setup sentence describes the campaign in four parts: the lead list, the sender, the schedule and the pace. On a new campaign it starts as Reach pick a lead list on LinkedIn from pick a sender. Each underlined part opens its own picker. A short tip walks you through the setup in order (Step 1 of 6): the campaign's name and description first, then the four parts.
- Lead list. Click pick a lead list. The Lead Lists library opens in Choose the lead list: search or filter, select a list and click Use this list. Need a new one? Click Create Lead List without leaving the campaign.
- Sender. Click pick a sender and choose the seat under Send from this LinkedIn account. A campaign sends from one seat. No seat yet? Click Connect another account.
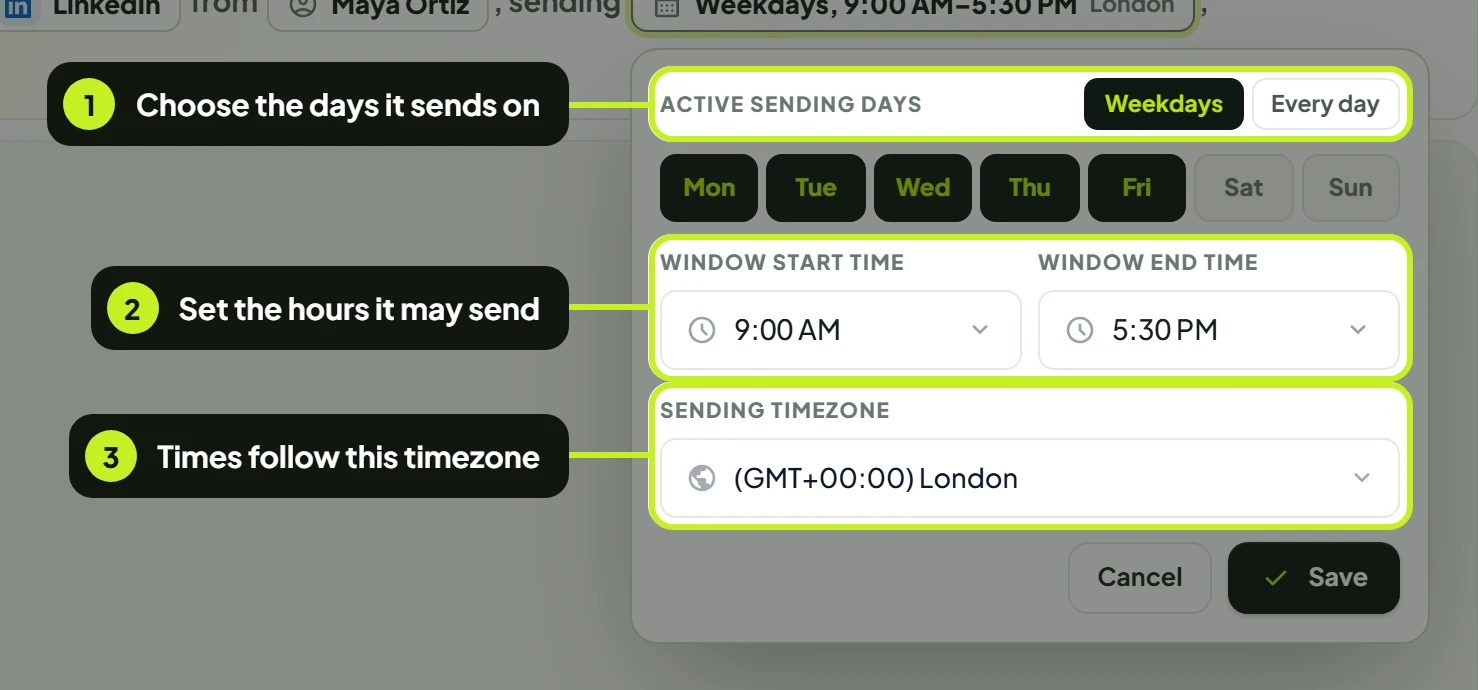
- Schedule. Click the schedule (for example Weekdays, 9:00 AM–5:00 PM) to check when it sends. Choose the Sending Timezone, pick Active Sending Days (Weekdays, Every day or single days), set Window Start Time and Window End Time, then click Save. The default is Monday to Friday, 9:00 AM to 5:00 PM.
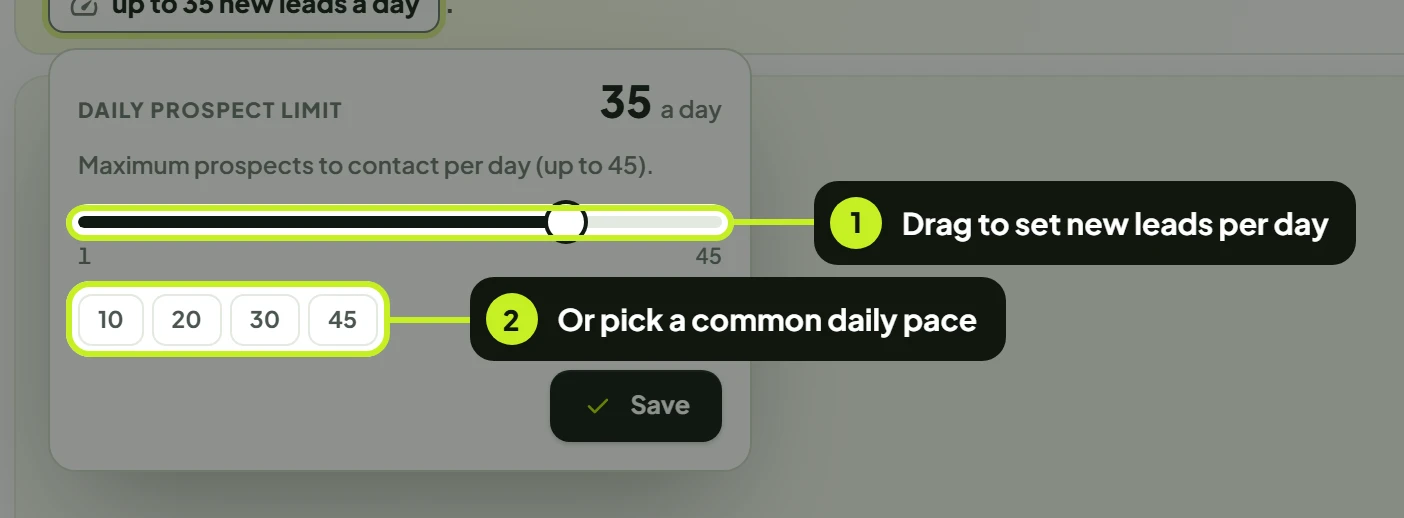
- Pace. Click the pace (for example up to 24 new leads a day). Drag the Daily Prospect Limit slider, or use a quick pick (10, 20, 30 or 45), then click Save. The default is 24 and the most is 45.
The schedule and the pace come with defaults: the tip's main button (Set the schedule, Set the pace) opens the picker, or click Looks good to keep them as they are. The description is optional; click Skip to move on.
Note: Once the campaign has been created, its lead list can't be changed. Once it runs, it keeps its sender.
Build the sequence
The sequence canvas sits under the setup sentence. While it's empty, Build your sequence offers three ways to begin: click Add first step, click Import JSON, or pick a template under Start from a template. LinkedIn templates include Connect and follow up, Warm up, then reach out, Connections first and InMail first.
- Click Add step in the toolbar to add a step at the end.

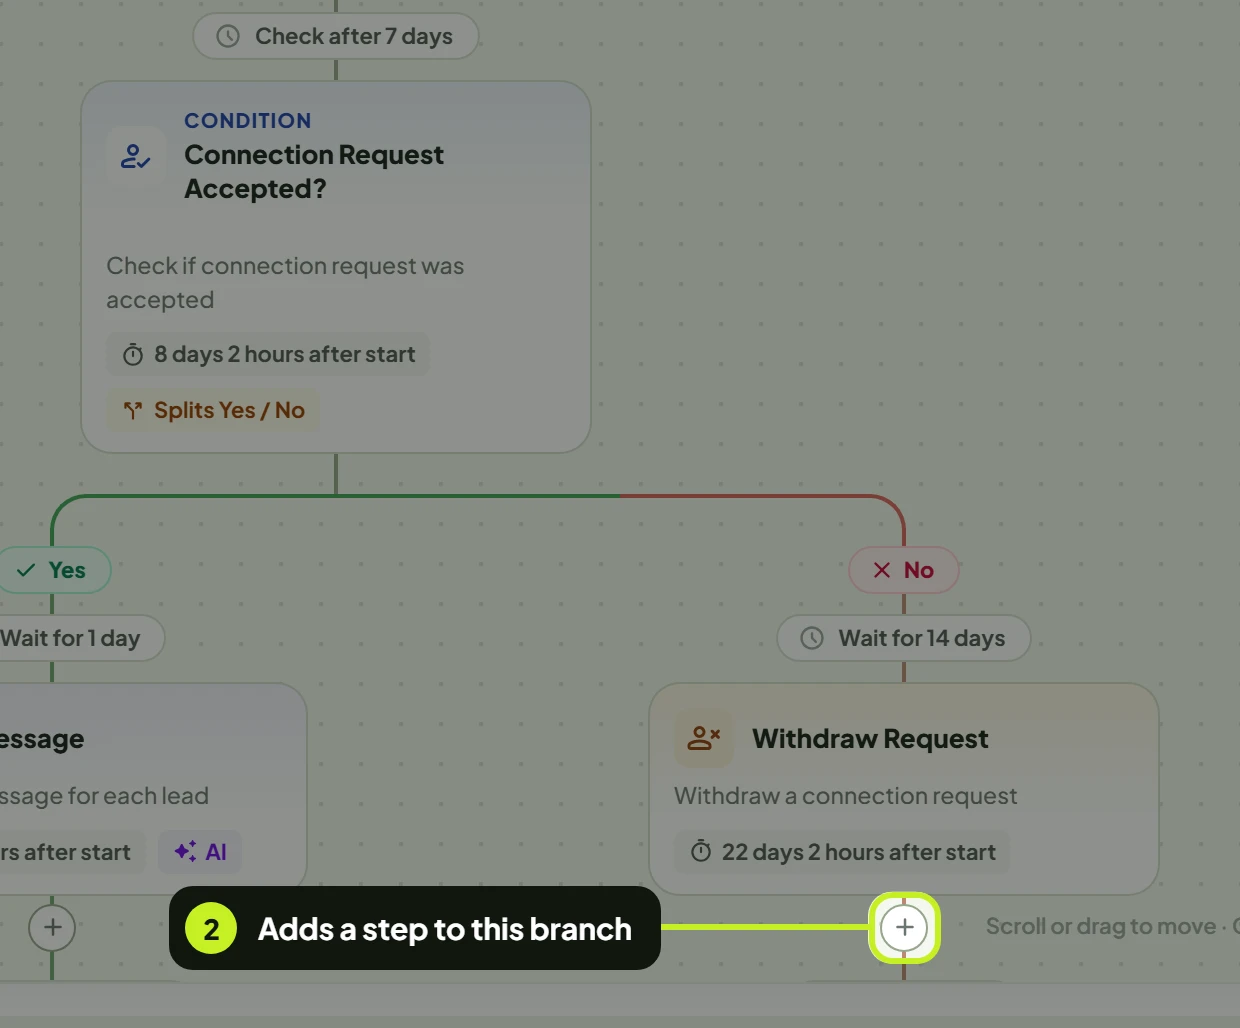
- Or click a small + under any step, or on a Yes / No branch, to add a step exactly there.
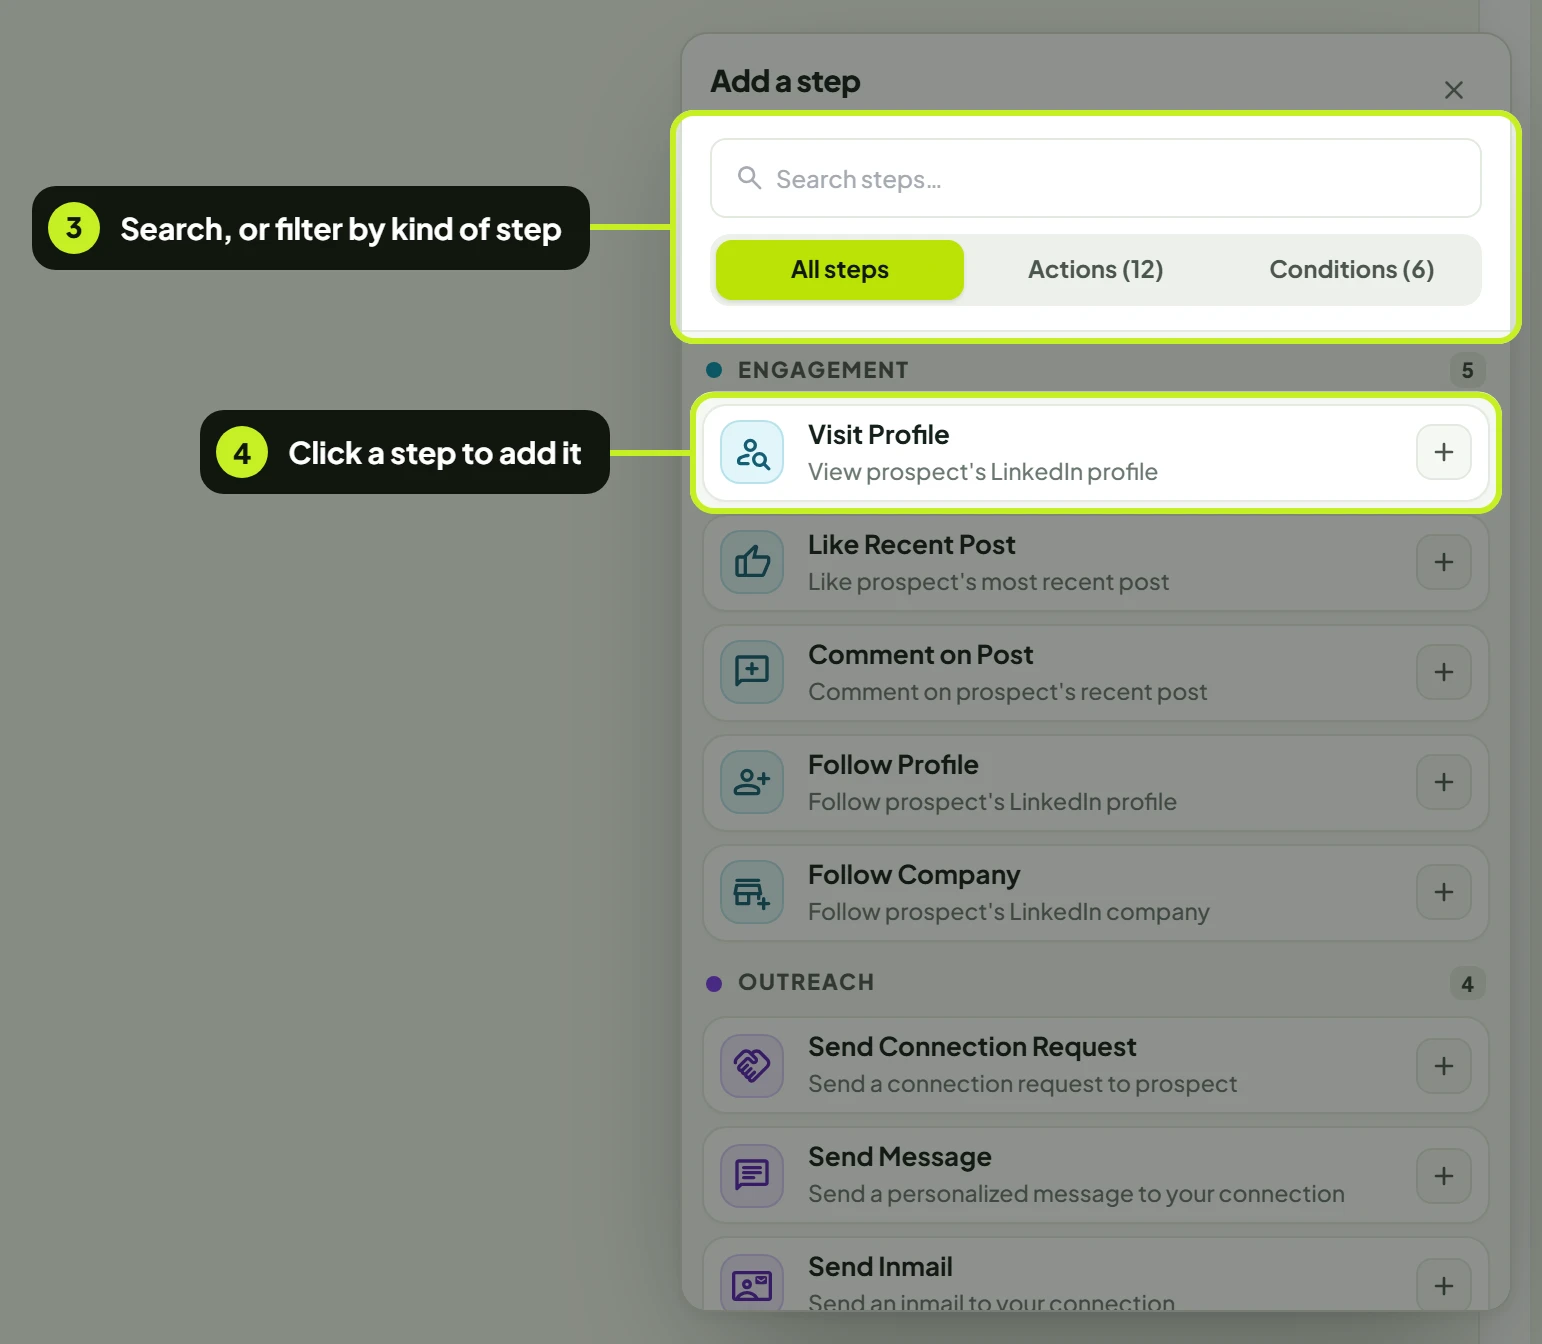
- In Add a step, search, or switch between All steps, Actions and Conditions.
- Click a step to add it. Its settings open in a panel on the right. Changes apply as you edit (press Ctrl+Z to undo); click Done to close the panel.
Click any step on the canvas to open its settings again. Scroll or drag the canvas to move around, hold Ctrl (⌘ on a Mac) and scroll to zoom, use Fit to screen to see the whole sequence, and Back to the start to return to the top. Zoomed out, each step shows just its name. Each step's timing reads in plain words, for example 2 hours after start, counted from when the lead was enrolled.
Actions
| Step | What it does |
|---|---|
| Visit Profile | Views the lead's LinkedIn profile |
| Like Recent Post | Likes the lead's most recent post |
| Comment on Post | Leaves a comment on one of their recent posts |
| Follow Profile / Follow Company | Follows the lead, or their company page |
| Send Connection Request | Sends an invite, with an optional note |
| Send Message | Sends a LinkedIn message to a connection |
| Send Inmail | Sends an InMail |
| Send Email | Sends an email from a connected inbox |
| Withdraw Request | Withdraws an invite that's still pending |
| Add/Update Tag | Replaces the lead's tag |
| Notify Webhook | Sends the lead's data to a webhook you set up in Settings |
Conditions
A condition splits the sequence into a Yes and a No branch.
| Condition | Branches on |
|---|---|
| Connection Request Accepted? | Whether the invite was accepted |
| Replied on LinkedIn? | A reply on LinkedIn |
| Replied via Email? | A reply to an email |
| Email Opened? | An email being opened |
| Link Clicked in Email? | A link in an email being clicked |
| Is a 1st degree LinkedIn connection? | Whether you're already connected |
Under How it runs, choose Wait a specific amount of time to check once after a delay, or a wait until mode (for example Wait until accepted) to hold the lead until it happens. Set the delay under Condition Evaluation Window. A wait until condition shows as a single line on the canvas, without the Yes / No split.
Timing
Every step runs After the previous step, or When a lead enters the campaign for the first one. Set Wait from 1 to 365 Minutes, Hours, Days or Weeks, or use a quick pick: 15 min, 1 hr, 1 day, 3 days or 1 wk. Where it's offered, Run immediately skips the delay.
Write messages with AI
Message steps can be written for each lead by the AI, from that lead's profile.
- Send Connection Request: turn on Configure With AI, then set Tone, Formality, Approach, Focus, Intention, Call to Action, Personalization and Language. With AI off, write the Invite message yourself (up to 300 characters).
- Send Message: turn on Configure With AI and set Message Length, Tone and Language. Turn on Smart Follow-up so the message only sends if the lead hasn't replied yet.
- Send Email: choose the Sending Email Account and Sender Display Name, then turn on AI Writing Assistant. Set Email Reach, Length, Tone and Language, leave AI Generated Subject on, and choose what to personalise.
The LinkedIn steps also offer Engage with Recent Activity, and each AI step has a guidelines box (Additional Custom Guidelines, or Custom Guidelines on email) for anything the AI should know. With AI off, click a Personalization Tags variable like {{first_name}} to insert it.
Tip: Generate Example Invite, Generate Example Message and Generate Example Email show a sample of what the step writes, for a made-up lead. Click Generate another for a new version. The real message is written for each lead when the step runs.
Launch
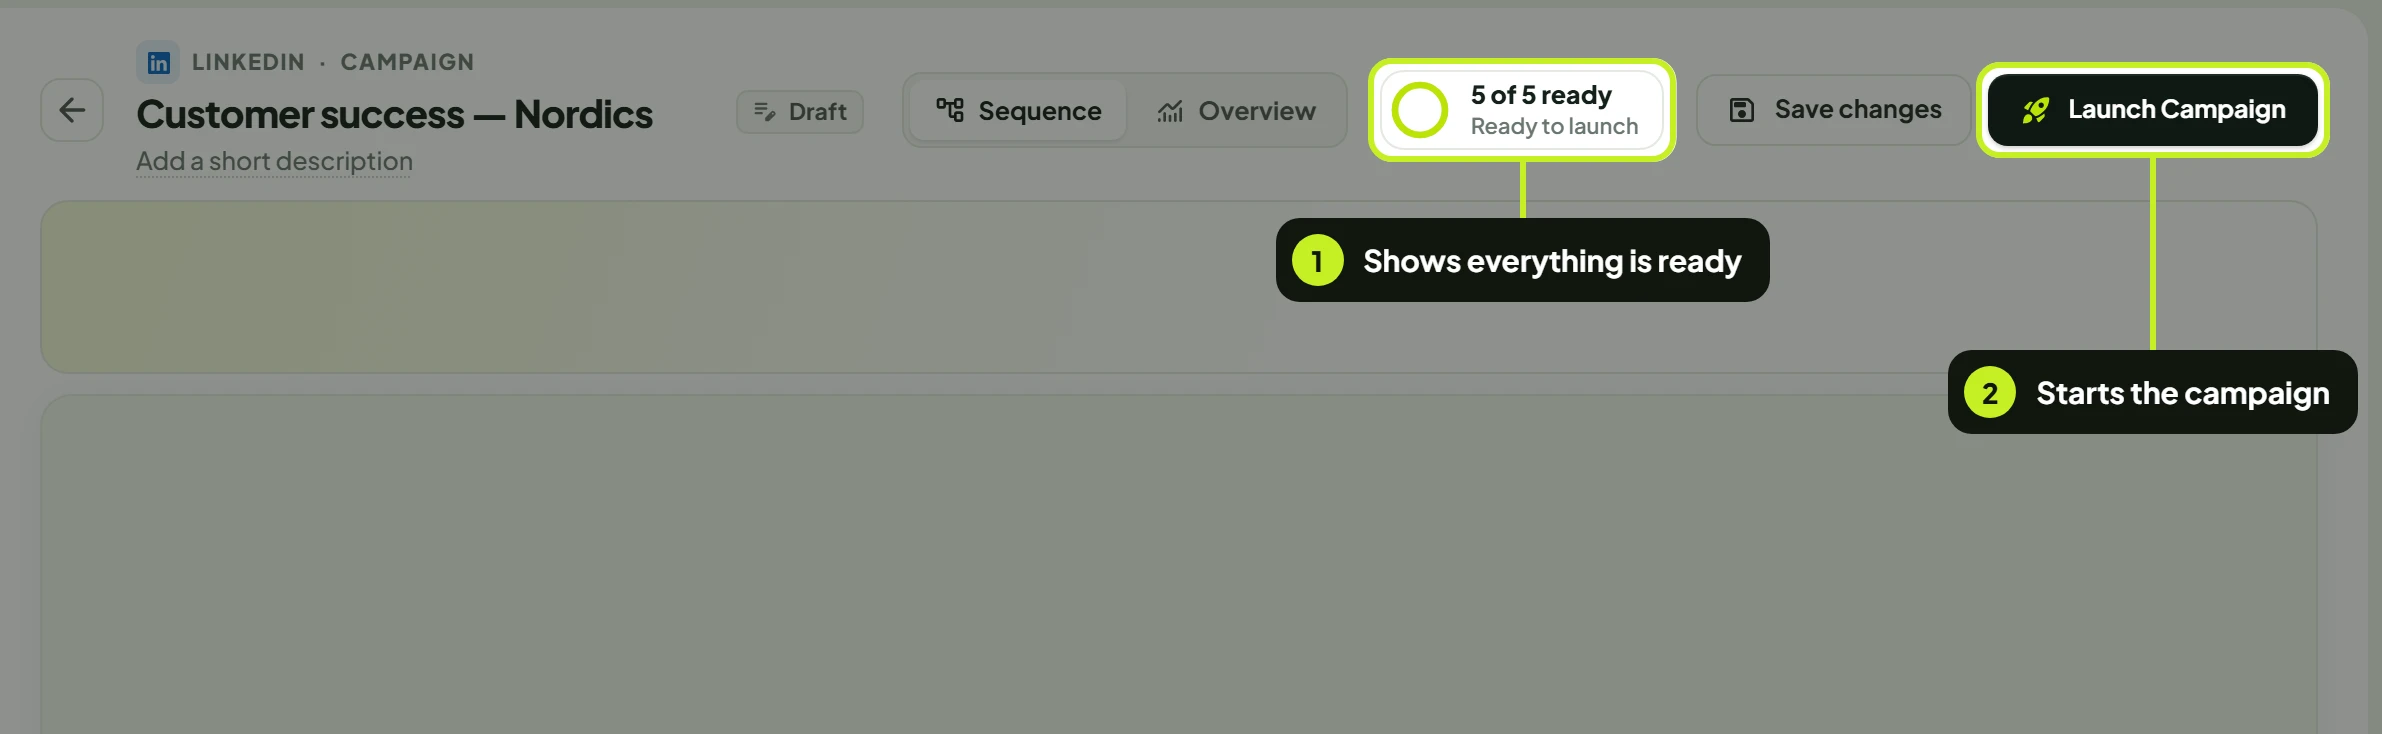
The header shows how ready the campaign is, for example 4 of 5 ready. Click it to see Before launch: Campaign name, Sender, Lead list, Sequence has steps and At least one sending day. Click a missing item to jump straight to the part that fixes it.
When it reads Ready to launch, click Launch Campaign at the top right. Not ready yet? Click Save draft to keep your work.
You'll see Campaign launched successfully! and the campaign shows as Active on the Campaigns page.
After you launch
On the Campaigns page, click a campaign's row to open it. The status column has a quick Pause (or Resume, or Start) button, and the row's ⋮ menu has Edit sequence, Campaign settings, View leads, Export flow and Delete campaign.
While a campaign runs, you can still change its steps, schedule and pace: click Save changes and they apply to upcoming outreach. Its sender and lead list stay locked. Hover a row's results to see every count: sent, accepted, replied, opened, clicked, and leads skipped as duplicates or blacklisted.
Common problems
| Problem | Fix |
|---|---|
| Launch Campaign is greyed out | Click the readiness ring and fix the unticked item in Before launch: the name, sender, lead list, sequence or sending days. |
| No connected accounts yet. in the sender picker | Click Connect another account, or connect one on the Accounts page. |
| Sequence has steps stays unticked | A sequence needs at least two linked steps. Add another step. |
| Campaign limit reached | That seat already runs the most campaigns your plan allows. Pause one of its campaigns or choose another seat. |
| A campaign can't be deleted | Pause it first. A running campaign can't be deleted. |
| Completed campaigns can't be edited. | Completed campaigns are read-only. Create a new campaign instead. |
| Leads are skipped | They're on your Do Not Contact blocklist or already being contacted by another campaign. Hover the row's results to see the skipped count. |
Next: Work every reply in Reply from Conversations.